
UPDATE: There are Sage X3 1099 updates for 2019 if you are on Product Update 9, version 11 or version 12. See knowledgebase article 101916. If you are on v6, v7 or u8, there are no updates required for 2019
Let’s look at some tips on processing this year’s 1099s and keeping ahead of the game for next year.
If you are just starting the 2019 1099 process, first check out “Time is flying by...Have you started prepping for your 2019 1099s?” https://www.sagecity.com/support_communities/sage_erp_x3/b/sageerp_x3_product_support_blog/posts/time-is-flying-by-have-you-started-prepping-for-you-2019-1099s
Quick review:
- There are no new patches for 2019 1099s.
- To generate, the 2019 1099s you must have the patch for 2018 1099s installed.
- If you need to install the 2018 1099 patch, it can be downloaded via knowledgebase article Download X3 1099 Updates for 2018 (KB 94729).
- Sage X3 only supports the printing of 1099-MISC and 1096 forms. Sage X3 does allow for the collection of 1099-DIV and 1099-INT, but only the printing of 1099-MISC.
- Sage X3 does not support e-filing/electronic filing, but the 1099 data can be easily exported for use in the software of your choice.
- For 1099 frequently asked questions, refer to knowledgebase article 18346.
Does each BP Supplier have to have assigned 1099 default form and box number?
No, they don’t, the 1099 form and box number can be assigned or changed at the time you enter the invoice.
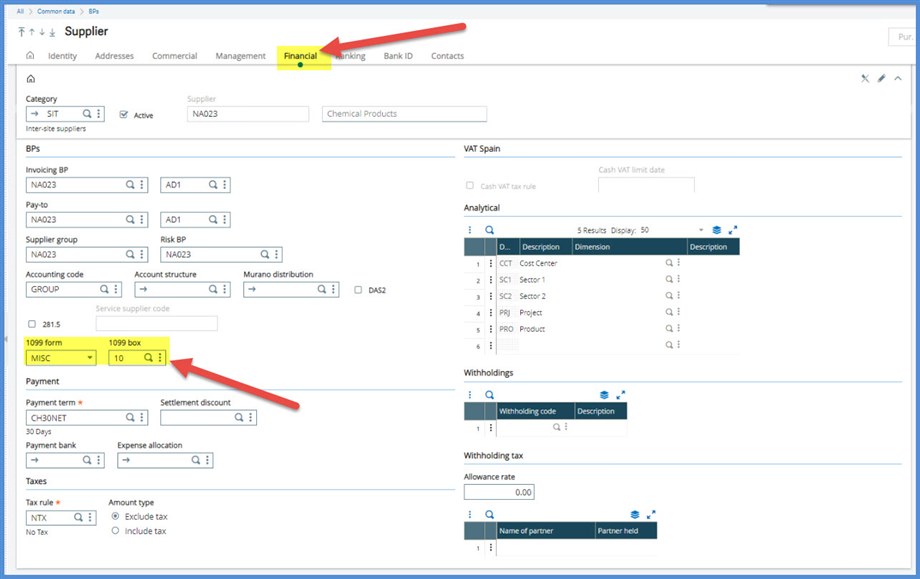
To assign a default 1099 box and 1099 form, go to the Financial tab under Common data, BPs, Supplier.
If you want to review which suppliers have None for the 1099 form, you can set up an Advanced selection using the option in the right panel under Selection. The left list will populate with only Suppliers with 1099 equal to None
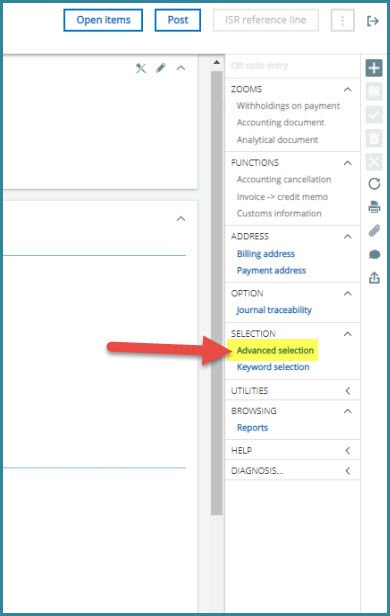
In the Object selection screen, use FRM1099 with Operations = Equal and the Values = None. Save it as a Memo for future use.


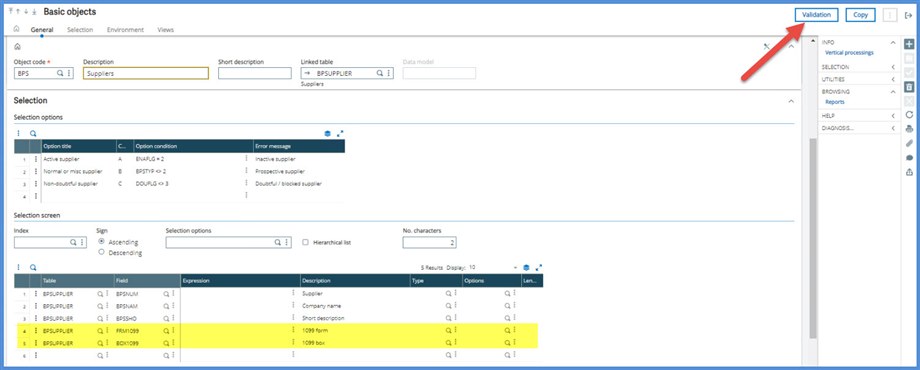
If you want to have the 1099 form and 1099 box field values to be available at a glance, you can add the two fields to the Supplier left list. To add the fields:
Go to Development, Script dictionary, Basic objects and select Object code Suppliers object (BPS)
On the Selection tab, add Field FRM1099, Table BPSUPPLIER to the Selection options grid.
Repeat adding Field BOX1099 with Table BPSUPPLIER
Click Save.
Click Validation
Under Development, Script dictionary, Window Management, select OBPS Window
Click Validation

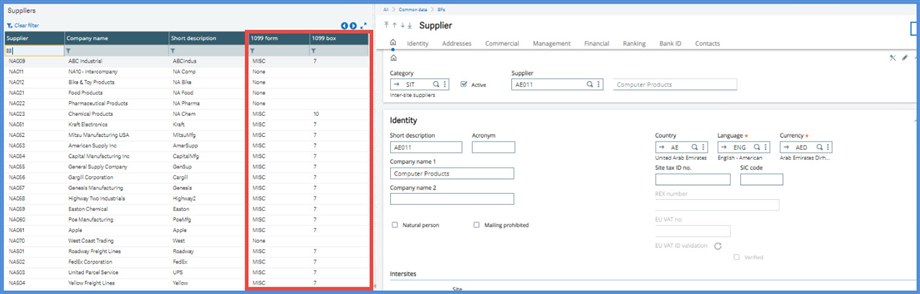
Your left list now will have the 2 fields and their values for easy reviewing.
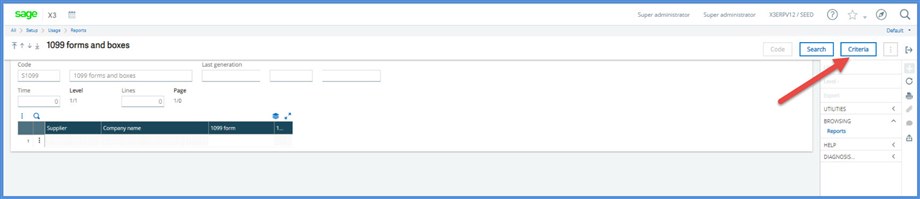
You can also create a simple Query to review the 1099 form and 1099 box by Supplier under Setup, Usage, Reports Query tool run off the BPSUPPLIER table. I selected Supplier number, Company name, 1099 form and 1099 box with a Range on Supplier number. Click Validate and Run.

Click Criteria
Complete the range of suppliers and click OK
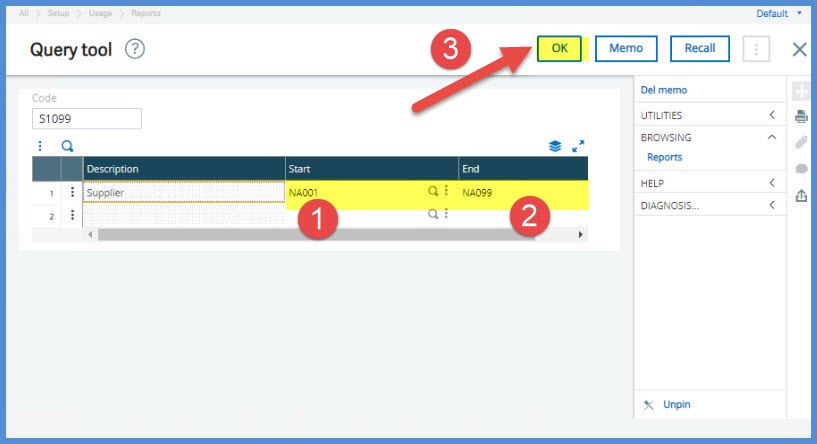
You have a list of Suppliers with their 1099 forms and boxes

1099 Defaults and the invoices
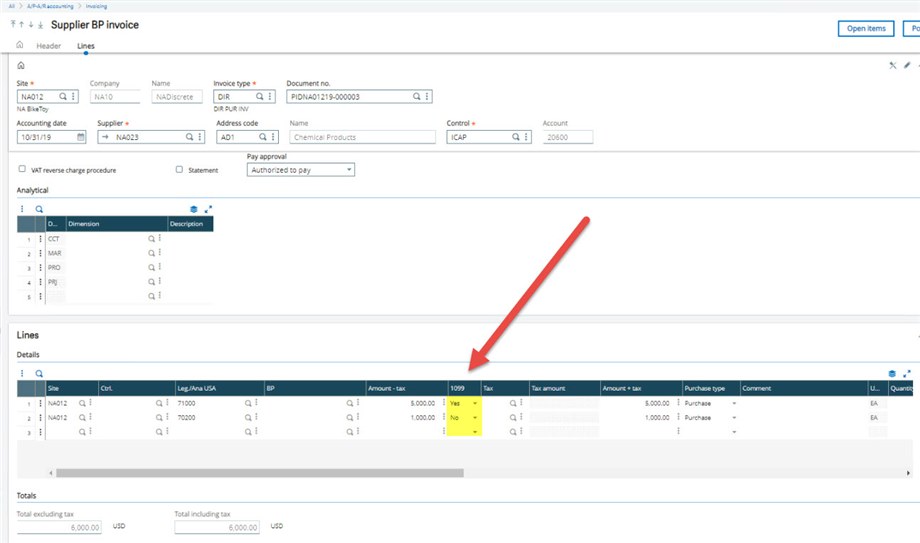
When you create a Supplier BP invoice under A/P-A/R accounting, Invoicing, the 1099 form and 1099 box fields are automatically populated with the values from the Supplier record.

You can change the 1099 form and 1099 box values on the invoice Header tab. There is only one 1099 form and box allowed per invoice.
Note: The default 1099 form and 1099 box values do not automatically populate the Purchasing invoice screen. It is assumed that these are not typically included in 1099s.
As you review transactions, you may see that the Amt subject to 1099 is different from the Amount – tax. Why?

You have the option on each invoice line to designate whether the charge should be included in the 1099 total. In our example, we have a $6000 invoice total with $5000 Amt subject to 1099. We accomplished this by selecting “No” in the 1099 column for the $1000 transaction line which excludes this amount from the Amt subject to 1099
1099 Data
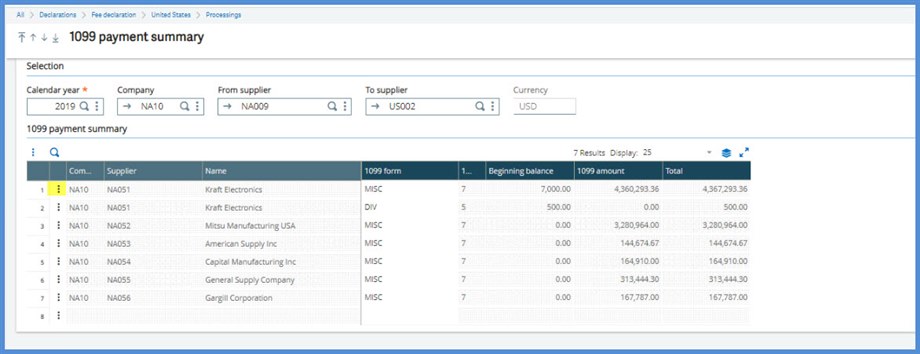
To create 1099 data records, run Calculate 1099 payments (BPS1099CLC) for the appropriate Calendar Year under Fee declaration, United States, Processing.
Selecting Log allows for the creation of a report of what is included in the generation process.

If you are not seeing any data in the 1099 payment summary (BPS1099SUM) make sure that you have run Calculate 1099 payments for the appropriate Calendar Year.
If you discover that your Supplier transactions have not been assigned 1099 forms or boxes, run the Calculate 1099 payments with the Default 1099 form and box from supplier option selected. This allows for the following per the Online help:
If checked, the form and box from the supplier will default on the payment record, when the invoice 1099 form is none and the supplier has selected a default 1099 form type on the supplier record. This is useful when a supplier is initially not setup for 1099 tracking and invoices and payments have been processed against the supplier.
Data can be edited in the 1099 payment summary (BPS1099SUM) function. Click the Action icon on the Supplier’s line.
Select Edit 1099 data from the dropdown menu. Change the values in the 1099 amount column as needed. Be sure to keep notes as to what you changed and why for future audits.
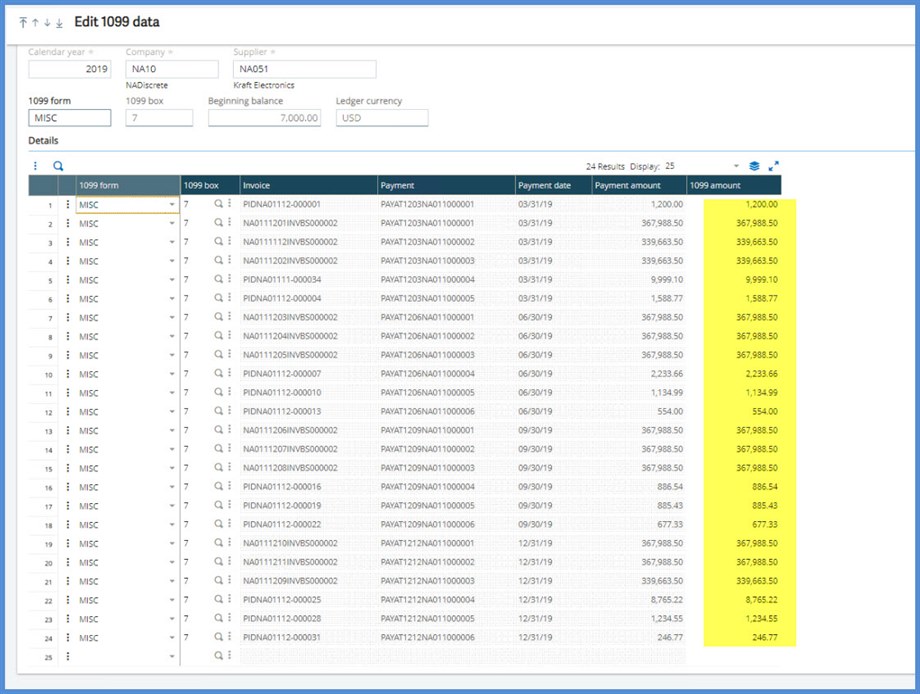
The Supplier 1099 Activity report (1099ACT) found under Reports, Reports can be used to review the payments, related invoices and entered beginning balances by Supplier.
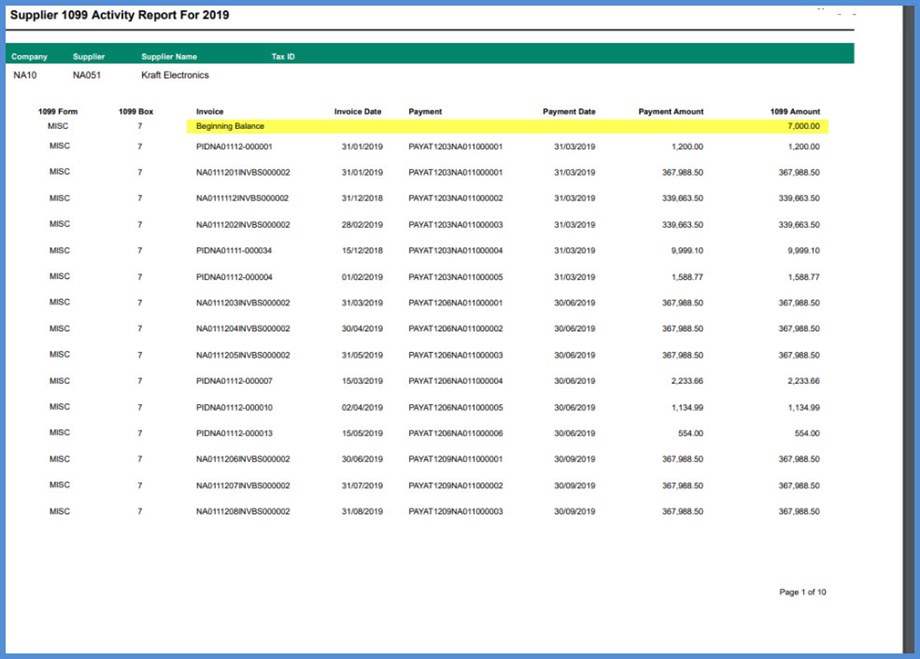
As you review the 1099 data, remember that 1099s are based on payments made during the calendar year. No matter what dates are on the invoices, the invoices must have been paid in the calendar year to be included in the 1099 activity. If you have a fiscal year instead of a calendar year, the 1099s will still be for the calendar year’s activity.
From other systems
If you are bringing 1099 data over from another system, you can do this by manually entering data in Declarations, Fee Declaration, United States, 1099 beginning balance or by importing data using template B9B 1099 beginning balance under Usage, Imports/exports, Imports.