

The next step in our integration is on Sage CRM. We need to make sure that we have setup our link to Sage 300 for the connection to pull data from the WEBAPI as well as display the new web screens in Sage CRM.
Master article can be found Sage 300 -> CRM integration troubleshooting guide
Previous article can be found here
Next article can be found here
These steps can only be done once all the previous steps have been completed.
In the Sage CRM menus, navigate to the Administration menus and then click on the Sage 300 Administration menu item
Administration -> Sage 300 Administration
You should see the following menu displayed

Now click on the "Setup Integration" screen.
You should be presented with this screen now
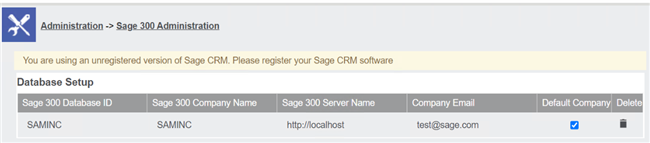
Now you need to complete the information in this menu.
| Sage 300 Database ID: | The database ID assigned to Sage 300 in the Sage 300 setup databases screens |
| Sage 300 Company Name: | This is the company name that the users will see in the front end, basically the translation for the company you are setting up. |
| Sage 300 Server Name: | With the new Web screens and WebAPI, this needs to be a valid web address to the server that has Sage 300 installed. It needs to be prepended with http/s and have the address of the web screens, but without the Sage300 at the end. Make sure this is correct and reachable from the CRM server. You can just type this into the browser and add /Sage300 at the back and it should redirect you to the web screens of your Sage 300 install. PLEASE NOTE! IT IS CRITICAL THAT THE ADDRESS DOES NOT END WITH A SLASH. The correct address should be http://servername or https://servername and NOT http://servername/. The integration will fail in critical points if this is incorrect! |
| Company Email: | This is the email of the admin person responsible for the Sage 300 database/Company |
| Default Company: | If selected, this selection will always bring this company up as the default company when multiple companies are setup. |
Now save this data and exit the screen.
You can read more on this setup on the Integration Manual under chapter 5