

Evening Readers,
I have another topic “by request” for you all to read about. We are going to look into how the Purge utility functionality works. This came along because there is a series of temporary tables in Sage X3 and a colleague of mine wanted to know how to clear them, specifically a safe way to do so. Sage X3 has a purge function just for this type of request. We are going to take a look at purging and how you can use it.
Before we start, you want to make sure you have access to the following:
- Access to the ADMIN account, or at least an account with ADMIN access
- Specifically access to Developer, Setup, and Usage Modules.
- Access to a test/dummy folder you don’t mind breaking (Or losing data in this aspect).
- IMPORTANT: Make sure you have a full backup of the environment. (Just in case things go horribly south you can restore).
Warning: the Purge function outcome is permanent any thing cleared is gone forever.
After you have all those available, we can start. First you will want to log into the Sage X3 application with the ADMIN (or equivalent) account. Then you will want to set the Endpoint Folder to the correct folder you want to test with. Before we run anything, I am going to give you some context on where to locate the purge codes and the parameters they use. We are going to explore the History/purge and the purge parameter functions. This with give you an idea how they are setup and what they do.
Note: if you need additional assistance, please reach out to your assigned business/channel partner.
Secondary Note: This blog is for informational purposes only. It would not be recommended to use all the time. It can be useful to understand when migrating or running folder copy to help remove data not needed to be migrated or copied.
The first function we are going to look at is the History/Purge function. This function shows the list of purge codes and what tables they are assigned to. This will help you see what default codes are already available and what is already configured when you first install Sage X3. You can navigate to the History/purge function by going to Development, Data and parameters, Development setup, History/purge (GESAHI).

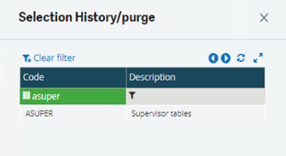
Once it loads, you should get a left list with a set of code values with descriptions. For my example, I will be using the code ASUPER. The ASUPER purge code is tied to the ALISTER and AESPION Tables. The ALISTER table tracks queries used in the system which is stuff like requesters or general SQL query tool calls. You can read more HERE. The AESPION table tracks user connection history and other user system history. You can read more HERE and HERE.
From the left list, you will want to locate the ASUPER code and select it to load it. As you see in the Tables grid, the ASUPER code is tied to ALISTER and AESPION.

On the right list, there will be an option labeled as Purge parameters. Go ahead and click on that to load the Purge parameters.

The Pure parameter’s function shows you the rules the history/purge function codes will follow. This is rules like how often to run, how many days of data to keep, do you want to archive (H folder), and more. We are going to look for ASUPER in the grid, since this will be the example purge code, we will be testing with.
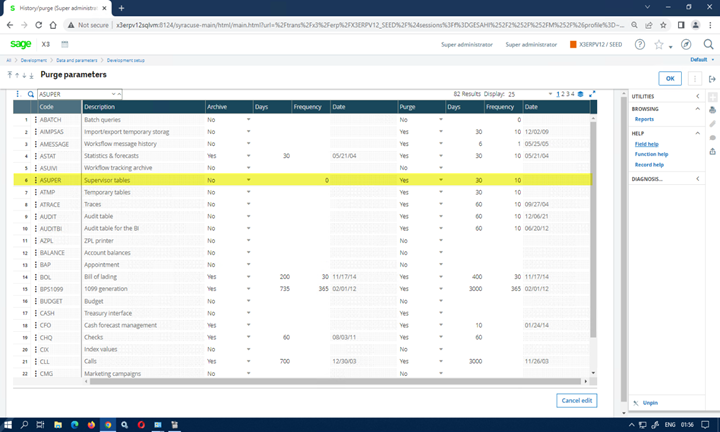
If you look closely at the highlighted row, you will notice that Archive is set to NO and the Purge is set to YES. These can be in any combo. Obviously NO and NO means the system won’t do anything. As we look at the row it is set to run every 10 days and keep 30 days of data. What this means is that the purge will run every 10 days and will delete anything with a timestamp that is greater than 30 days old. The Last column is the Date column. The Date column tracks the last time that code was ran. In this case, it has not been running before.
We are actually not going to do anything here specifically. I wanted to show where you can find the parameter values that the purge codes follow. This way, if you want them to be more or less frequent or hold onto more data, you will know where to look. We can now close out of the Purge parameters. This should take you back to the history / purge function which you can also close.
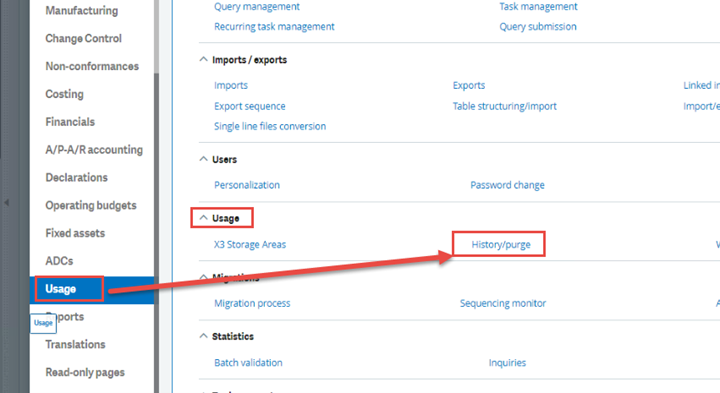
Now that we have some context on how the purge codes and purge parameters are set up, we can now run a test and see how the purge function actually works. To get to the purge function that executes the codes, you want to navigate to Usage, Usage, History/purge (AHISTO).
The Purge function will should look like my screenshot below. It will ask you what purge code you want to use along with a couple of options for you to check. I highly recommend running it the first time in simulation to see what will actually be removed when you run your selected code. It will generate a report, which we will look at in a minute.
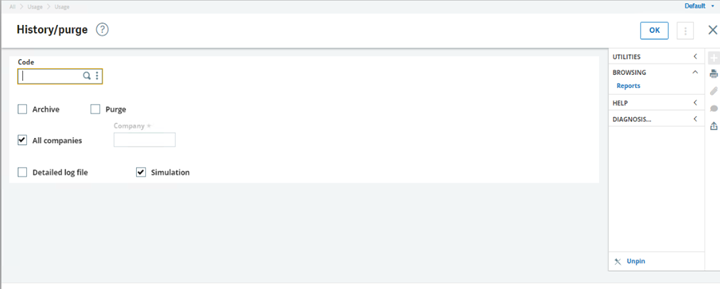
On this screen I am going to look up the code ASUPER (as I said I was going to use earlier) and select it.
Next, we are going to select Purge, All companies, and Simulation
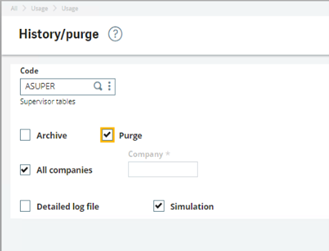
Now, all you have to do is hit ok and wait for a report to pop up. Mine took about 3-4 minutes to show. Depending on the amount of data you have it could take longer or shorter. Also, to note, we selected simulation, so the system will simulate a run but not actually remove anything.
And here is what the simulated report will look like:
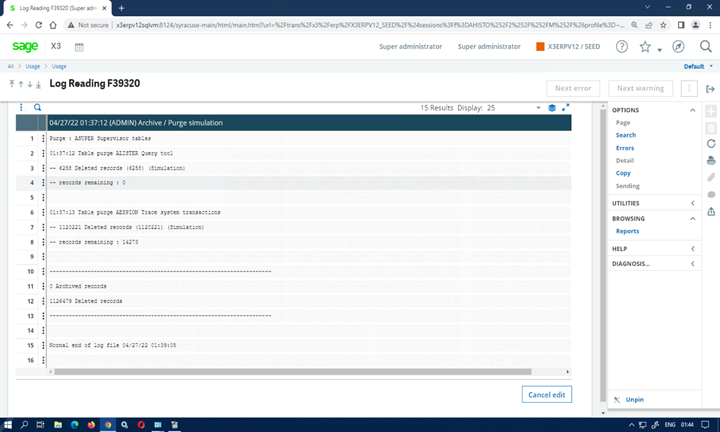
If you look closely, you can see ALISTER had 6,258 records deleted with 0 remaining and AESPION had 1,120,221 records deleted with 14,273 remaining. So why would ALISTER have no records left and ASEPION have 14,273 records left. Well, it comes down to the Purge parameters we looked at previously. Remember that if it 30 days old or less it will not be deleted. Since I am in the system my current records are less than 30 days and therefore not removed. But again, this is a simulation, so they’re not actually gone. Now that you know how it works, if you wanted to actually run it (without the simulation checked), it would then clear out all the simulated records shown in the report.
So, that’s pretty much it. Once you break it down it’s not that complicated to use. Although, this is the manual way to run the purge function. What if you wanted to set it on a schedule so it runs without you having to remember to run it.
Well, I am going to show you how you can do that…
Next post…
Keep a lookout in the coming weeks for my follow up blog on, “How to run Purge as a recurring task?”.
Until next time,

REMINDER: PURGING IS PERMANENT AND WHAT IS CLEARED IS GONE AND NOT COMING BACK.


