Evening readers,
Today we are going to look at the Traceability function for MongoDB. This function keeps a history log of changes to collections in mongo. It will let you trace stuff like authoring, pages (like dashboards), user changes, and more. This is a somewhat new function as it appears to have been added in version 12 of Sage X3 (couldn’t find the exact patch number). But, once I show you how to enable it, it is quite easy to use. Note that you will need an ADMIN account because you will need to access the Administration module.
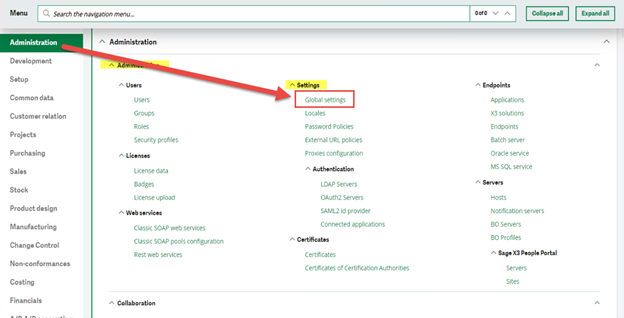
So, to start, you will want to log into Sage X3 as the ADMIN account (or any other administrator type account that has Administration Module access). Don’t worry about the endpoint your logged into, it will not matter. First thing we’ll want to do is to enable the logging. We are going to navigate to the Global Settings function, which is located under (you guessed it) Administration, Settings, Global Settings.
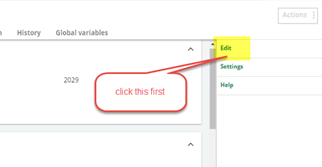
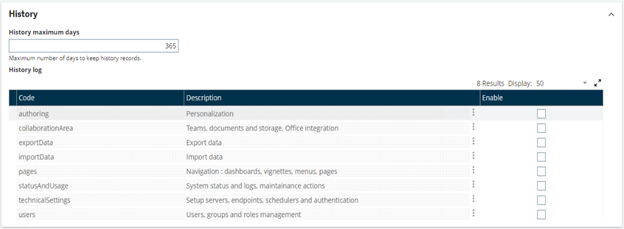
Once it loads, you are going to see a ton of options, but don’t freak out, were ignoring majority of these. We are only interested in the HISTORY tab subsection. Before you click on it, make sure to click on the EDIT button from the right list. We will need to be in EDIT mode to enable the logging for traceability.
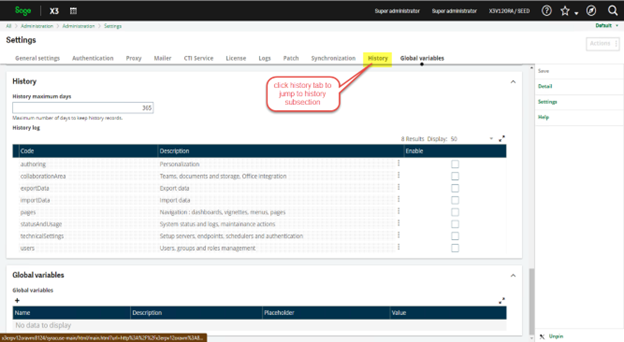
If we take a closer look at the History section, you can see there are several options to enable. Now, you can enable all of them, one, or any combination of. These specific 8 rows are what you can track in terms of Mongo Traceability. You also have a max number of days in which you would like to track for.
For the sake of example, I will go ahead and enable the authoring tracing. So, I will just check the box at the end of the authoring row and click the save button (when I’m done selecting). It is important to make sure you click save or your options will not be saved.
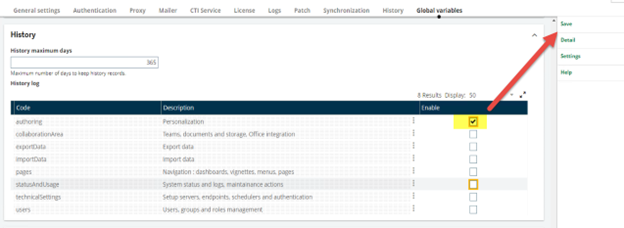
You may now exit the function. Note: when clicking Save, there may be a delay before the save completes, just be patient.
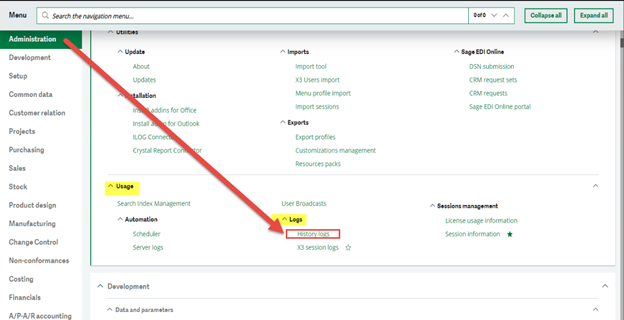
Now that were back to the main Landing pages, we are going to navigate to the History logs function, which can be found under Administration, Usage, Logs, History Logs.
Once the function loads (and if you’re following along) you might notice there is already an entry in the history logs.
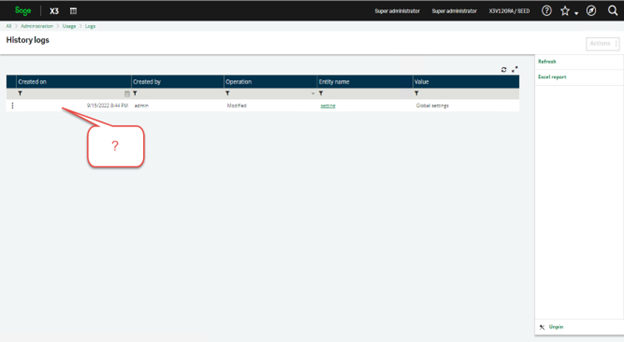
If you look closely at the entry, you will notice it has the value of Global Settings. This is because it recorded me changing the log values of the global settings to enable the authoring tracing. If you click on the entity name, it should load the log of the trace.

When I click on it, it loads the log. If it does not auto expand the history log, you can click the chevron and expand it manually. It should look like my log.
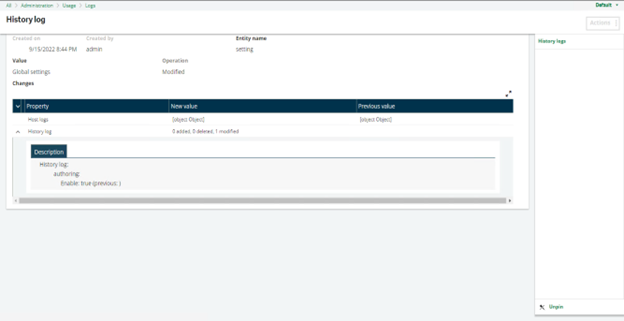
You can see that the log show “authoring” enabled: true (as in I turned it on).
Cool, right?
And that’s it. I told you it would be easy!
Now that you have a new function to toy around, go play with it and see what cool things you can capture!
P.S. If you would like to read more, we have a few topics on our online help which you can read up on: Global_Settings & MongoDB_Traceability
Until next time…