Today’s topic is HTTPS and Add-in. We are going to have a short discussion on how to get the Sage X3 Office Add-in to properly connect with a Sage X3 application that is configured on an HTTPS connection. Before we begin, there is a few requirements we need:
- Need to have the office add-in installed on a workstation PC (obvious one).
- Need to have a Sage X3 install that is PU9 or higher versions (another obvious one).
- Need to have SSL configured with a port that’s set to HTTPS (which I am not going to cover because it would take far too long).
Outrageously Mega Important information:
- Office add-in versions that are compatible with HTTPS connections
- For X3 PU9: version 1.09.13 and up
- For X3 V11: version 1.11.13 and up
- For X3 V12: version 1.12.13 and up
- Must be on minimum version(s) of Syracuse component
- For X3 PU9: Syracuse 9.13
- For X3 V11: Syracuse 11.13
- For X3 V12: Syracuse 2018.R9
- Office add-in requires IE browser
- IE10 (PU9 only)
- IE11 (PU9, V11 & V12)
- Protocols currently forbidden with X3
- TLS1.0
- TLS1.1
- Encryption algorithms currently forbidden with X3
- RC4
- CBC
Once we know that everything needed is in place we can finally start.
We start with one of the workstations where the Office Add-in is installed. It is very important to be logged into the machine as Administrator, not a user with administrator rights but the actual administrator account. It is also super important that the Office Add-in is installed with the same Administrator account. We are going to access the Microsoft Management Console (MMC) as that same administrator account and import the certification from Syracuse. This certification is called ca.cacrt. To access the MMC you would go to the start button, then run button, then type mmc all lower case and it should pull up the screen you see here:
If you’re on windows 10 then you can use the Cortana search bar and look for run and run mmc from there.
Note: if your MMC is blank you may have to add the snap-in for certifications you do this by going to file, add/remove snap-in and select certifications
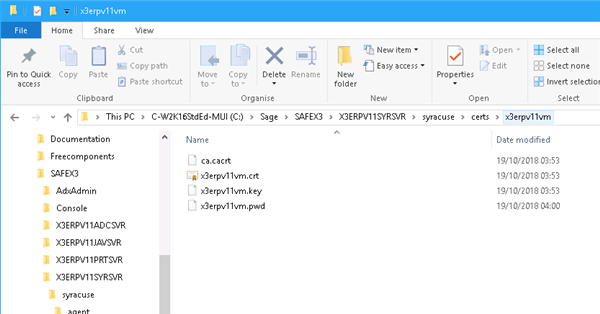
Before we import the certification, we need to go find it. Luckily the Syracuse component has a copy and its relatively easy to find. Inside the main Syracuse directly there will be another directory called certs. In the certs folder you should be able to find a file called ca.cacrt. We need a copy of this certification file.
Here is an example location. Note that Syracuse can be installed anywhere so if you do not know where it is installed please talk to your local admin and find out where. If you have a cool admin, I would just ask for a copy of the file.
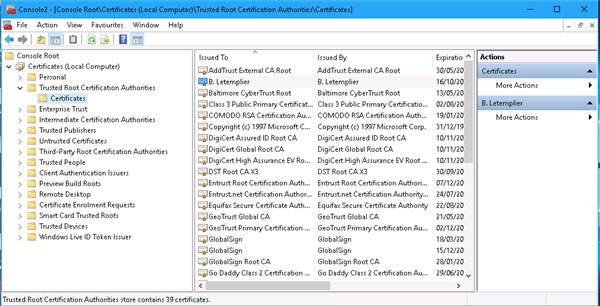
Now that you have a ca.cacrt file you can import. From the original mmc we discussed above we are going to expand Trusted Root Certification Authorities and select the Certificates folder.
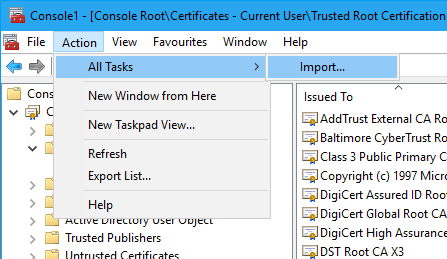
Then go to Actions, All tasks, Import
Follow the prompts to add the cert file to the trusted certs. Once this is done, we should be good to go. Depending on the environment, you may have to restart the machine for the certification addition to be applied.
Now you only have to manually do this to every workstation that uses the Office Add-in.