So, you always wanted to direct? I can’t offer you a movie deal, but I can give you tips on directing where your Positive Pay file is saved.
What is Positive Pay?
The generic definition is that positive pay is an automated service offered by banks to help prevent check fraud. The bank customer submits to the bank a list of checks that includes account numbers, check numbers and dollar amount of each check. When a check is presented for payment to the bank, it is matched against the list. When the check is not on the list, the bank notifies the customer and withholds payment until instructions are received from the customer.
There is a function within Sage X3 for creating positive pay files. The Online Help Center defines the Positive Pay file generation function as follows:
“Use this function to generate the Positive Pay bank file. This function takes information from Supplier payments (PAYMENTH) and check table (CHQNUM) to generate an output file for records that have not been previously included. The file is generated based on the file format specified in Bank.
“The file includes checks where the check status is set to Issued, Voided, or Posted. Only records where the Positive Pay sequence number is Null are included. In addition, the file includes checks with a Voided status where the Positive Pay sequence number is Null. If a check was voided after being included in a prior file, the accounting cancellation will clear the Positive Pay sequence number and creation date. The file can be regenerated from the sequence number.”
Positive Pay file template
The first step in using Positive Pay is to contact your bank to obtain its specific requirements for the file. Under Setup, A/R-AP accounting, Files, Bank file definition, there are a few basic header, detail and total templates for Positive Pay. Because each bank can have its own unique requirements, you may need to enlist your business partner or Sage Professional Services to create the template for your bank.
Once the definition is created, take note of the Bank file name.

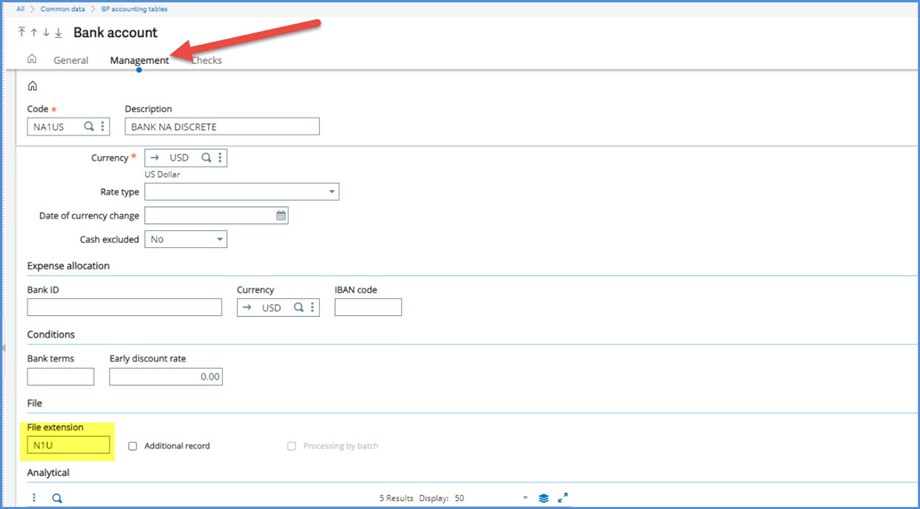
Bank account
There is setup required on the Bank account under Common data, BP accounting tables. After selecting the bank Code, move to the Management tab and add the File extension in the File block. The File extension is the extension for file names that are generated for electronic transfers.
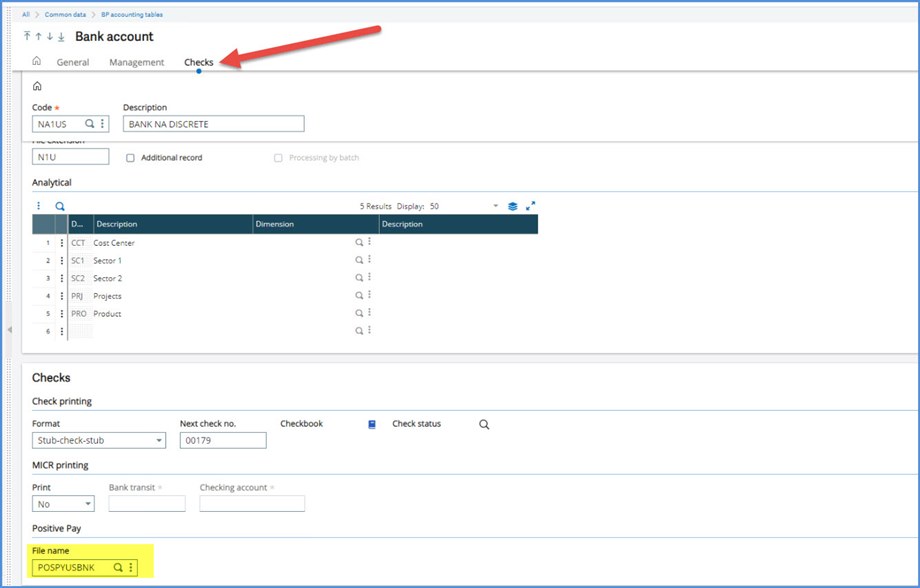
Next, proceed to the Checks tab. In the Positive pay block, select the File name from the Bank definition.
Generating the Positive pay
Positive pay files are created under A/P-A/R, Payments, Positive Pay file generation
Select all your options: company, bank, check numbers, payment dates. I recommend always selecting Log. If you select Server, the File field will be available. It defaults to the BQE directory which is listed as Sent bank files. You can “direct” it to another folder on the server
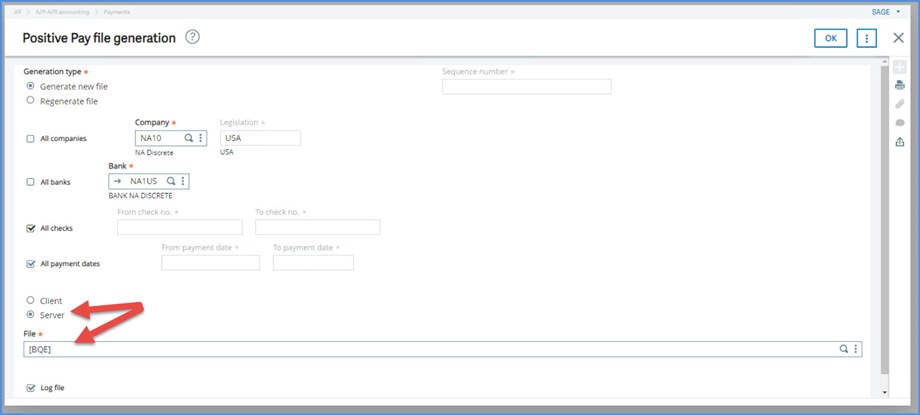
Drilldown on the File field to see the other available directories.
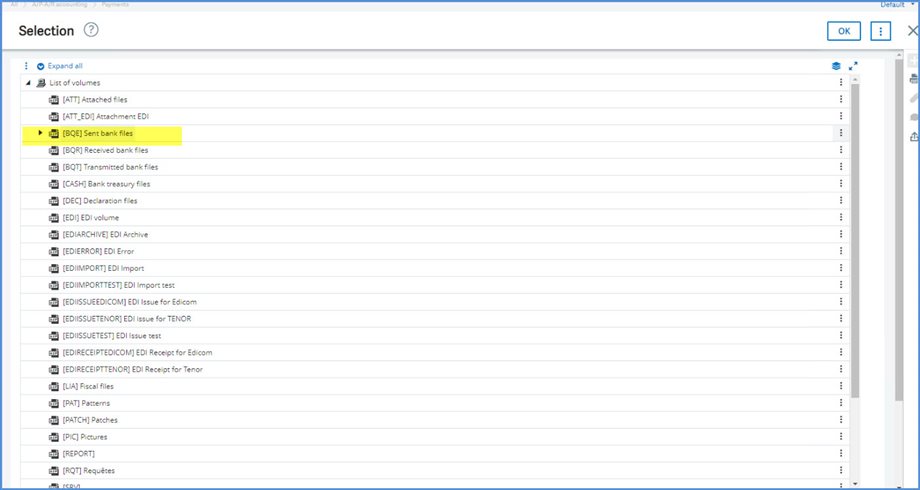
The Log will give you 1) bank, 2) bank file 3) location of the file which is the BQE directory on the server under the production folder.
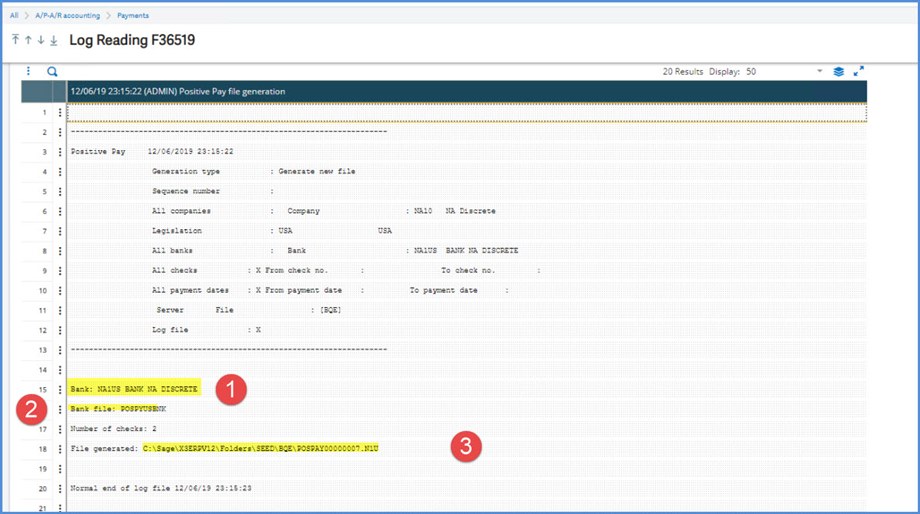
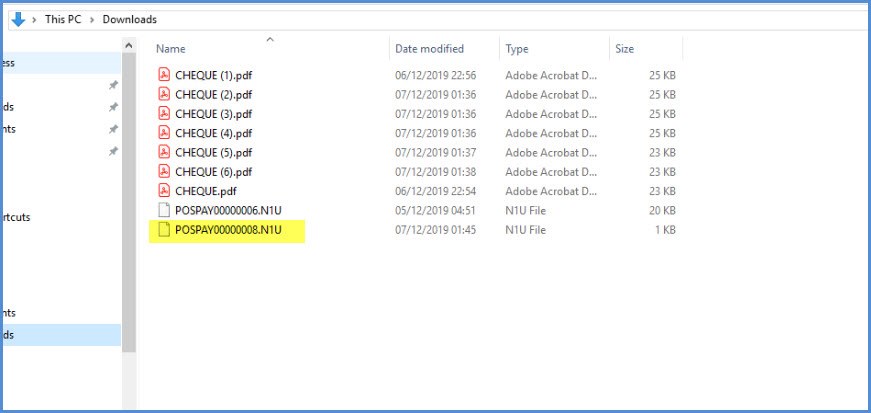
Proceed to the server and you will find the file POSPAY00000007.N1U in the BQE directory. Note that the extension is N1U as defined on the Management tab for the Bank Account

Let’s enter additional checks and head back to Positive Pay file generation. This time we will select Client. Note that the File field is grayed out and not accessible.
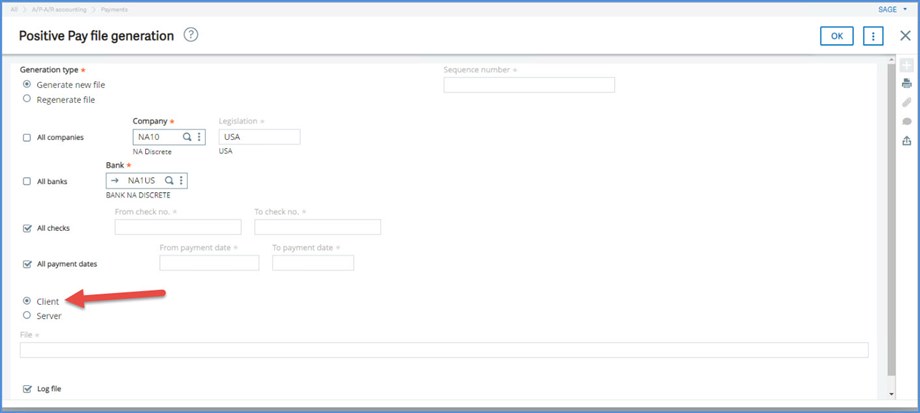
When Client is selected, the file goes to the Download directory of the computer where the generation was executed, although the Log doesn’t list the exact path to the file.
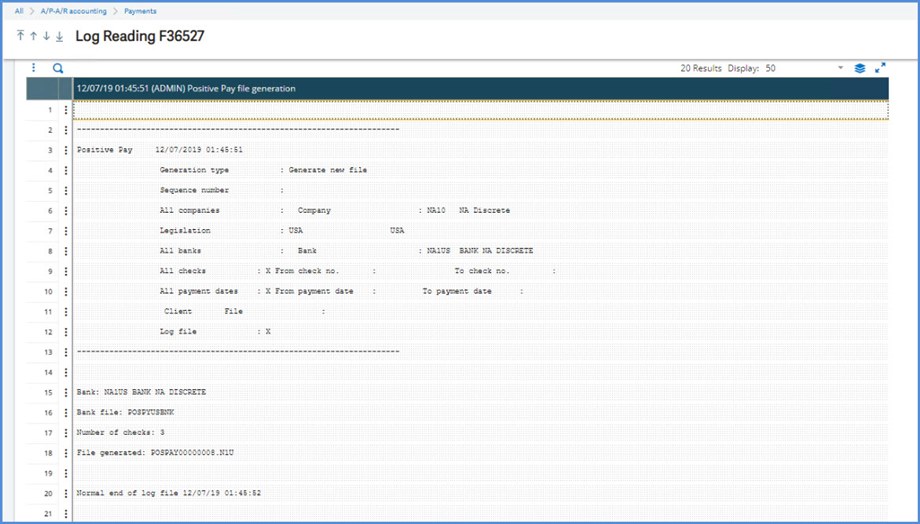
You have “directed” the file, POSPAY00000007.N1U. to the Download directory on your workstation. Its not as glamorous as directing a movie, but you have to start somewhere!