

There are 4 core entities in the system that have progress tables.
- Lead
- Opportunity
- Cases
- Solutions
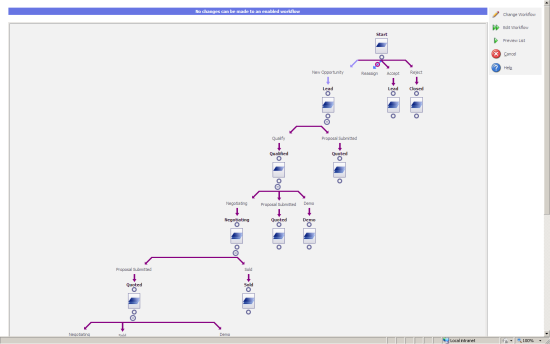
There are default workflows provides for these entities and in most implementations of Sage CRM the powerful feature of the graphical workflow engine will be used.
This is found under
Administration -> Advanced Customization -> Workflow
However there are cases when implementations do not use the full workflow feature. So workflow can be switched off.
This is done for an entity in the configuration screen.
Administration -> Advanced Customization -> Workflow & Escalation Configuration

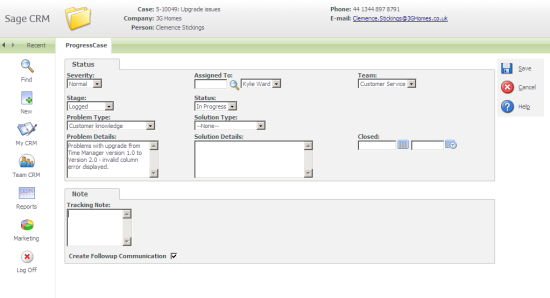
Once the workflow is switched off, then in the summary screen you will see a 'progress' button rather than the workflow actions.

This allows all of the fields in the 'status' box to be edited and a tracking note entered. A follow up communication can also be created.
These screens can be edited.
Clientside code can be added to the screen's content box, along with with additional buttons on the screen using the Button Groups feature.

I have discussed in previous articles how to use the Button Group feature.
- Adding Extra Buttons to the Saved Search Screen
- Adding Extra Buttons to the Group Details Screen
- Adding a Print Button to a System Screen
- Adding Buttons and Customizing the Outbound Call Screens
Editing the Screens
Inline Customization of Screens allows the editable screens to be easily found. The screens that can be edited for each entity are:
Lead
- Administration -> Customization -> Lead Progress
- LeadStatusBox
Opportunity
- Administration -> Customization -> Opportunity Progress
- OpportunityStatusBox
Cases
- Administration -> Customization -> CaseProgress
- CaseStatusBox
Solutions
- Administration -> Customization -> Solutions Progress
- SolutionStatusBox
Editing the Button Groups
The system actions that can to be used to add extra buttons to the progress screens are
Lead
- lead progress
Opportunity
- oppoprogress
Cases
- caseprogress
Solutions
- A Button Group can not be added to the Solution Progress screen.