
Lets look at the steps required to setup document transmittal for Print EFT Remittance. You must have applied the Sage 500 July 2017 Product Update or newer. Below are the steps broken down into sections The first three sections are setup and the last three are process.
Setup Document Transmittal Email Server
-
Common Information, Maintenance, CI Setup, Set Up CI Options
-
Setup CI options , select transport, select or enter the email server
-
Save record
- Common Information, Maintenance, CI Setup, Set Up Document Transmittal
- Select transaction = EFT Remittance (Note, if EFT Remittance is not seen on the dropdown list, confirm July 2017 PU has been installed)
- Enter CC, BCC, Subject, Body Text as desired
- Provide the appropriate Mailbox information for Exchange or SMTP depending on what is being used
- Save record
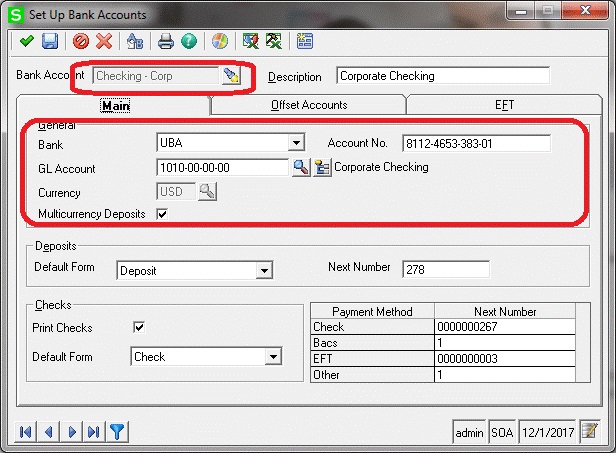
Setup Bank Accounts
- Common Information, Maintenance, CI Setup, Set Up Bank Accounts
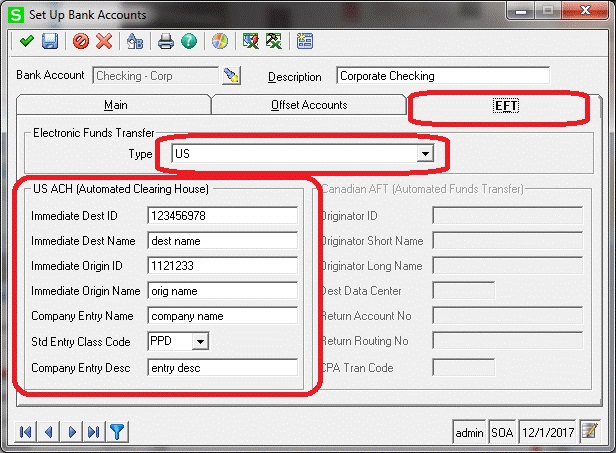
- Setup the bank account associated to EFT and select that account from Bank Account(checking Corp for example). Fill out contents on the Main, Offset and EFT tabs, click EFT tab and fill out all of the left side for the Type US
Setup AP Vendors
- Accounts Payable, Maintenance, Maintain Vendors
-
Pull up vendor. On Main tab, under primary contact, enter valid email address
-
Click on the Doc Transmittal button
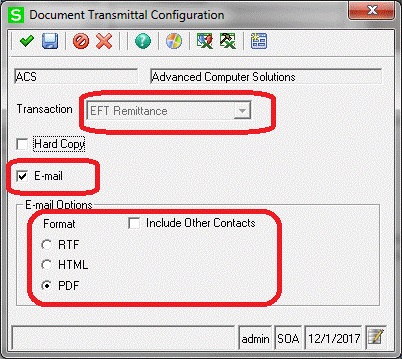
- From the Document Transmittal Configuration screen, select Transaction = EFT Remittance
- Place a checkmark next to E-mail. (You can have both Hard Copy and E-mail checked but for doc transmittal, E-mail must be checked)
- Select Format that will be used for the remittance.
- If you are planning to include Other Contacts, click that checkbox as well. (That will bring up the Maintain Contacts screen)
- Place a checkmark next to EFT Remittance for each of the other contacts entered and supply email address and Name as well


- Accounts Payable, Maintenance, Maintain Vendors, Main tab
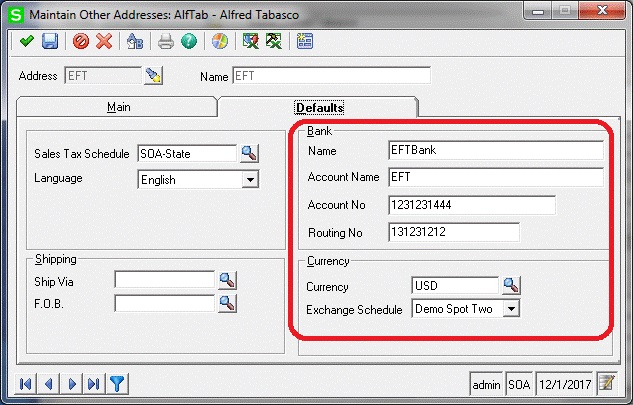
- Create other address by clicking the Other Addresses button
- Create an address id, for example Address = EFTAddress Name = EFT. Fill out street address
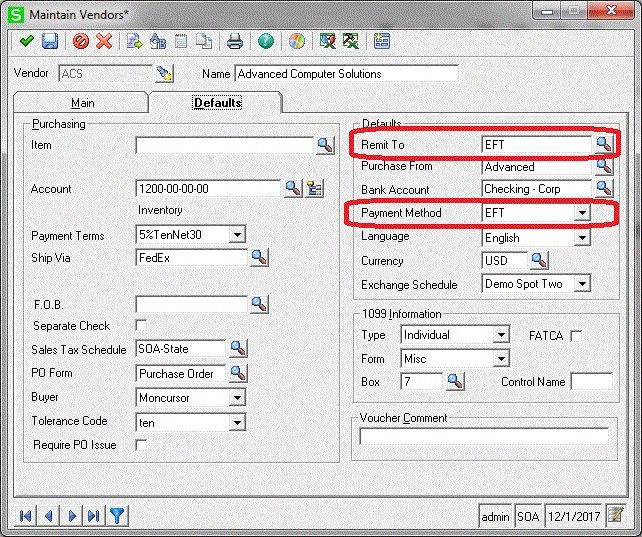
- Click the Defaults tab
- Fill out the Bank Name, Account Name, Account No, Routing No.
- Back on the Maintain Vendors form, click Defaults tab, select Payment Method = EFT and click Remit To lookup Select EFT address created from step 3 above
- Save information


Create vouchers and Pay
- Accounts Payable, Activities, Process Vouchers, create new batch
- Select same vendor as setup previously
- Add item(s) and save voucher by clicking the green checkmark
- Register post voucher batch
Process Invoices for Payment
- Accounts Payable, Activities, Process Invoices
- Create a new batch and select Payment Method =EFT
- Click Select for Payment button
- Select vendor from above and click green proceed button
- Register Post and make note of the batch (in this example APSC-0000041)
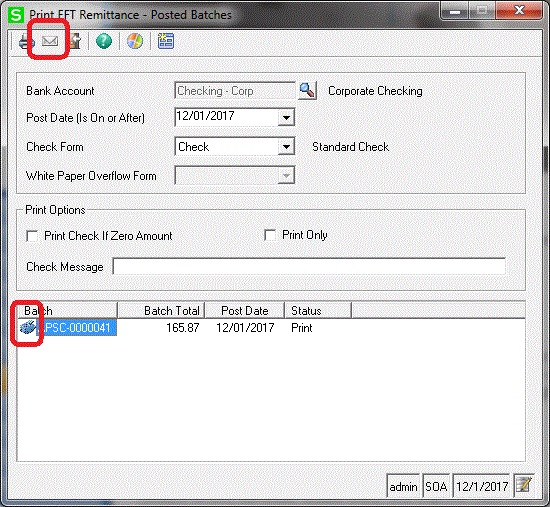
Print / email EFT Remittance
This is the step that will produce the EFT remittance email.
- Accounts Payable,Activities, Print EFT Remittance
- Select same bank account that has been previously set up for EFT
- Check Post date and enter date desired
- Double click the specific batch so it has a small print icon next to it
- Click the envelope icon at top of form
If you already have Document Transmittal working from another area in the application, you can skip the first section. For more details about Print EFT Remittance, click on the Help icon at the top of the Print EFT Remittance form.

