Display a calculated value (not a UDF) on a customized window?

SUGGESTED

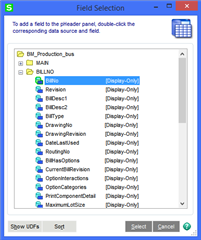
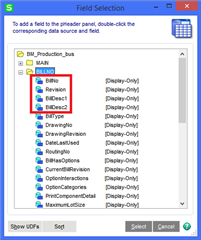
My goal is to calculate a value with a script and display it on a customized window similar to this.  Essentially my script calculates the open quantity for items on a purchase order that are within 30 days

The next trick is to display the result.  

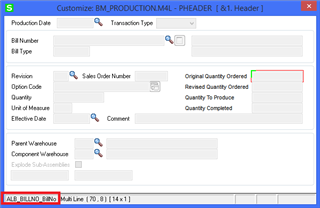
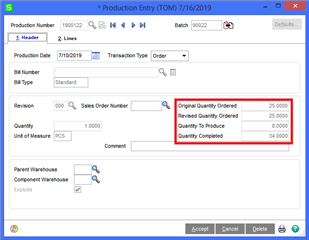
At this time the script is triggered by clicking on the button that says PO 30 day 0.  The code below then changes the text displayed on the button to return the result.  That works but I really would prefer to have it displayed in a similar manner to the ordered | received and back ordered fields at the bottom of the window.  And eventually the calculation will be triggered automatically when the orders tab is entered and there won't be a button.

This is not a UDF to be updated/displayed, it is just a calculated value.

I have tried to change the text value (note the Text 4 field to the left of the button that says PO 30 day 0.

I suspect the SetControlProperty below is what I want to do but the property of "TEXT" that I am trying to change is not correct.  Pretty sure it is as simple as that, but I can't find a reference to tell me what the correct property is to change.  Help.

'code not shown that calculates PO30daytotal

result = "PO 30day "&cstr(Po30daytotal)

 retval = oUIOBJ.SetControlProperty ("BT_LINK_2","Text", result)   'changes the text on the button that executes the routine - works


 retval = oUIOBJ.InvokeChange ("Fonted_Text_4","Text", result)   'attempt to change text of a text field - no go


  retval = oUIOBJ.SetControlProperty("Fonted_Text_4","Text", result) 'attempt to change text of a text field - no go

  'following pops up a text box that displays the info - it works! but I really don't want a pop up
  retval =  oSession.AsObject(oSession.UI).Messagebox("Quantity Pending " & POAlltotal & "/" & PO30daytotal & " " & resultl )

Parents
  • 0 in reply to TomTarget

    I think has a method for changing text by script... not sure if he posted it here or 90M.

  • 0 in reply to Kevin M
    SUGGESTED

    Several methods to accomplish this depending on when you need the value calculated.

    Fonted Text added to a panel is only processed when the panel is first drawn, think of it like the post load event. You can not modify the text afterwards typically. Although i feel like at one point i accomplished this but it might have been changing the color and not the text itself. If you only need the calculation to perform once, you can prefix the calculation with an "=" just like with excel to enter a formula, you can then reference variables present in the UI object's scope. The "formula" must return a "string" value though. So if you wanted to perform a mathematical equation, you have to convert the final output to a string value, i.e. [=STR(2*4)] will display "8" where the text is placed when the panel is drawn.

    The next option is useful when you need to update the value, such as on the post read of a record or some other event. For this, you can either create a UDF in the "MAIN" table for the task so that you can add it as a place holder to the panel and configure it to be locked and borderless (if you don't want to see the outline of the control, making it look like it is just text). You can then use either the Business object's SetValue on it or if it is purely for informational purposes only and you don't want the value saved to the record or to trigger the "Do you want to save changes" prompt, you can use the [oUIObj.SetControlProperty "Control_Name", "Value$", "Value To Set"]. If you want to use the latter, than you don't technically have to add a UDF to the table, instead, in customizer, choose to add a UDF to the target panel and then click the "Show All" button, then pick a field from the list, excluding any fields under the "MAIN" tree, that will create a control on the panel prefixed with "ALB_", you should get the best result if you use a field from another table, see the attached images for an example of this.

    I needed a total of four "informational" fields so i just picked the first four fields from the "BillNo" tree

    Then update the field captions.

    Here's a snippet of the code used to update them.

    oBM_Production_UI.SetControlProperty "ALB_BillNo_BillNo", "Value$", FormatNumber(nQuantityOrderedOriginalTotal, 4)
    oBM_Production_UI.SetControlProperty "ALB_BillNo_Revision", "Value$", FormatNumber(nQuantityOrderedRevisedTotal, 4)
    oBM_Production_UI.SetControlProperty "ALB_BillNo_BillDesc1", "Value$", FormatNumber(nQuantityToProduceTotal, 4)
    oBM_Production_UI.SetControlProperty "ALB_BillNo_BillDesc2", "Value$", FormatNumber(nQuantityCompletedTotal, 4)

    Here's the end result.

    There is one more method that can be used to do "advanced" calculations when a Fonted Text is first drawn but it requires knowledge of the ProvideX language since it uses the XEQ function and the logic must be in a file similar to PERFORM LOGIC. It is used like the following, [=XEQ("PathToFileContainingProvideX","Value/Variable to return from the function", "Value/Variable passed as parameter to the "CALLED" program specified")]

  • 0 in reply to David Speck

    Finally found the other script i created that actually deals with text and groups but it requires ProvideX.

    This first script is triggered in a UI Post Load event on your target panel.

    'RED' is the color.

    @X() is the column.

    @Y() is the row.

    You can get the X and Y values from the Customizer status bar by clicking where you want the text to start in the target panel.

    "CUSTOMER ON CREDIT HOLD" is the text.

    The Credit_Hold_Warning.grp$ is the groups variable used in the local scope, i then set a copy of it into the global scope using [%Credit_Hold_Warning.grp$=Credit_Hold_Warning.grp$].

    Replace the "Credit_Hold_Warning" with whatever you want to call your group.

    oScript.Execute "NEW_img$=""I_00""+STR(1:""0000"")"
    oScript.Execute "PRINT 'IMAGE'(NEW_img$),'RED','TEXT'(@X(30),@Y(4),""CUSTOMER ON CREDIT HOLD""),"
    oScript.Execute "PRINT 'IMAGE'(""""),"
    oScript.Execute "Credit_Hold_Warning.grp$=STR(0:""000"")+NEW_img$"
    oScript.Execute "%Credit_Hold_Warning.grp$=Credit_Hold_Warning.grp$"
    oScript.Execute "Call ""*wingrp;HIDE"",%Credit_Hold_Warning.grp$"


    The second script is triggered by whatever table event you want to add it to. In this case, the Post Read.

    If oBusObj.CreditHold = 1 Then
    sState = "show"
    Else
    sState = "hide"
    End If
    If Len(oScript.Evaluate("%Credit_Hold_Warning.grp$")) > 1 Then oScript.Execute "Call ""*wingrp;" & sState & """,%Credit_Hold_Warning.grp$"


    Now in theory, if you look at the ProvideX documentation for the 'IMAGE' Mnemonic, you should be able to just repeatedly destroy the group and recreate the group with the updated values every time you need to recalculate and display the updated values to the user.

Reply
  • 0 in reply to David Speck

    Finally found the other script i created that actually deals with text and groups but it requires ProvideX.

    This first script is triggered in a UI Post Load event on your target panel.

    'RED' is the color.

    @X() is the column.

    @Y() is the row.

    You can get the X and Y values from the Customizer status bar by clicking where you want the text to start in the target panel.

    "CUSTOMER ON CREDIT HOLD" is the text.

    The Credit_Hold_Warning.grp$ is the groups variable used in the local scope, i then set a copy of it into the global scope using [%Credit_Hold_Warning.grp$=Credit_Hold_Warning.grp$].

    Replace the "Credit_Hold_Warning" with whatever you want to call your group.

    oScript.Execute "NEW_img$=""I_00""+STR(1:""0000"")"
    oScript.Execute "PRINT 'IMAGE'(NEW_img$),'RED','TEXT'(@X(30),@Y(4),""CUSTOMER ON CREDIT HOLD""),"
    oScript.Execute "PRINT 'IMAGE'(""""),"
    oScript.Execute "Credit_Hold_Warning.grp$=STR(0:""000"")+NEW_img$"
    oScript.Execute "%Credit_Hold_Warning.grp$=Credit_Hold_Warning.grp$"
    oScript.Execute "Call ""*wingrp;HIDE"",%Credit_Hold_Warning.grp$"


    The second script is triggered by whatever table event you want to add it to. In this case, the Post Read.

    If oBusObj.CreditHold = 1 Then
    sState = "show"
    Else
    sState = "hide"
    End If
    If Len(oScript.Evaluate("%Credit_Hold_Warning.grp$")) > 1 Then oScript.Execute "Call ""*wingrp;" & sState & """,%Credit_Hold_Warning.grp$"


    Now in theory, if you look at the ProvideX documentation for the 'IMAGE' Mnemonic, you should be able to just repeatedly destroy the group and recreate the group with the updated values every time you need to recalculate and display the updated values to the user.

Children