

If you want to setup additional Syracuse nodes and form a Syracuse cluster, then I hope you will find these notes useful. Generally this requirement is due to the number of users and the type of workload, or you may want to provide high availability and resilience. You can find Syracuse sizing recommendations in the online help at https://online-help.sageerpx3.com/erp/12/public/administration-reference_node-js-sizing.html. You may also want to have multiple Syracuse nodes to dedicate certain nodes to interactive users, whilst other different nodes process only Web Service calls.
When setting up a Syracuse cluster, there are several things to plan and consider:
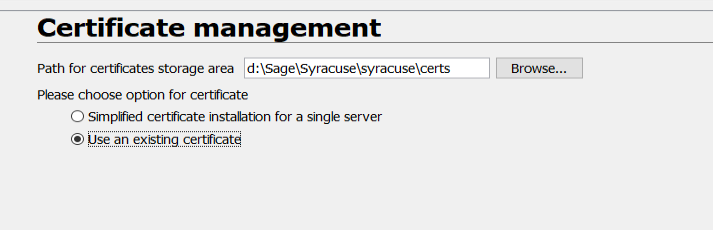
- All Syracuse nodes in a cluster need to be using an SSL certificate which has been issued by the same Certificate Authority (CA). You will need to have such SSL certificates available before you do the Syracuse installation. The good news is that you already have the ability to generate appropriate SSL certificates as you will see later.
- Syracuse nodes need to communicate with each other to control the cluster, so you will need to configure a dedicated TCP port (this is not actually mandatory technical requirement, but is a security recommendation) Of course, you will need to adjust firewall rules to allow this communication.
- You need to consider how users will be accessing the Syracuse cluster.
- If you are looking for resilience and performance, it makes sense to have an external load balancer in front of the Syracuse nodes which will direct users to one of the available Syracuse nodes.
- Syracuse itself does do load balancing, so you could alternatively just give users access to one or more of the Syracuse nodes directly, although I think this approach is a bit clumsy and does not provide best resilience in the event of one node failing.
- You may also be considering dedicating one (or more) Syracuse node to only service interactive users, and a separate Syracuse node(s) to service only Web Services which is sometimes recommended for best performance and stability. - You will need the Sage License file when doing the new installation, as well as the Windows service user name and password.
- When using SSL encrypted connections to MongoDB (which is recommended) you will need to manually copy the appropriate SSL certificates from MAIN node to SECOND node
This document will assume you have already already have installed one standalone Syracuse node which is working well and now want to add a new Syracuse node.
Steps to take
In this guide, I will be using version 2021 R2 (12.0.26) to demonstrate the steps, however the basic principles will apply to previous Sage X3 versions also.
For my starting point, I already have a single node X3 installation installed on host "X3ERPV12SQLVM" which I will refer to as "MAIN node". I will work through setting up Syracuse on a second server called "X3SECOND" which I will refer to as "SECOND node". If you need to setup a third or more Syracuse node, you will follow these steps for each node in turn.
1. Check host setup on MAIN node
Navigate to Administration, Administration, Servers, Hosts
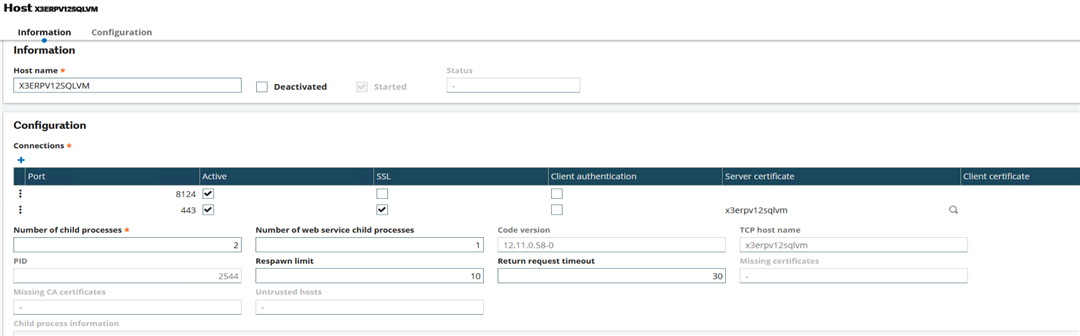
Non-SSL port 8124 will be setup exclusively for the inter-server communications (using Firewall rules) I would recommend you to configure all Nodes to have the same port number on the first line, as this is taken as the management port for inter-cluster communications.
Port 443 will be used by the users to access Sage X3
2. Create Syracuse SSL certificate
Create certificates on MAIN node and copy over to SECOND node.
All Syracuse nodes in the cluster need to have SSL certificates with the same CA. We already have SSL certificates for the MAIN node, so simply need to run the certificate generation script (certgen.bat) on the MAIN node for the SECOND node hostname
In my case, the certgen.bat is located in the directory "D:\Sage\SafeX3\SyraSrv\syracuse\certs_tools" so can launch this script and select the following options:
Select option 1 "Create new certificate and private key"
Name of server: x3second
Press < enter >
Press < enter >
Enter passphrase for new private key: Password1
Enter passphrase of private key of CA certificate: Password1
Press < enter >
Option 10 "End"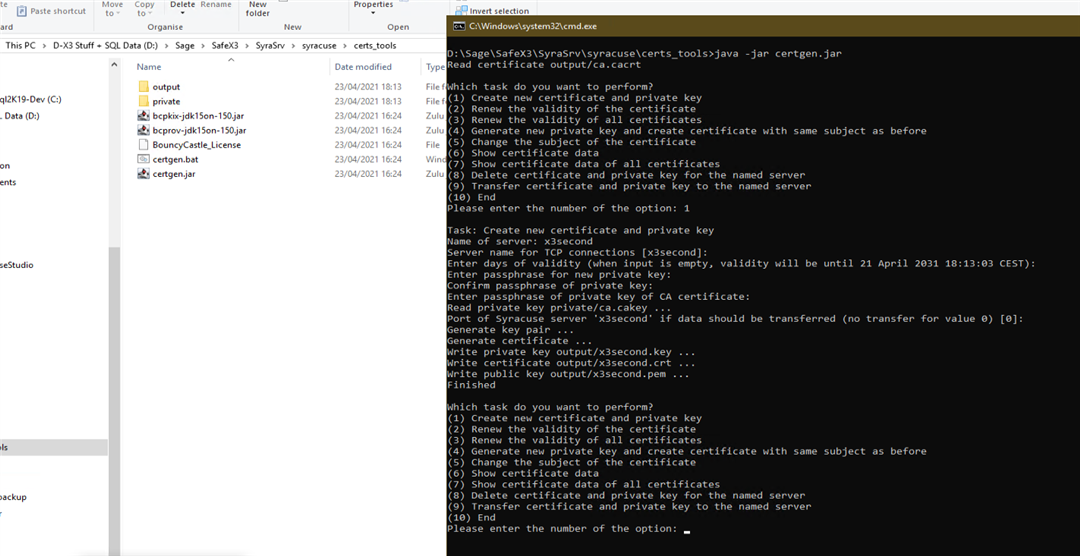
From "D:\Sage\SafeX3\SyraSrv\syracuse\certs_tools\output" directory, copy the following files:
a. Copy to SECOND node temporary directory, such as the "Documents" directory
x3second.crt
x3second.key
ca.cacrt
These files will be used during the Syracuse installation on the SECOND node
b. Copy to "D:\Sage\X3ERPV12\Runtime\keys" directory on MAIN node
x3second.pem
This file is required for the SECOND node to be authenticated to the X3 Runtime service

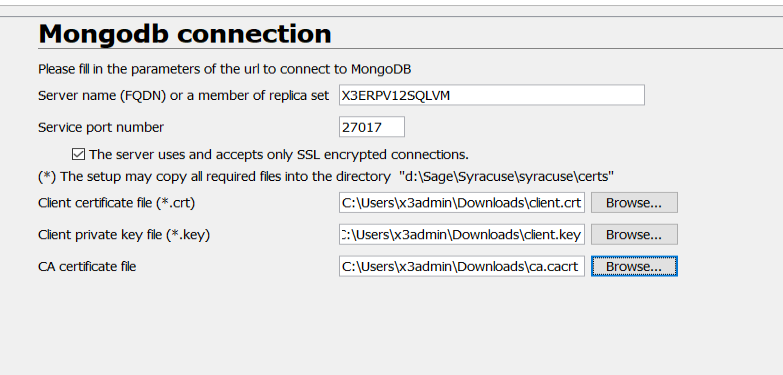
c. Copy SSL certificates for use with MongoDB connections
When using SSL encryption for MongoDB (which is recommended) you should copy the mongodb certificates from MAIN node to SECOND node
In my case these are located in "D:\Sage\SafeX3\SyraSrv\syracuse\certs\mongodb" directory.
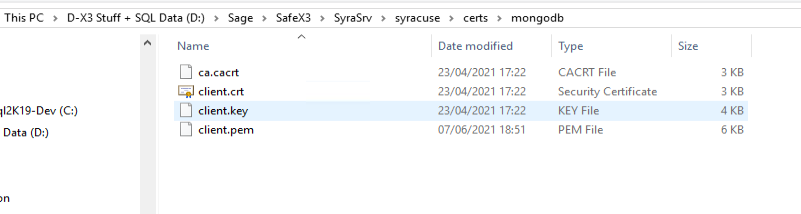
Copy all four files to the SECOND node into a different temporary directory, such as the "Downloads" directory
3. Setup firewall rules
You can review "Which firewall ports need to be open in a multi-node environment" to determine which ports need to be opened in your specific case
For my server setup, the steps I need to do are:
a. On the MAIN node, setup firewall rules to allow access from SECOND node.
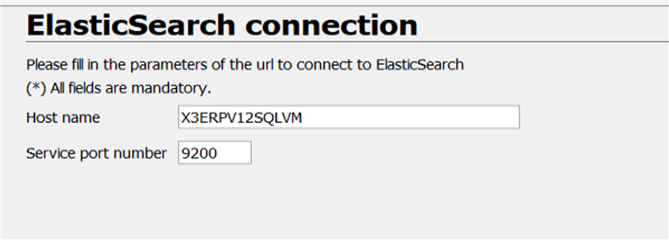
Open up Syracuse port 8124, MongoDb port 27017, Elastic Search port 9200, Apache port 8080, Runtime port 50012 and Print Server port 50001 for the IP address of the SECOND node
b. On the SECOND node, setup firewall rules to allow access from MAIN node.
Open up Syracuse ports 8124 for the IP address of the MAIN node
All other ports except 443 can be disallowed so far as Sage is concerned, although you will likely have other firewall requirements for Windows domains and other software to take into account.
You should review https://online-help.sageerpx3.com/erp/12/staticpost/security-best-practices/ for more discussions about security requirements
4. Install Syracuse on the SECOND node
New installation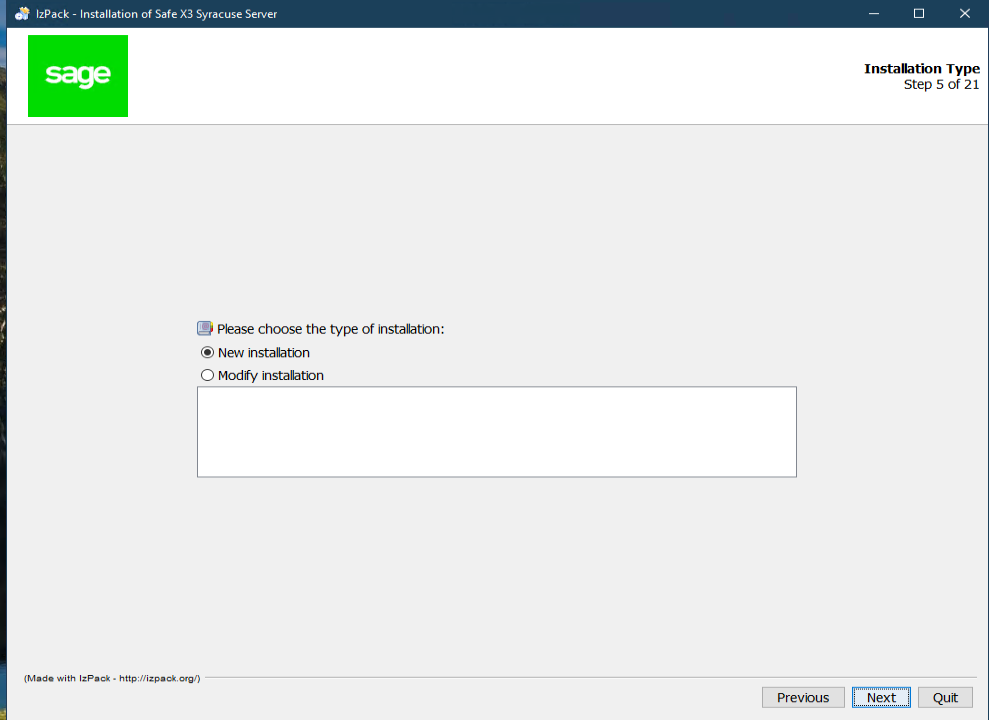
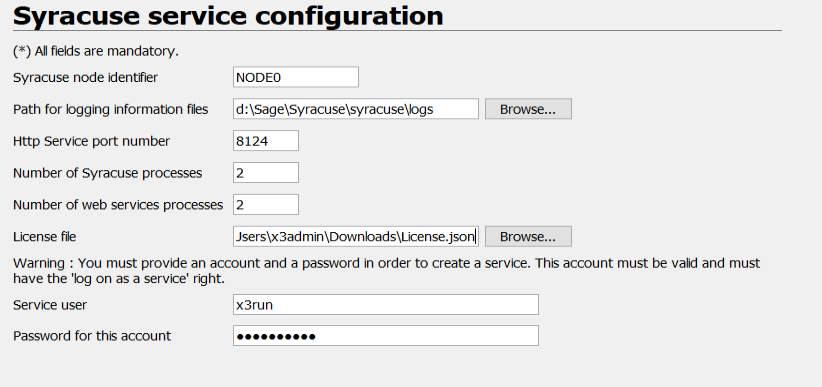
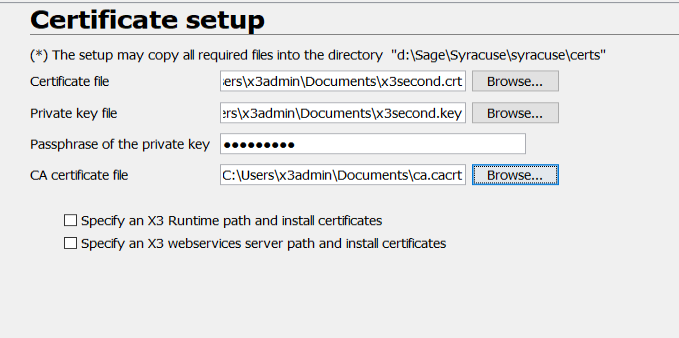
Note we cannot check "Specify an X3 Runtime path and install certificates" as the runtime is on the remote server. This is why we manually copied the file in a previous step.

Click OK
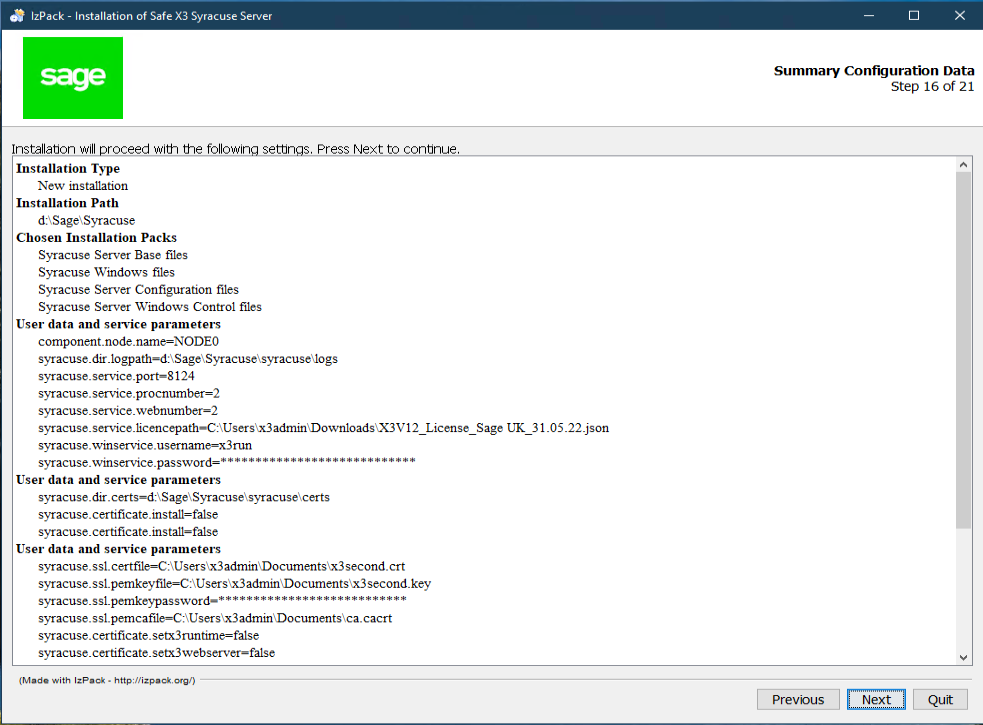
Check the settings and click "Next"
Once the first phase of installation has completed, click "Next" again
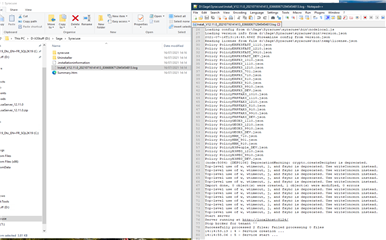
When the installation has completed, check the messages to ensure there are no errors.
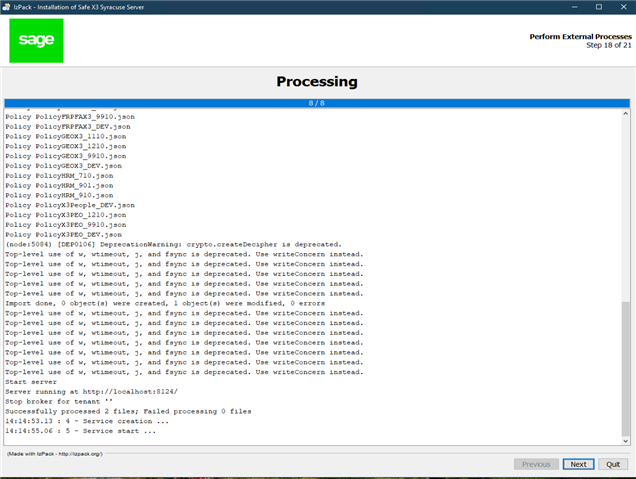
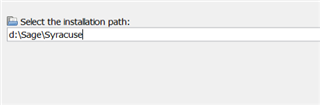
These messages are also echoed to the log file in "D:\Sage\Syracuse" directory
Click "Next", "Next", "Next" and then "Done" to complete the installation
5. Check results
Login using "http://localhost:8124" from the SECOND node and check the hosts

Both nodes should be listed, status "OK" and be the same version
Also check you can launch a classic page from the SECOND node
6. Finishing tasks
a. If you have configured an external load balancer, you can turn off Syracuse load balancing.
In this case, on BOTH servers, edit "D:\Sage\Syracuse\syracuse\bin\nodelocal.js" and add the following section to disable inter-node load balancing. Then restart Syracuse for this change to take effect
hosting: {
localBalancer: true,
},
b. Setup SSL connections (Port 443) on SECOND node
Port 443 is the only port that I want to be used by interactive users and is the only port that needs to be opened in the firewall settings to the outside world
You would normally get your SSL certificates from a recognised CA and load these into Sage X3, but for the purposes of this document, I will use the existing self-signed SSL certificates for testing purposes
Navigate to Administration, Administration, Servers, Hosts to add the new port with SSL certificate for X3SECOND host

Conclusion
Hopefully this document has helped you understand the steps needed to configure extra Syracuse nodes in your Sage X3 environment