This Sage City Blog article discusses how to set up the ability to track the movement of specific serial number Inventory Items using barcodes so that they can be scanned. In addition, it also allows you to retain historical data on such movements.
Consider the following practical example of how the above scenario can be applied:
You need to regularly ship/send machine components to an outside mechanical service provider (SP) for their fixing or general maintenance.
However, you need to closely track the movements of all such components (to the SP and back into your company). Therefore, you need to know their exact location at any given time and be able to review the full history of your components’ movements.
Finally, you also have an external stock/component movement tracking system that is used to scan the barcodes of such components. This is used to keep close track of their movements and to prevent theft or admin mistakes.
Please first note:
This article assumes you have a basic understanding to customize source document layouts. If not, please consult with your Evolution Business Partner to assist further.
Apply the following steps to achieve the above outcome:
Phase 1: Creating two new User Defined Fields
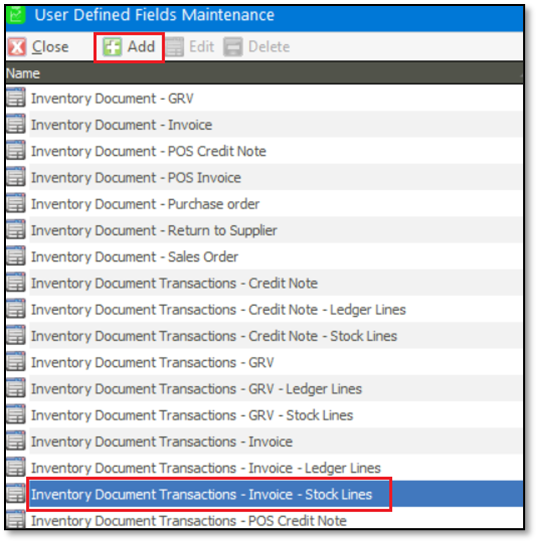
1. Go to Administration | System Configuration | User Defined Fields.
2. In here first highlight the Inventory Document Transactions – Stock Lines record and then click the Add
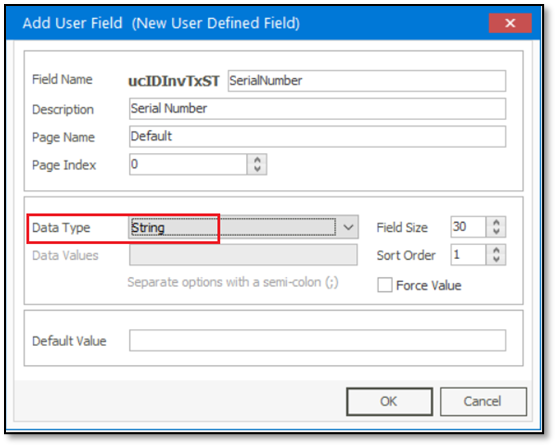
3. Create the new User Defined Field (UDF) as below:
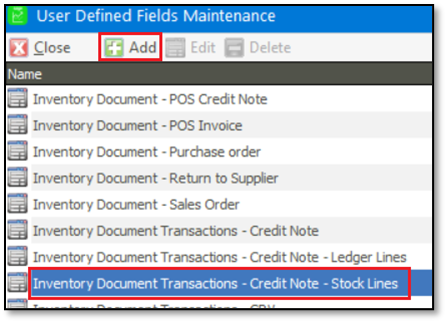
4. Also repeat the same steps for the Credit Note – Stock Lines
Phase 2: Customize the Invoice layout
1. Open the Inventory or Sales Order Invoice layout to customize it.
2. In here free up sufficient space for a new barcode field on the transaction line section.
3. On the top of the screen click the DBBarCode
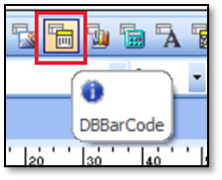
and place it on the layout’s transaction lines section.
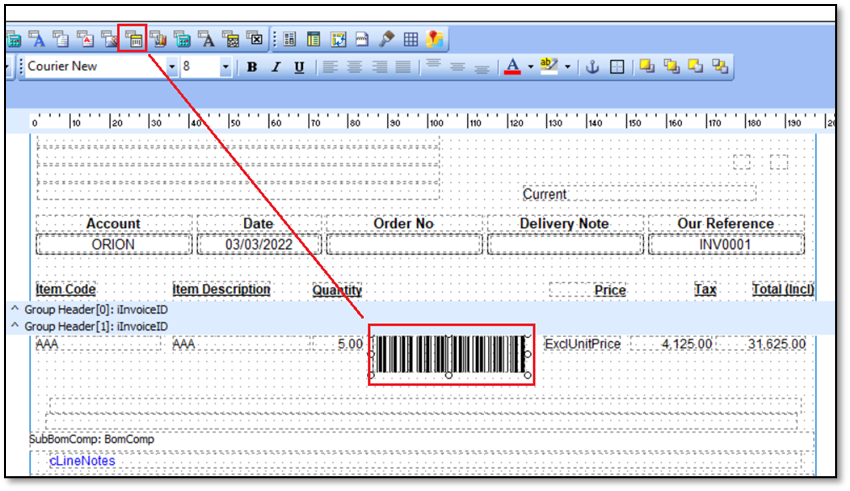
4. Select the newly placed field and on the top left of the screen, define it as seen below.
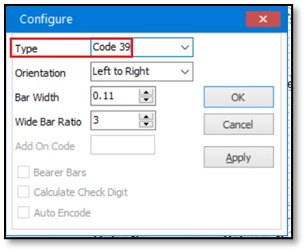
5. You can now also set up the specific barcode type that is compatible with your own barcode scanner.
Do the following:
a) Right-click on the new barcode field and select Configure…

b) Select the relevant Type value and change the other values below as required.
6. When done, further configure the layout to include a barcode field header as well as apply all other ‘cosmetic’ changes to have a professional-looking document.
7. Repeat Phase 2 in a customized Inventory Credit Note layout also.
Phase 3: Setup new Inventory Items for all relevant components to be tracked
Create new Inventory Items for all machine components with the following properties:
a) Strict Serial Number Tracking applied.
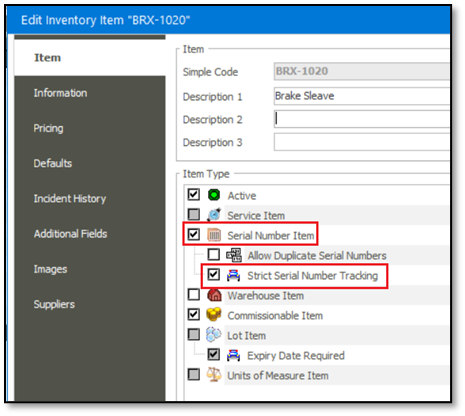
b) There will be zero cost on these items as you will not be purchasing and selling them from a commercial viewpoint. In fact, they should not be counted as part of your normal Inventory valuation.
c) Finally, also process an Inventory | Transactions | Adjustment transaction to add one unit for each Inventory Item/Component record. In doing so, also create the new serial number as per the normal procedure.
Please also note:
You should also consider adding these component items to your Fixed Asset Register as their asset values may depreciate and contribute towards your Balance Sheet. However, please consult with your own chief financial officer/auditor about doing this.
Phase 4: Create new customer records for your service providers
Create a new customer record for each separate service provider that will be fixing/maintaining the components.
Phase 5: Process the Invoice
1. Before processing the new invoice, select the above-customized layout as the default print layout to be used.

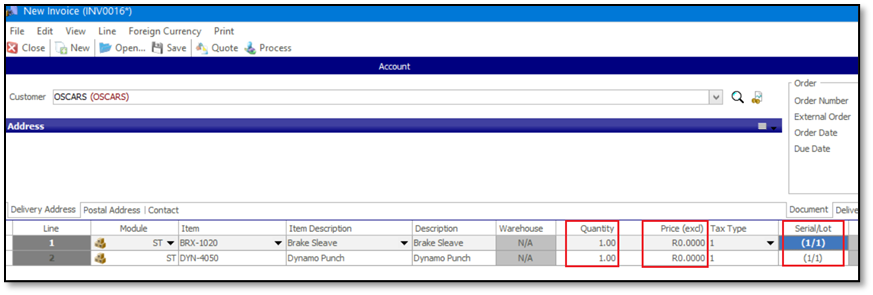
2. Capture the new invoice as follow:
- On the top left, select the relevant Customer (Service Provider record) to which the machine component will be sent to.
- Select the machine component’s Inventory Item on the transaction line and enter 1 unit on the Quantity column that will be moved out of the company to the service provider.
- On the Serial Number selection screen, select the serial number as created in Phase 3 above.

- Manually capture the same Serial Number as selected above on the new Transaction Line UDF field (created in Phase 1 above), as seen below (if needed, customize the grid to insert the UDF field).
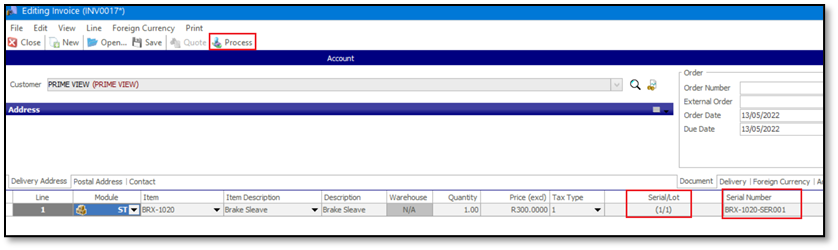
- If needed, also capture, and select the serial numbers for all relevant machine components that need to be sent to the same service provider.
Do not capture any selling prices.
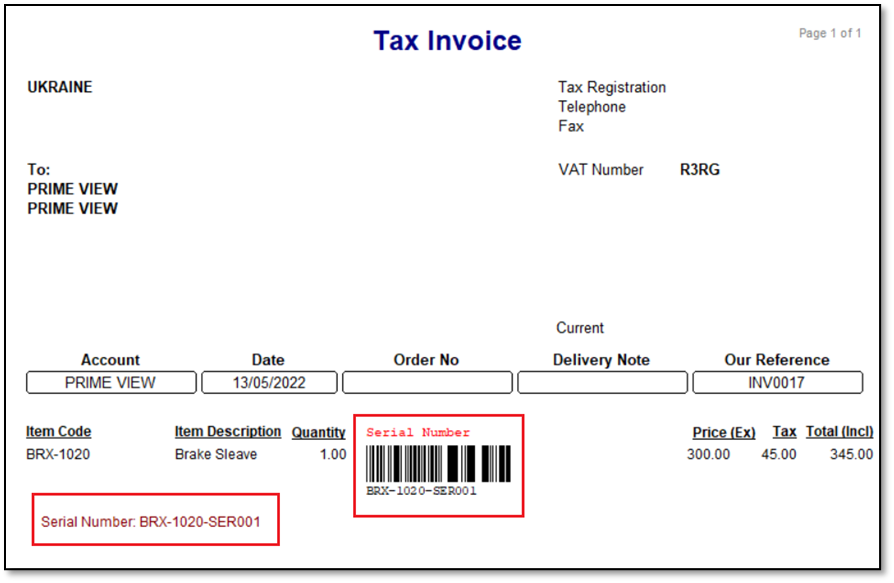
3. When done, process the Invoice and print it out.
Notice below the new Serial Number field as added in Phase 2 above.
Also, notice the standard Serial Number value (bottom left) that should agree with the UDF captured value.
Phase 6: Printing and scanning the Invoice
The invoice is now printed and handed to the courier of the components to be taken to the service provider for fixing/maintenance.
At the relevant exit point, e.g., the warehouse security gate, the invoice’s barcode/s are being scanned as required by the external stock control system’s procedures.
Phase 7: Returning of machine components
1. When the fixed/maintained machine components are returned to the company, a new Credit Note is processed.
To simplify the capturing, open the Credit Note Maintenance screen, find the archived invoice, and use the Load as Linked or Load as Template option to create the new Credit Note.
2. Ensure the same serial numbers as processed on the Invoice, are selected on the Credit Note’s transaction lines.
3. Before finally processing the Credit Note, select the newly customized Credit Note layout as created in Phase 2 above.
4. When done, process and print the new Credit Note.
5. Finally, hand the credit note to the courier who is returning the machine components back to the company so that their serial numbers can be scanned by the relevant entry control point, e.g., warehouse security.
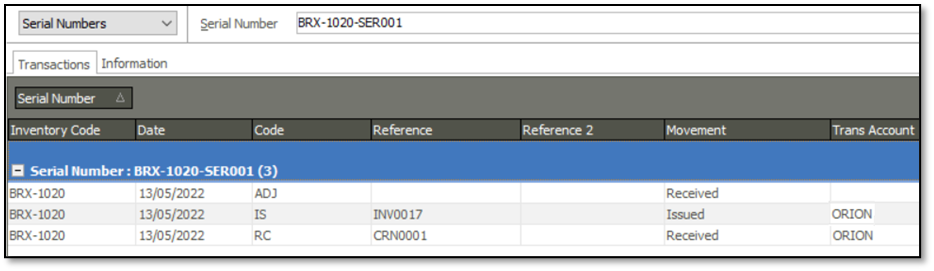
Phase 8: Reviewing/tracking the history of components’ movements
Finally, the complete movement history of all components can be reviewed/analyzed by going to the Inventory | Enquiries | Serial Number Enquiries screen and selecting the relevant serial number.