In my previous post, I explained how to deploy a SQL Elastic Pool in Azure Portal. In this post, I am going to show how to perform a Sage X3 Solution configuration using the deployed Database, so let's dive right in.
To create a solution, open the Solutions component on the left list panel, and click the New Solution button of the general tool bar.
The following dialog box entitled Create a new solution is displayed; it enables to build the basic solution using the components that have already been installed on the servers:
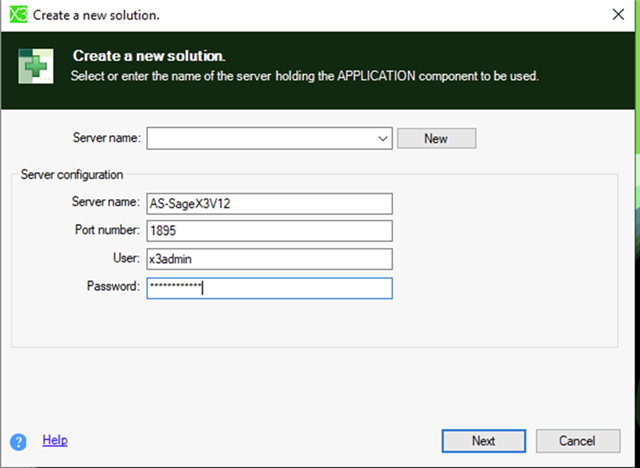
Perform the following steps:
- Click the New button.
- Enter the name of the server where the Application and Runtime components are installed.
- Enter the port, user, and password for the AdxAdmin service. The AdxAdmin default port is 1895.
- Click the Next button.
The process starts with the selection of the application component that refers to the product and determines the solution type.
The following dialog box entitled Create a new solution is displayed:
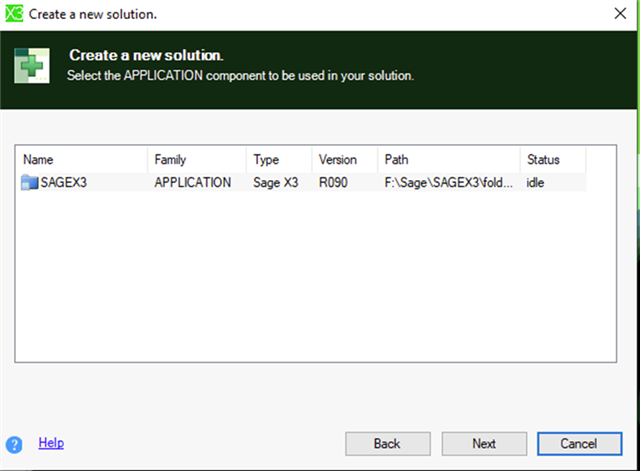
To select the application component to be used in your solution:
- Set the cursor on the selected Application component.
- Click the Next button.
Then the Console submits a list of main runtimes available for your solution in the following dialog box:
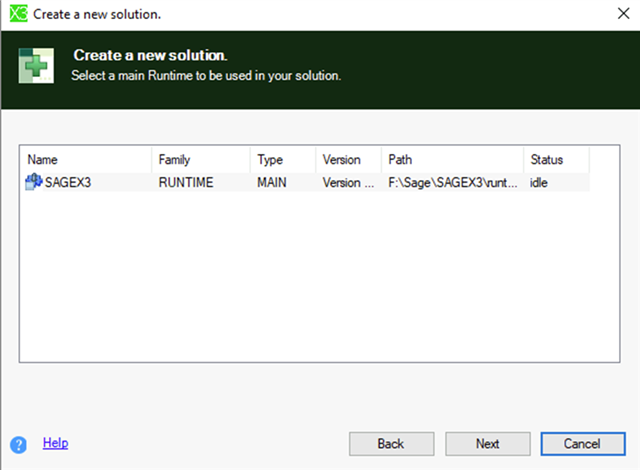
To select the main runtime to be used in your solution:
- Set the cursor on the selected Runtime component.
- Click the Next button.
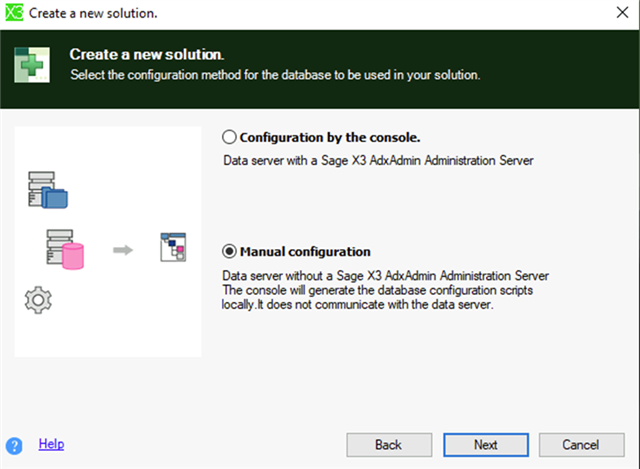
The next step is to choose via the following dialog box the configuration method for the database to be used by the solution. For Elastic Pools, you need to choose Manual configuration. Click the Next button.
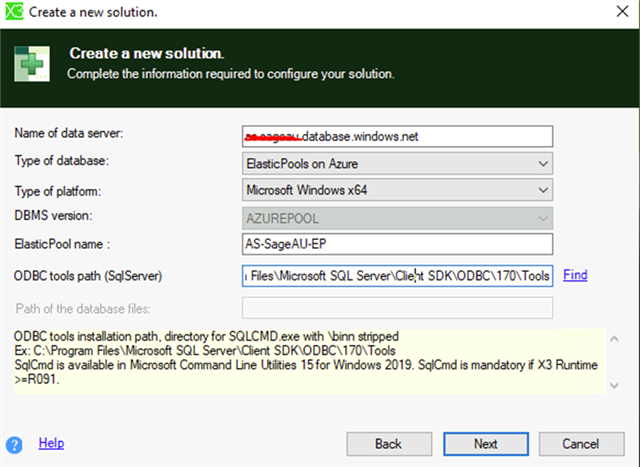
Enter the following details in the following window to connect to the Pools:
- Name of data server: Your Azure SQL Server name noted in the previous article. In usually ends with *database.windows.net
- Type of database: Elastic Pools Azure
- ElasticPool Name: The name of the pool created in the previous article.
- ODBC Tools Path: The directory in which SQL Server Command Line Utilities V15 is installed. You need to install this manually if you have not already done so: https://go.microsoft.com/fwlink/?linkid=2142258
- Click the Next button.
- Click the OK button
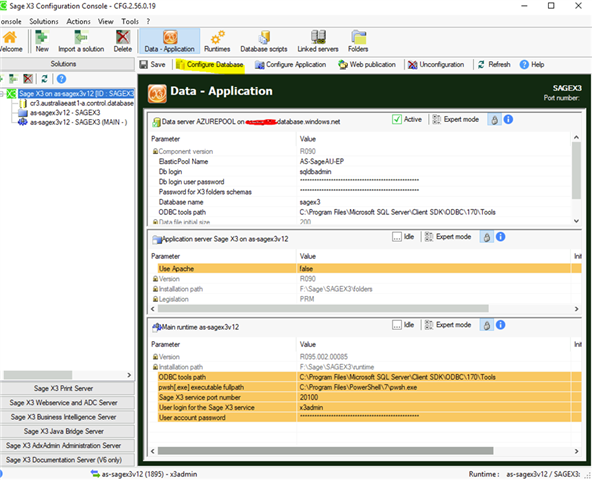
In the Solution Configuration window, provide the following details:
- DB Login: This is the database administrator login username we created in the previous article.
- DB Login user password: This is the database administrator login password we created in the previous article.
- Database name: Choose a database name to be created. The default value is “sagex3”
- Use Apache: It is recommended to choose No in this field, but you may choose to use Apache if you wish to do so.
- ODBC Tools path: The directory in which SQL Server Command Line Utilities V15 is installed.
- Pwsh[.exe] executable fullpath: The directory in which PowerShell 7.2 an above is installed
- User login for Sage X3 service: The Windows login account to use by the Runtime component service
- User account password: The password of the above user.
Once these parameters are entered, click the Save button of the Configuration Console.
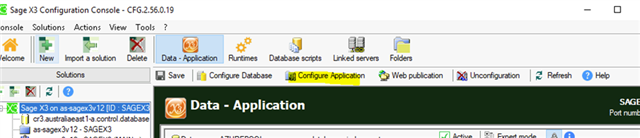
To start the configuration of the database server, click the Configure Database button.
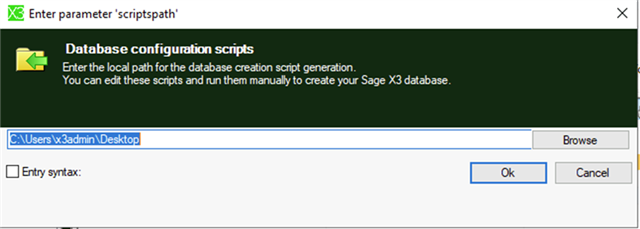
Choose a local directory in which the temporary Database generation scripts will be saved. I am choosing to save them on my desktop:
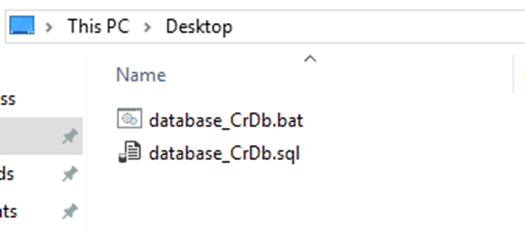
Two files will be saved to the local directory. A bat file and a sql file including the scripts to generate the database.
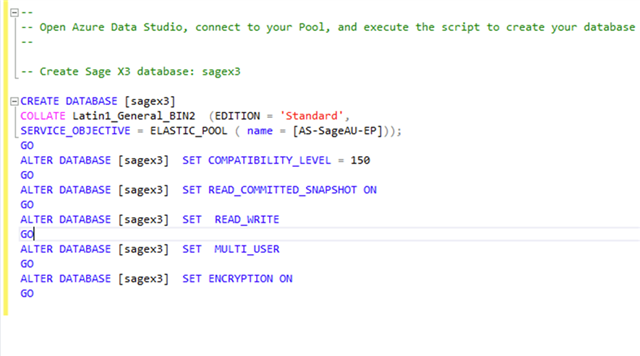
Open SQL Server Management Studio, connect to your Pools and run the query which is in the database_CrDb.sql file generated above.
Paste the contents of database_CrDb.sql and if necessary, change the EDITION to Standard if, as per the last article, you chose to go with the DTU Based edition of the Pools, rather than Core based edition. You will also need to remove the MAXSIZE argument if going for the Standard edition.
Upon the successful execution of this script, you may go back to the Management Console and continue with the configuration of the Application component and the rest of the Sage X3 installation process as usual.