Amazon Simple Email Service (SES) is a robust email service provided by Amazon Web Services which helps businesses send business emails to their customers securely via the latest email transmission and authentication technologies such as SPF and DKIM.
As more and more businesses are adopting these technologies in their email policies, they usually demand their business partners, too, to adhere to these standards when communicating with them or else communications would be lost by their email filters/spam detectors. It is therefore obvious that Sage X3 customers need the communications sent out of their ERP system to be compliant with these frameworks. Fortunately, in the latest release of Sage X3 (V12 2022R4), you can setup the system to use an external messaging server, also known as Notification Server, such as Amazon SES. Let’s see what we need to do to set things up for our business:
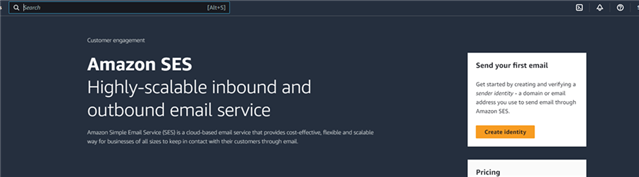
First up, you will need to login to your AWS Console and search for SES. Click on the Simple Email Service link to be greeted by the following screen. You will need to establish an identity with SES so that you confirm the ownership of your business domain or email address and accept certain fair and rightful usage policies. Click on “Crate identity” to get started.
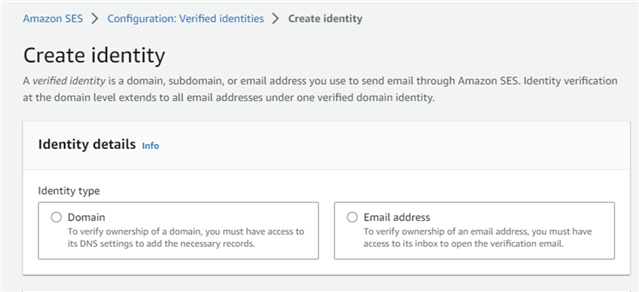
On this screen, choose whether you want to establish the identity for your entire organisation via the domain name or a single email address that you will use to contact your customers. As Sage X3 will send emails to your customers From the user who initiates the message, it is recommended that you confirmed your domain name.
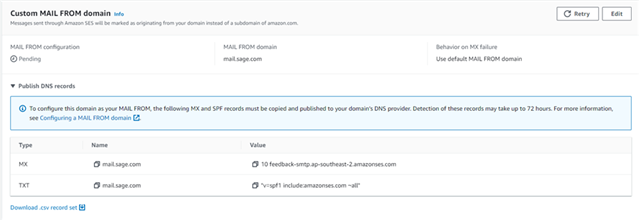
Choose “Use a Custom Mail from Domain” option so your emails will look like they have been sent from your corporate email.com, e.g. Sage.com in my case.
If Amazon is your domain registrar, enable the “Publish DNS records to Route53” option so SES can easily change your MX record settings for you, otherwise disable this option and you will be guided to setup your MX records later.
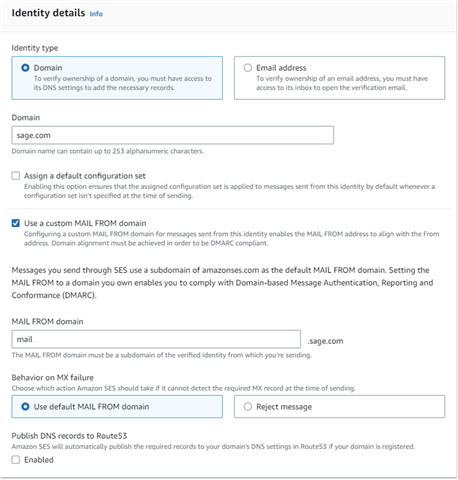
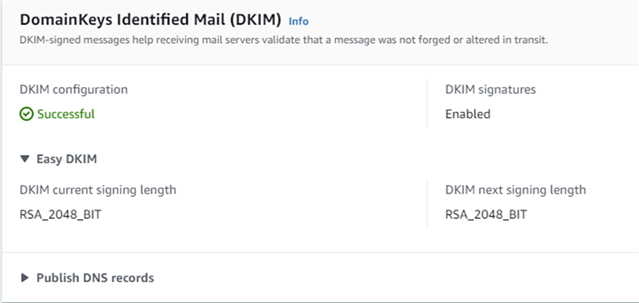
In DKIM section, choose Easy DKIM option, followed by RSA_2048_BIT as your key length and Enable the DKIM signatures for the best DKIM authentication.

Click the Create Identity button and you will be given a set of CNAME, MX and TX records you will need to add to your DNS settings so SES can confirm the ownership of your domain as well as establishing a certified SPF and DKIM relationship with your DNS server.
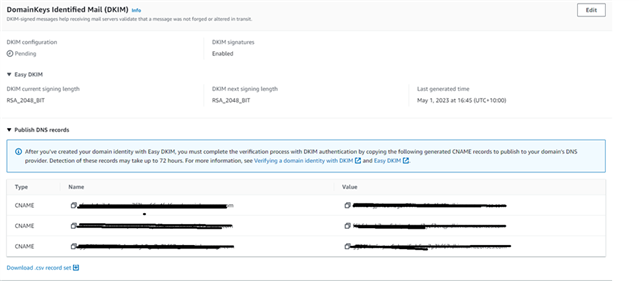
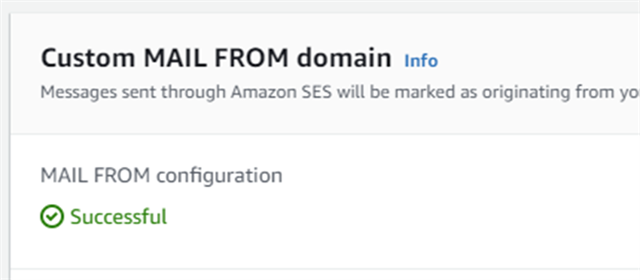
Once you have added these records, your identity status will change to “Successful”.
You will now need to create a unique SMTP credential to be used in your Sage X3’s Notification Server. Click on SMTP Settings and then Create SMTP Credentials. Do take note of the assigned SMTP endpoint (Server) as well as this will be the server you will need to set up in the Notification Server function in Sage X3.

Choose an internal IAM name for this user or accept the default user. I am going to accept the default name and click Create.

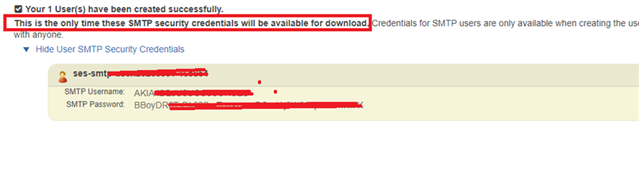
You will be given a confirmation window that shows you a unique SMTP username and password which you won’t be able to retrieve later, so please take good note of them as you will need to enter these in X3’s notification server settings:
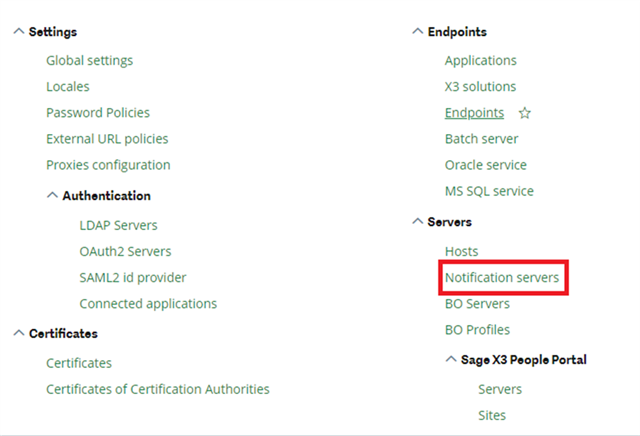
Now head back to X3 and create a new Notification Server in Administration module:
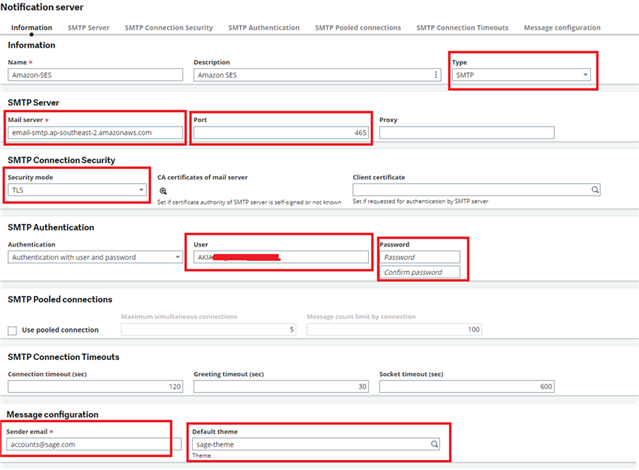
- Choose SMTP as your server type. – Do not use the Amazon SES option as that requires a different type of credential setting not covered here.
- Enter the provided SMTP server in the SMTP Credentials page of SES
- Enter port 465
- Choose TLS as security mode
- Authentication Type: Authentication with user and password
- Enter the username and password generated by SES.
- Sender Email: enter any email @yourbusiness domain. This will not be used to send emails from, but to establish trust with SES.
- You can either use the default theme provided by Sage or define your own HTML theme for your outgoing emails. Leaving this option blank will result in your emails generated in Text mode instead of HTML. Themes are configured in Administration > Collaboration > Notification > Notification Themes
In order to enable this new functionality, two new Folder-level Parameters need to be modified:
- SYRMAIL : Use notification server? (SUP chapter, WRK group) to Yes if you want to use the new email client, otherwise No (Default value).
- SYRMAILSRV : Notification server (SUP chapter, WRK group) value contains the name of the appropriate notification server.

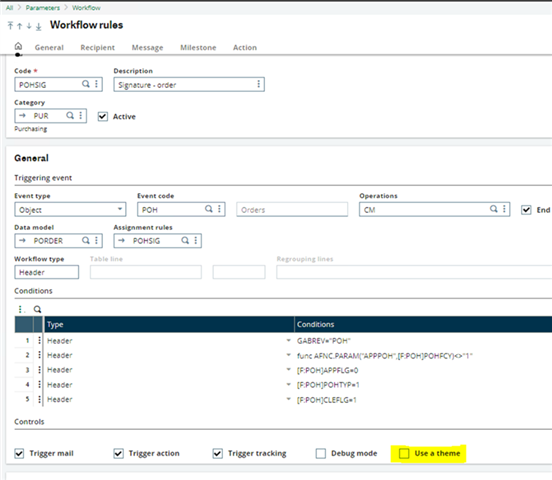
In addition to setting the SYRMAIL and SYRMAILSRV General Parameters, if SYRMAIL is set to "Yes", then each Workflow Rule can be configured separately to use or not use a Notification Theme by ticking the "Use a theme" box - this is not available if SYRMAIL is set to "No". This is done in Setup > Workflow > Workflow Rules