

This is a slightly more up to date version of Casey's article here, so let's dive right into it.
If you are up to exposing your Sage X3's environment to the public, it is strongly recommended that you avoid using X3's standard authentication method and resort to a more secure authentication method such as Active Directory (if you an on-prem Active Directory and X3 instalaltion), or a third-party provider such as Microsoft Azure AD or Okta. If your organisation is on Microsoft 365, there would be no better way than to integrate your authentication with that so your users use the same credentials that they use for their Office apps to log in to X3. Better yet, you can add Sage X3 to your Azure Application Gallery so your users can log into X3 by just clicking on X3's icon and voila! How awesome would that be? So let's get started.

1- Enable HTTPS
The first thing you need to do is to enable HTTPS on your Sage X3 system as the latest Azure AD policies do not support HTTP, so please follow these instructions to do so.
2- Open HTTPS access to your X3 system
Now that HTTPS is enabled, you may need to open external access to your environment through your chosen port, e.g. 443. This needs to be done in your cloud provider's firewall settings as well as in your Syracuse server's Operating System firewall. To verify that it works, you need to open the link in your browser and be greeted by X3's login screen.
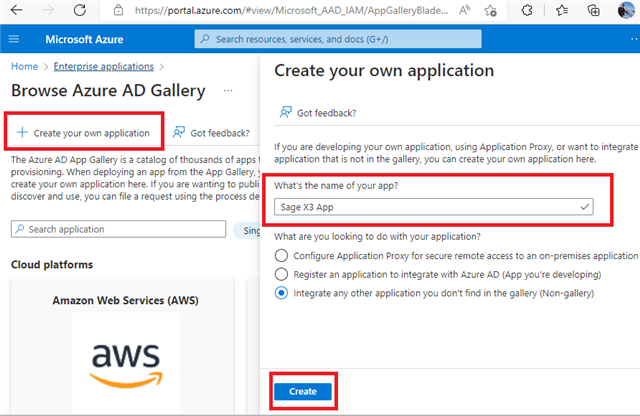
3- Add a non-gallery application to Azure AD
Log into your Azure Portal, navigate to Azure Active Direcoty and then to Enterprise Applications. Now add a "New Application" and click "Create your Own Application". Give this application a name, Such as "Sage X3 App" and click "Create"
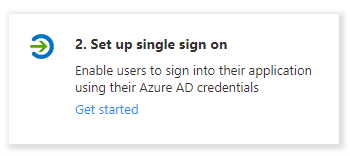
Click "Set up single sign on"
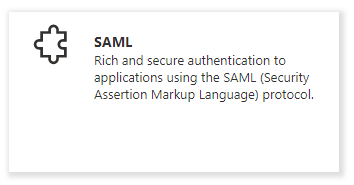
Click "SAML"
4- Configure Sage X3 to accept SAML2 authentication
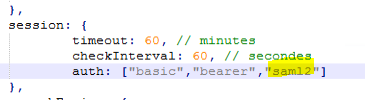
Change the nodelocal.js to allow SAML2 authentication.
Note: You will need to restart the Syracuse service after this change has been implemented
In Sage X3, open Administration, Administration, Settings, Authentication, SAML2 Id provider.
Click Actions, Create saml2

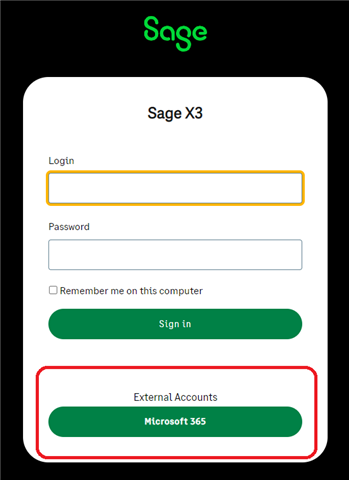
Give this service a name, such as AzureAD, a Display Name, such as Microsoft 365 which would be displayed as the label of the login button on your login Screen:
Fill in the fileds in X3 as below:
| X3 Field | Value |
| Authorize URL | Login URL from Azure |
| Logout URL | Logout URL from Azure |
| Issuer | https://[yourip]:[yourport] |
| Response Attribute | schemas.xmlsoap.org/.../name |
| Force Authentication | No |
| Protocol Binding | HTTP-Post |
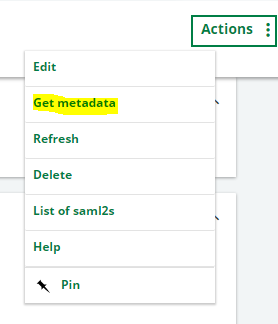
Save this and click on "Get Metadata" button to copy these settings to Azure through a metadata file.
5- Configure Azure to accept requests from X3
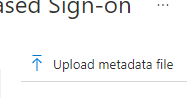
in Azure's application your just created, click on the "Upload metadata file" and browse for the metadata file issued by Sage X3. Note: You will need to change the drop-down selection to All files from *.xml.
Most of the required configuartion will be now loaded from the file. You need to add the following details as well though:
Sign on URL: https://[yourip]/auth/saml2/x3/loginStart
Click "Save"
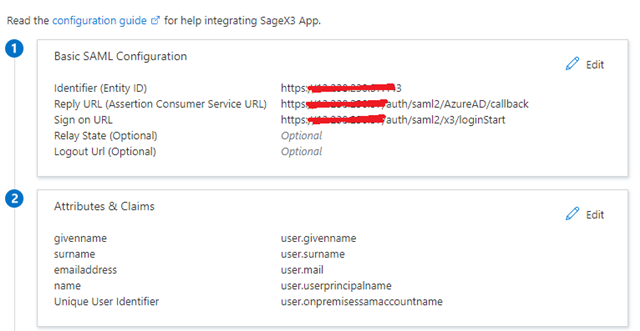
in the "Attributes & Claims" step, clik on Edit and change the value of the "Unique User Identifier" attribute to "user.onpremisessamaccountname"
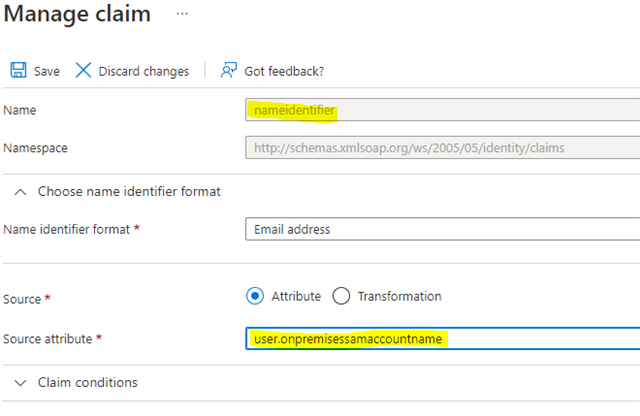
Click "Save". Your end result should look like this:
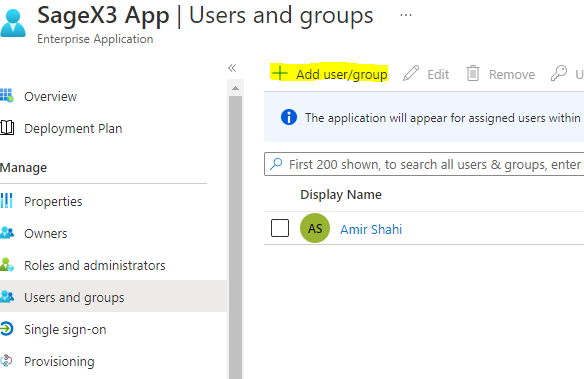
6- Assign users to this Azure Application
You need to assign the authorised users to this application so that they can login to X3 through Azure AD. Click on "Users and Groups" and assign your users:
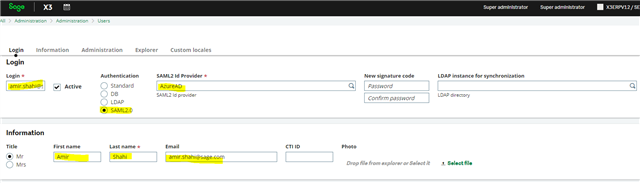
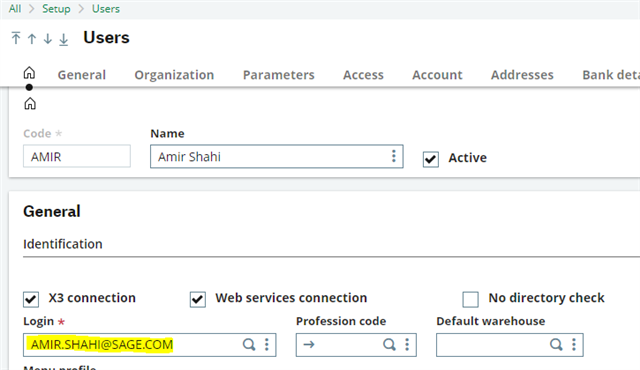
7- Create Users in Syracuse and X3 Folder
Now go to X3 and Create your X3 users in Syracuse and X3 folders and chosse the Saml2 provider you just created as their security provider. Make sure your X3 Login is your users Full Email address
Congratulations! You have a working system now!
To test things out, navigate to your Syracuse's login page and click on the "Microsoft 365" button on the login page. You should be taken to Micrsoft's login system and once successfull, you will redirected back to X3 as a logged in user. This is what we call the "Application initiated login" since you initiated the login process from X3.
Please note that for the "Azure authenticated/provider authenticated" process to work, i.e. clicking on Sage X3 App on your Azure app gallery, your SSL certifcate installed in Syracuse has to be signed by a trusted CA. If your X3 system in hosted on AWS, you can place that behind an Application Load Balancer and get Amazon to issue you a free SSL certificate. otherwise please speak to your hosting provider about how you can obtain a signed SSL certificate.
Good Luck!


