

I’m sure many of you are familiar with Robo3T, a tool used to query the MongoDB application components of Sage X3, however if you have not recently downloaded Robo3T you will learn that this tool has been replaced with Studio 3T.
In this blog I will cover how to link this tool to Sage as the setup is slightly more complex than Robo3T.
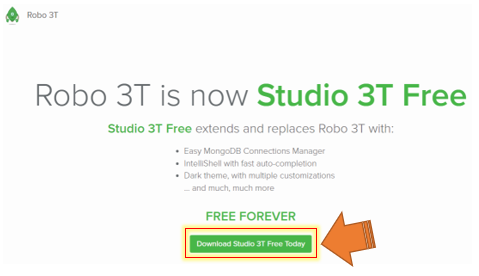
First let’s download studio 3T from the Robo mongo webpage.
You should see the following screen, click the link at the bottom of the page: “Download Studio 3T Free today”
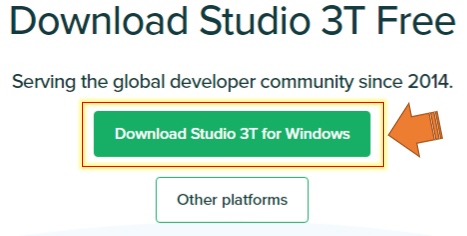
- Select the “Download Studio 3T for windows” which will start the download process.
- Download and extract the contents.
- Run the studio-3t-x64.exe file.
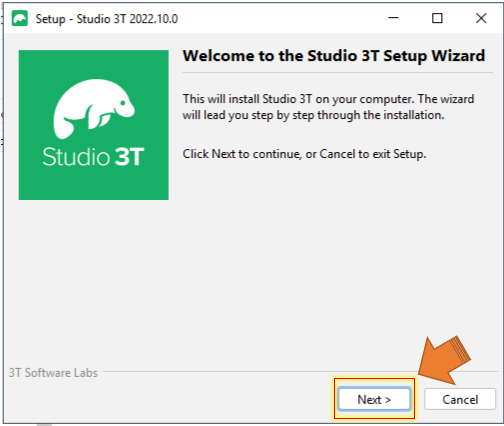
You will find typical install options where choosing next throughout should suffice, but feel free to change these values to suite your needs, I will just be selecting next and accepting the defaults.
- Click Next to begin
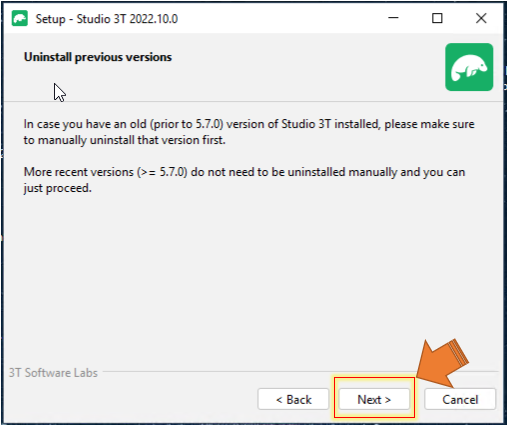
Remove old version of Studio 3T, if any.
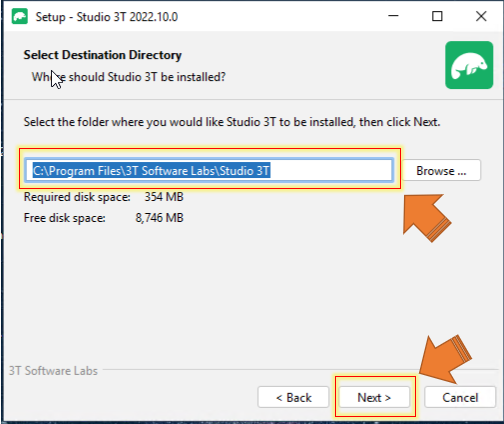
- Click Next to continue.
- Confirm the install location of Studio 3T.
- Click Next to continue.
Install and setup will now run.
Once complete you will see the following screen.
- Select if you want to open Studio 3T right away as well as add a desktop icon.
- Click Finish.

Now that Studio 3T has been installed we need to activate the application.
Launch Studio 3T from the desktop icon if you did not select “Run Studio 3T” from the last setup screen.

- Accept the license agreement.
- Click Next.

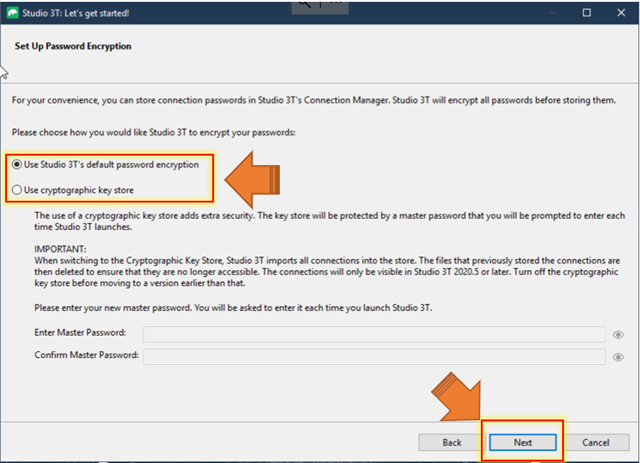
Select the appropriate option from the following screen.
I’ll be selecting to use Studio 3T’s default password encryption methods.
If you select to use the “Cryptographic key store” you will be required to provide a master password to login each time Studio 3T is launched.
- Select your encryption method.
- Next to continue.
Select a default view when opening a collection.
Given the 2 examples, choose between (I will select the Easy data access option)
- Easy data access with visual query builder
- Shell-centric (IntelliShell with powerful auto-completion)
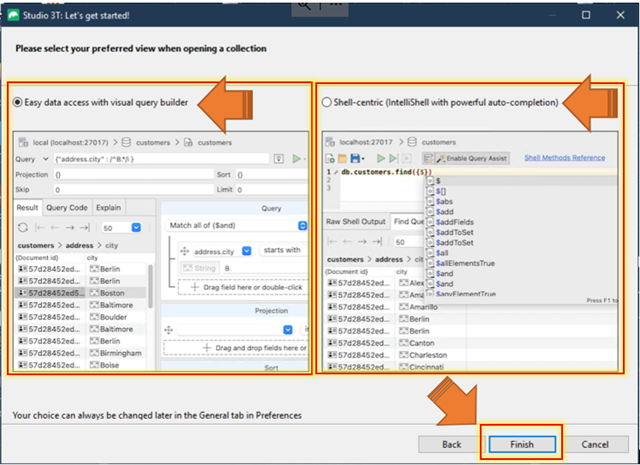
- Click Finish
This completes the setup.
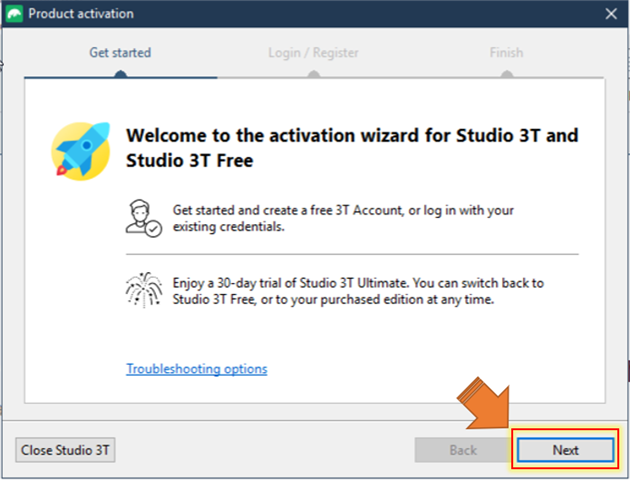
Last step before we get into the application is to activate the product.
Studio 3T is Free to use but does require activation.
- Click Next to begin activation.
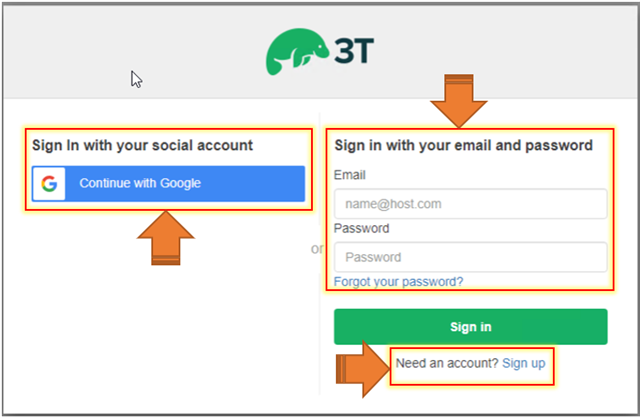
This will automatically redirect you to your browser with a sign in/up option through Studio 3T or Google account.
Please either:
- Sign-in (If you currently have a Studio 3T account)
- Sign-up to create a Studio 3T account
- Use Google to continue with your social account.
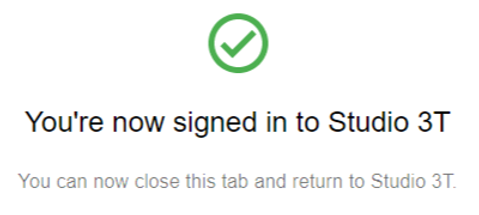
Once successfully signed in you should see the following prompt in your browser.
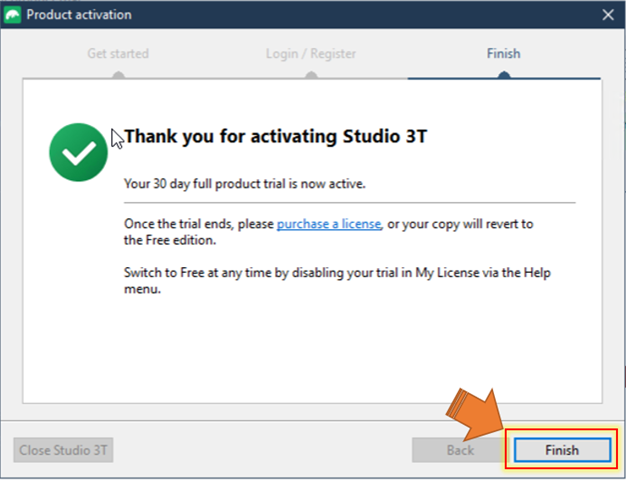
Congratulations, you are now active and setup on your 30 day full product activation.
(You can always disable the 30 day trial from within the Help menu noted on this screen)
- Click Finish to close the setup window.
Now that the setup is out of the way, lets jump into it!!
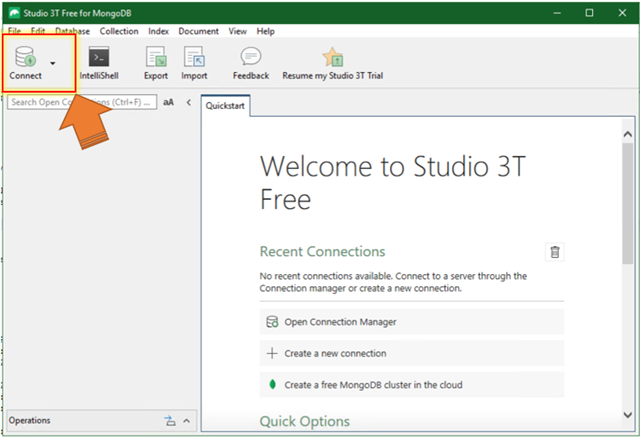
Launch Studio 3T if its has not already opened.
Below is the main landing page that you will likely see each time you launch Studio 3T.
Let connect to Sage!!!
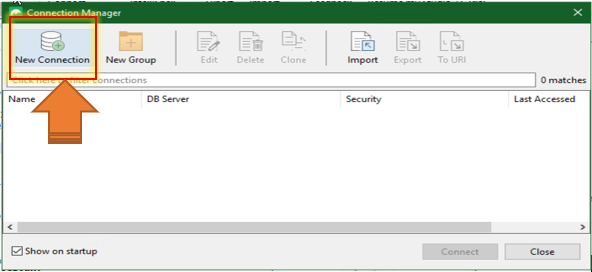
- Click the Connect button on the top left to open the connection manager.
- Click New Connection
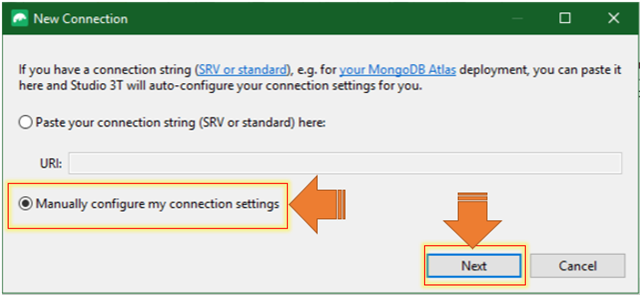
We will proceed with a manual configuration of your connection settings.
- Select “Manual” and click Next
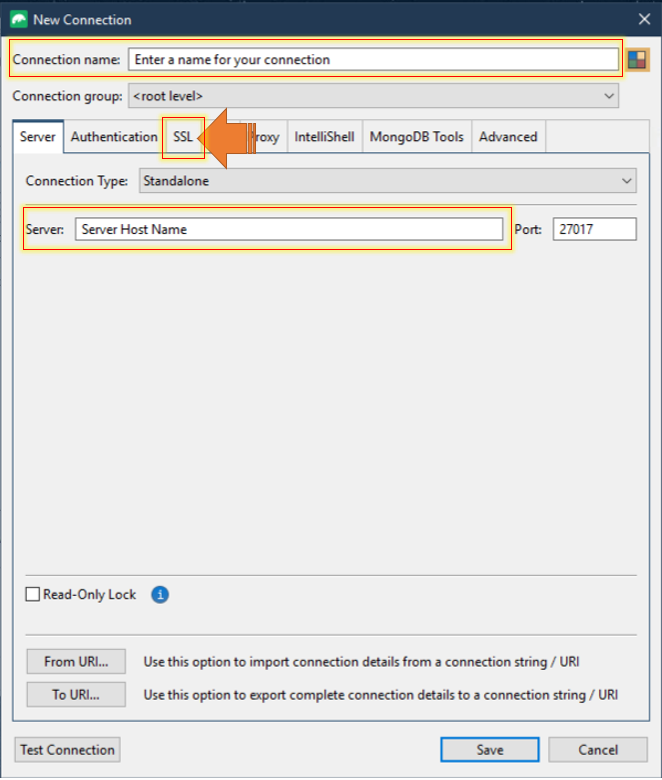
This will take you to the “Server” tab of the connection setup.
- Name the connection
- Fill in the server Host name
I will leave the assigned port as 27017.
Note: You also can specify a color to use for this specific connection by clicking the icon on the top right.

I selected “Gold” so the border reflects that choice.
- Click the SSL tab to continue
This is where the main details of the connection will be entered.
- Tick “Use SSL protocol to connect”
- Select “Accept any server SSL certificates”
- Tick “Use Client Certificate”
- Browse and select the Client.pem key found in the root Syracuse install location.
- Untick “My client certificate is not protected by a passphrase”
- Enter the Syracuse CA passphrase
Once complete, we will test this connection prior to saving.
- Click “Test Connection” on the lower left of this screen.

The connection manager will run through some tests to confirm a successful connection and display the following if all checks are passed.
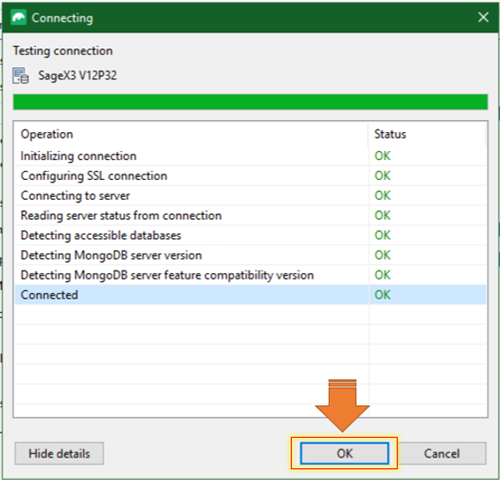
- Click OK once the check are complete and successful
This will return you to the main connection screen we were just in.
- Click save (providing the connection was estabished)
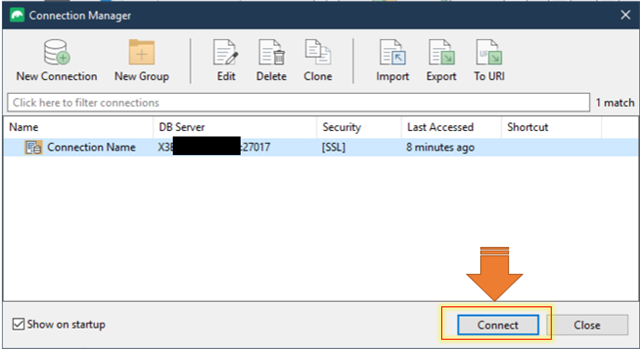
After returning to the Connection manager window you should see the connection we just established.
- Click Connect to continue
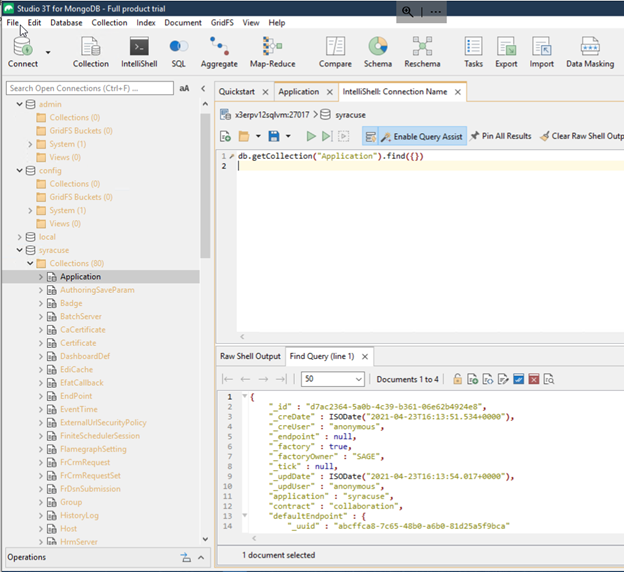
We are now fully connected to Sage using Studio 3T.
In the following window we can see the current connection tree (with our custom “Gold” theme).
I’ve selected to view the Syracuse/application data using IntelliShell and displaying results as JSON.
I encourage you to check out Studio 3T’s resources https://studio3t.com/resources/ to learn more about using the tool.
I hope this blog was able to assist you in making the link between SageX3 and Studio3T.
Thanks for reading.
Happy Holidays