Hi Readers,
Today’s blog, we are going to look at one of several ways you can use a control table. This is something new to me and that I was not aware that X3 had. I learned the most common use of the control fields it to force a limitation or set a value restriction to a field. Control tables also allow you to set requirements as well. It also does this without needing to know any code or creating any custom modification to the standard application. The example I am going to show you is very basic and I am sure there is far more complex things you can create with the control tables; but at least I wanted to demonstrate a basic understanding of them.
Alright, let’s get started…
First things first, you’ll going to need to log into Sage X3, and make sure you are loading into the correct endpoint. In my example I will be using the SEED demo dataset. If you would like a copy of SEED demo dataset, we offer a download ISO version of it. You can find attached links to every patch version which you can find from our Knowledgebase (URL: https://support.na.sage.com). Make sure you download (if you choose) the correct version/patch of the SEED dataset that matches your environment.
Next, once your logged in and on the right endpoint folder, were going to navigate to the control table function. You can find the Control Table function under Setup, General Parameters, Control Tables (GESACL).

Once the Function loads, were going to want to start a new record. Click the “+” sign in the top right to start a new record.

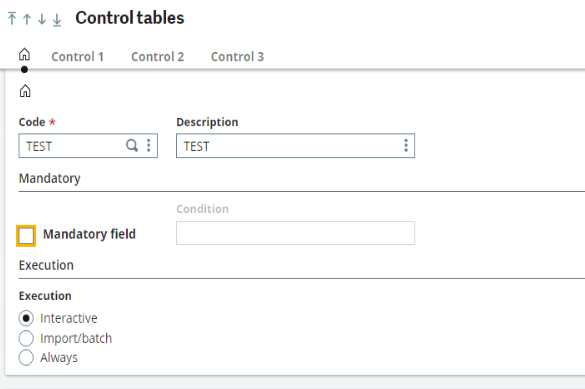
So, now we will start the creation of our Control Table Record. In the header part we are going to give it a name (I used TEST) and a description (which I also used TEST). I am selecting the Interactive Radio button under the Execution sub section. Here is what each of those three do:
- Interactive: signifies that the control is only made on entry (whether in client-server or Web mode)
- Import/batch: signifies this control is only carried out if the user is not available.
- Always: signifies that the control is always carried out.
Make sure you choose wisely 
This is what I have so far:
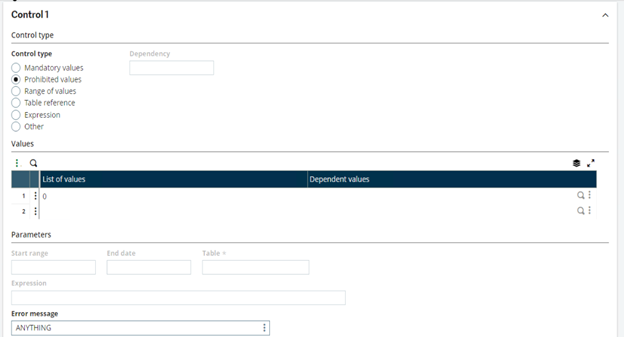
The next section is the Control section. There are 3 control sections to allow a record to have 3 criteria for control. I am only going to use one, for now.
I am going to use the Prohibited values (and you’ll see later). For the value I am going to put Zero (0) with no dependents. And lastly an error message “ANYTHING”. The Error Message field is not required but it is also a formula field. If you want to be fancy and create a nice popup message, you can. I am lazy so I am just using ANYTHING.
I am going to skip the other two control sections and save my record.
To Recap, I essentially created a control table that prohibits the use of Zero (0) as a value. I am sure some of you have an idea on what I am going to use it for…
Now that I have my control table created, I now need to apply it to something.
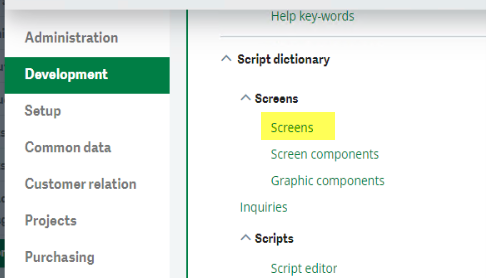
For my example, I am going to apply my TEST control to a field. Since I am going to use a field, I am going to go to the Screens Function and apply to a field through this function. You can find the Screens function under Development, Script dictionary, Screens (GESAMK).
Once the function loads, I am going to look for the Routings or ROU1 screen code.

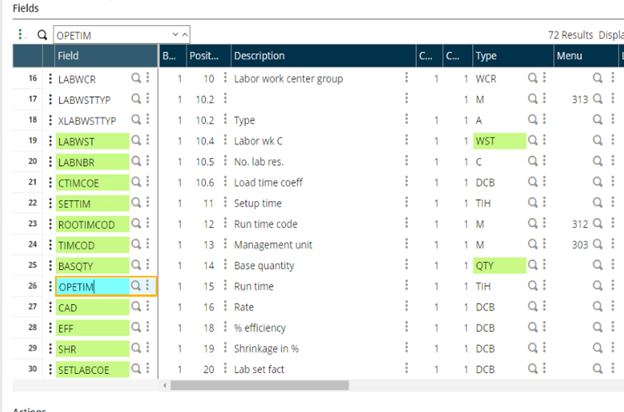
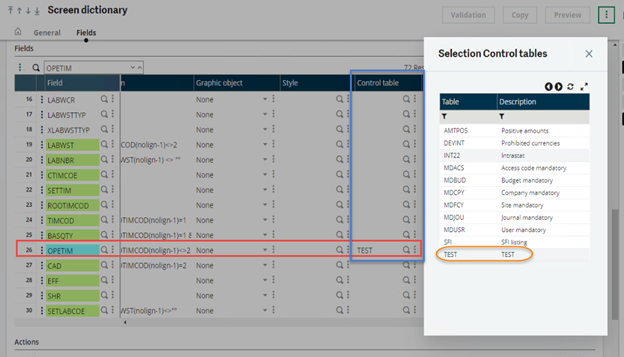
Now I am going to search the Fields for OPETIM (Run Time) field. It should be line 26 (or somewhere close to that) and it may be on your second page, as it was for me.
Then, we are going to scroll over until you see the control table column. When you find it, use the magnifying glass to select the control we made earlier.
After you add your control table to the field, we are going to save and validate the screen code. Depending on the screen code you have selected to test with, the validation process may take a minute or two.
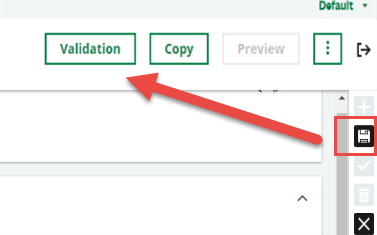
Once the validation finishes, you can exit the Screens function.
Now we get to test it out. Since I used Routings screen code, I am going to navigate to the routings management function which you can find under Manufacturing, Technical data, Routings, Routing management (GESROU).
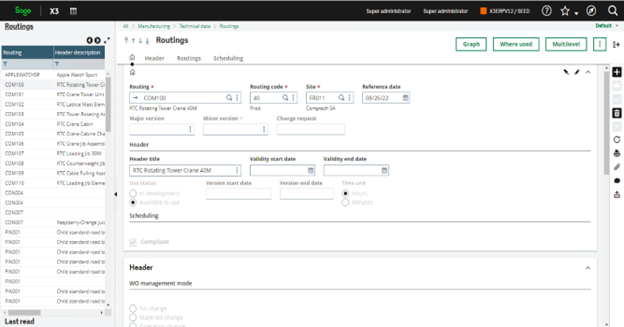
I am going to select COM100 Record from the left list. After the record loads, you want to scroll down to the Routings section and the first subsection called Operations.
Then (if you’re using the same COM100 record) select the second row and scroll over to the right until you find the Run Time column.

Now, the test, try and change that value of 32.000 to 0 and then tab away. Watch what happens…
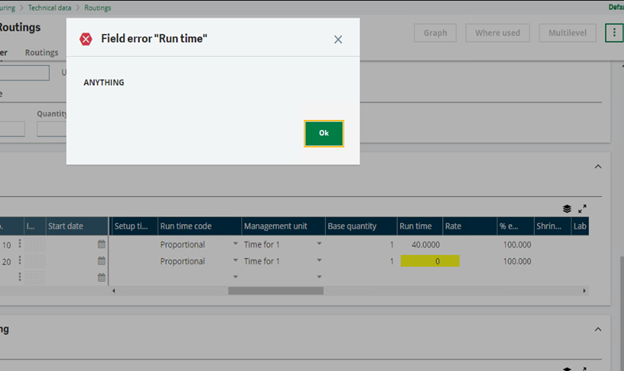
As you see the Zero (0) value is prohibited because of my control field. It also throws a popup error message which says ANYTHING because I put that there.
And that’s pretty much it. This is just one of the many ways you can use Control Tables to set requirements/restrictions to the system.
Until next time…