

Afternoon Readers,
Our Today’s topic is going to be around the Database Optimization function (GESANX). The Database Optimization function allows you to save, track, and implement custom indexes. The purpose of the function is store custom indexes for easy reapplication when updating or migrating a dataset. It’s also good to add the indexes through the Database Optimization function because it will allow you to see all custom indexes added without having to check table by table. This same function will not allow you to save modifications to existing standard indexes or the removal of existing standard indexes. Its only used to add. You can however modify custom added indexes. It is important to note that the Database Optimization function is under the Setup Module and therefore is folder specific. There is, however, a copy function to allow you to copy custom indexes to other endpoint folders.
Let’s take a quick look at how it works.
First off, you will need the Super Administrator account (ADMIN). This ensures that the index is properly created and applied. There is no specific reason that you must use ADMIN, its more of a “better safe than sorry” scenario.
Go ahead and log in. Once in, make sure you are on the proper folder. I would suggest testing it out and use a demo or test folder. You’re going to navigate to Setup, Usage, Data, Database Optimization (GESANX) as noted in the screenshot below.

If you’re using the Sage SEED Demo folder (as I am) then when you load the Database Optimization function it should be blank.
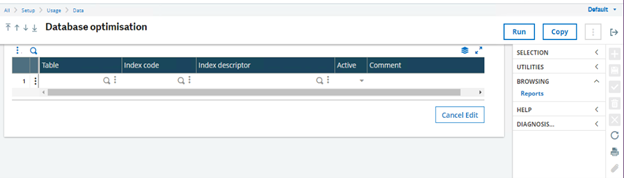
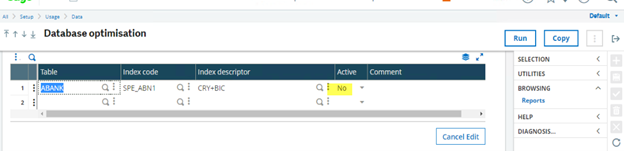
Before you actually start, you will need a couple of pieces of information. The first is the Table column. In the Table column you will put the Table Code for the table you would like to add a custom index to. If you do not know, the lookup option works here, and you find the table you want. The second column is Index code column. Here, you have to label the index starting with SPE_ then whatever else you want to label it as. It must start with SPE_ or it will not add it. The third column is the index descriptor which is the organizing field columns in which you want to use. For the column separator you must use minus (-) or plus (+). These signify the ascending or descending order for the columns. The Active column is a simple yes/no for if the index is active or not. Lastly the Comments column is just a text field for you to leave yourself comments about the index.
In my example, I am using the ABANK table, and using the CRY+BIC index descriptors. This should create an index for the table ABANK.
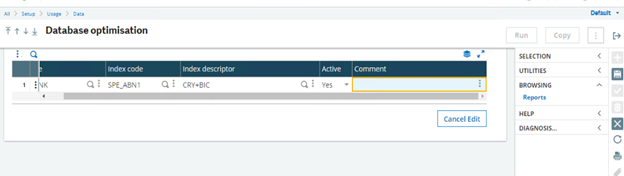
Once you have it setup the way you want. You then click save to save the record to the function.
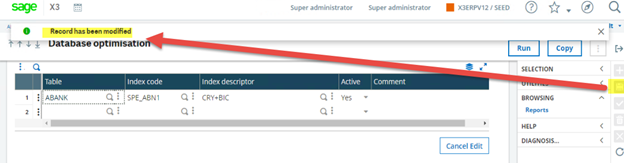
Now that it has been saved, you have to click the RUN button to apply the index. Note, it will apply all indexes marked as active.
If you are running it mid-day you might see the following message
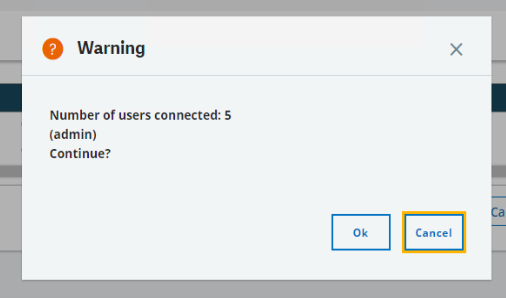
If users are in the system and they are also utilizing the table in question, the index will not be applied.
If everything is successful, you will get no popups.
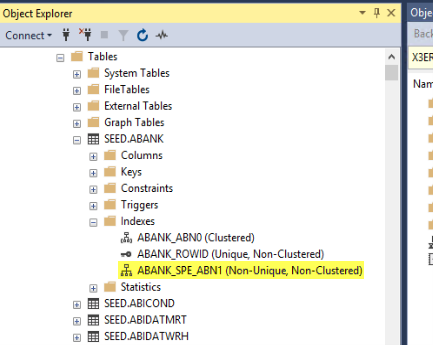
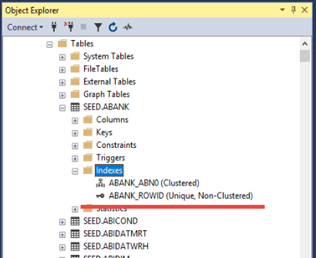
If you go to the table dictionary, you will not see your custom index. Custom indexes applied from the Database Optimization function are written directly to SQL. You will have to log into SQL Server to verify that the index was applied.
If you want to remove a custom index, sampling change the active column from yes to no and click the run button again to remove the index.
And that’s about all there is to it. If you would like to read more on the Database Optimization function (GESANX) you can visit our online help on Database Optimization HERE.
Until next time,

Top Comments