Evening Readers,
Today’s topic is going to be a continuation of what I have been mostly doing, which is showing you all how to update stuff. Well, today we are going to look at updating the VT Web component. If you are not familiar with this, the VT Web component is the new name for an older component called WebServices. The old WebServices component was the original web server back in the Version 6 under apps. Now a days its primarily used to connect to X3 via ADC guns or scanguns. It is also utilized by some third-party applications and addons. Anywho, I will be demonstrating how you would update the VT Web component.
The VT Web installer is very similar to installing the other component apps like Runtime or Syracuse. It will consist of a bunch of nexts followed by some user info and ultimately updating the Sage Management Console to reflect the updates. This is not a typically a regularly updated component as its rarely changed, but its also good to know what it consists of incase you ever have to reinstall or update it.
Let’s get started…
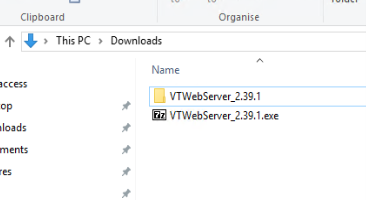
First, you’ll want to know where the component is installed. Its treated just like Syracuse or the print component as you can have it installed anywhere on the network and have multiple of them. Granted most people only have one install and its typically paired with another component like the print server. Once located, you will want to copy the downloaded install to that machine. Running the EXE download should create a folder of the same name as the install file.
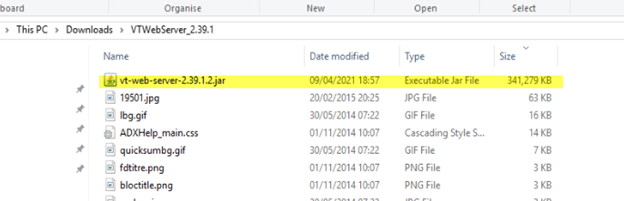
Open the folder and look the for the JAR file. If you organize the contents of the folder by size (biggest on top) it should be the biggest file in there. The name is typically like vt-web-server-<Version>.jar where version is the numeric version of the VT Web server you have downloaded.
Go ahead and double click it to start the installer, select a language, and click OK to begin the installer app.

At this point I will only screenshot relevant screens where important or useful information is provided by the installer. Other than that, I will just tell you to hit next or ok. Ok?
Once the installer opens, go ahead, and click next, then check the “I accept” (no need to read the EULA) radio button, then next again. Now the next screen is going to be where you choose a new install or modify an existing one. At this point you will check the Modify installation radio button. Then you will make sure that the component in the text box is highlighted just like this:
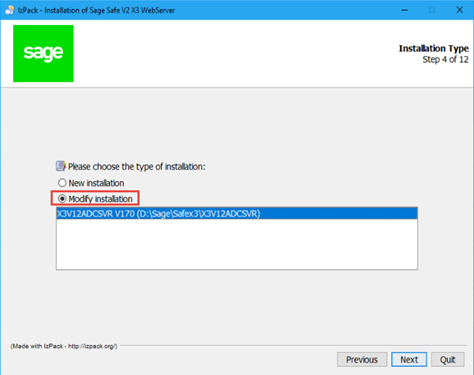
After you do those, you are safe to click next again.
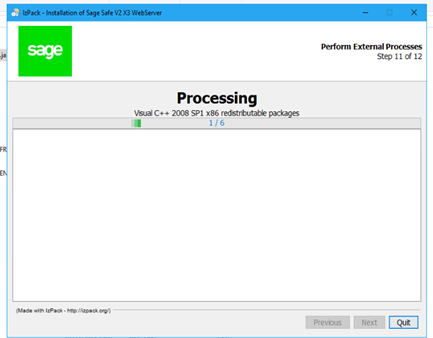
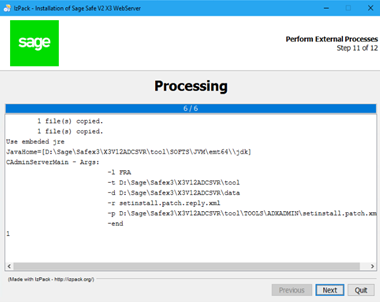
Then click next and skip over the documentation section (because no one really cares about it) and next two more times. At this time the installer will start the process of unpacking the jar file into the current directory for the old VT Web and overwriting the information system files there.

Once its finishes  click next again to start the configuration part of the installer. At this step it will check for the pre-requisites and install/update any that are old or missing along with reconfiguring the component. Note that you will not lose anything that was manually configured via the Sage Management Console.
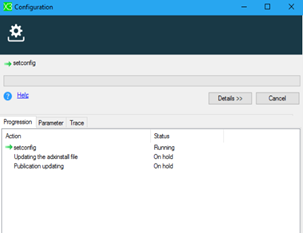
When the configuration finishes, the screen should update to look like the screenshot below. This is also the section where you will see errors. Any errors you would want to document and review online at either our Knowledge Resources like Sage City, Sage Knowledgebase, online help, or Sage Forums. 99% of the issues or errors you find at this screen is typically related to the pre-requites not being abled to be installed. If that is the case, the easiest thing to do is manually install them and then rerun the VT Web installer again.
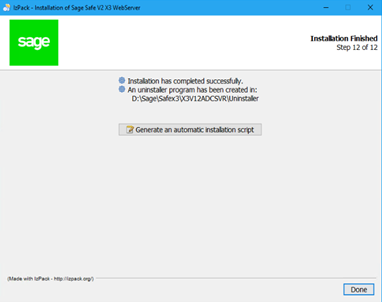
One more next and then you can click Done.
Now, that its installed. We are going to want to launch the Sage Management Console and let the console know that the VT Web is updated. The Console does not automatically pick up new versions, your have to rerun the configuration in the console to see the new version. The Sage Management Console is typically found on the application server but technically you can install it anywhere. Note: you will need to know the Admin account and password for the console to access it.
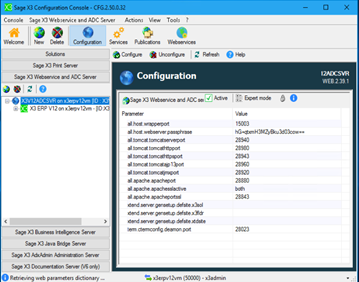
Once inside you will want to load the Sage X3 Webservice and ADC Server left tab by clicking on it. This should expand it out to where you can see your configured component. You will want to single click on that component listing to highlight it. Note: if you have more than one VT Web component you will see more than one listed. Next, click on the Configuration Tile at the top of the console. When it tries to load the Configuration Tile, the console will ask for a user/pass. This is where you plug in the admin account mentioned above. And then, finally, the configuration will be loaded. You should see an orange-yellow title bar indicating there is a change. That change is the update we just did.

As the screenshot above mentions, you would then click the Configure button (the one with globe looking icon) to start the re-configuration process. You should get a little popup confirming you want to start the configuration process. Say yes. It should kick off the configuration
Lastly, you will get a completion popup. Click ok to finish and the console should auto reload the configuration and the orange-yellow title bar should be removed. Note: typical errors at this point are normally due to the services being off. Part of the process is to turn off services then configure then turn them back on. If they are already off it fails immediately because it cannot turn off something already off. Another error you will see is when it cannot update the adxinstall file. When this happens it usually means your logged in as the wrong account or directory permissions have be altered to not allow your account user to access or modify the directory.

And now we are done, and the VT Web component is all up to date.
Until next post…