Evening readers,
This blog is going to be a slight continuation of my previous one, which was about the purge function (you can read HERE). We’re going to look into how you can schedule temp tables, like ALISTER, to be cleared periodically, via recurring task. How Purge is involved is we utilize that via batch to clear out the ALISTER table. So, utilizing a function via batch process is pretty common practice and people do it a lot. This blog might not be new to some of you, so you won’t hurt my feelings if you don’t read the whole article (I promise).
Before we start, you have to know a little bit about how to purge function works. I would suggest reading my previous Blog about Purge function HERE. If you are still uncomfortable about it, you can always have a discussion with your business/channel partner (and if you’re a BP you can call support). You will also need to know how Recurring Task Management works (which we will look at). Lastly, you will want a backup of the data you are going to use (or demo folder you will be testing with). It is important to have a backup because purge is not reversible and anything deleted is gone forever.
Here we go…
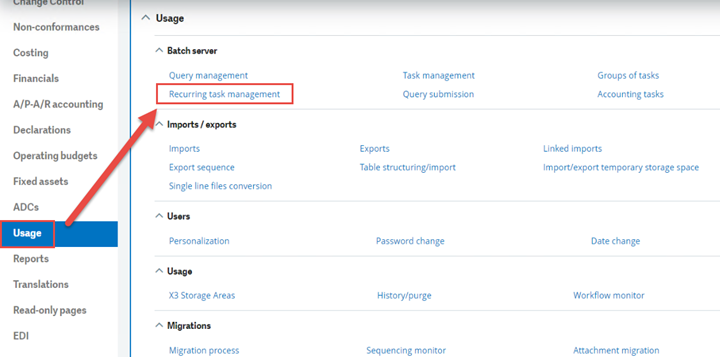
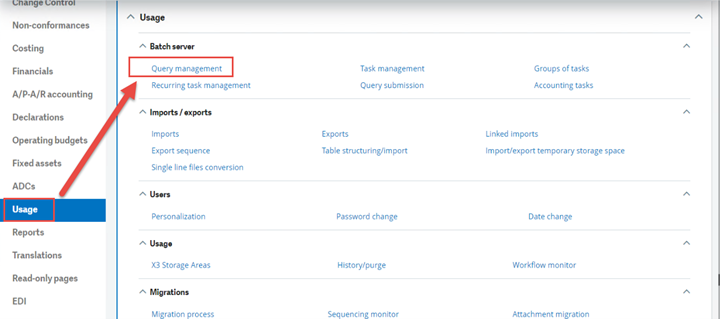
You’re first going to want to sign into Sage X3 and also make sure you are signed into the right Endpoint Folder. You do not want to accidentally mess up the wrong folder (which is why if this is your first time, to have a backup). Then, we are going to navigate to Usage, Batch server, Recurring task management (GESABA).
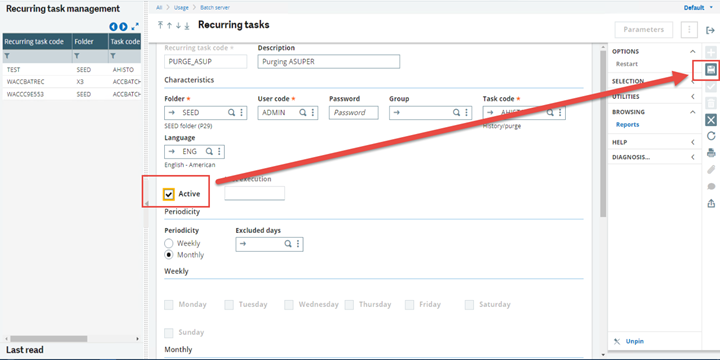
Once it loads, the Recurring task management function should show a listing of all the recurring batch tasks you have in your system. Now not all of them are active (or maybe they are, depends on what you have going on). As you can see from the screenshot here, I don’t have much going on. This is typically what a basic install would look like (minus the test).
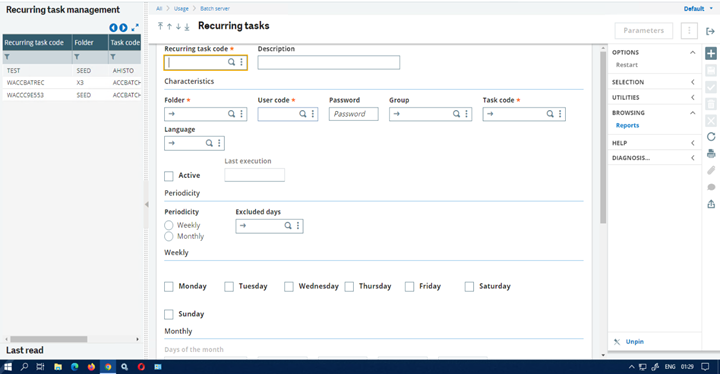
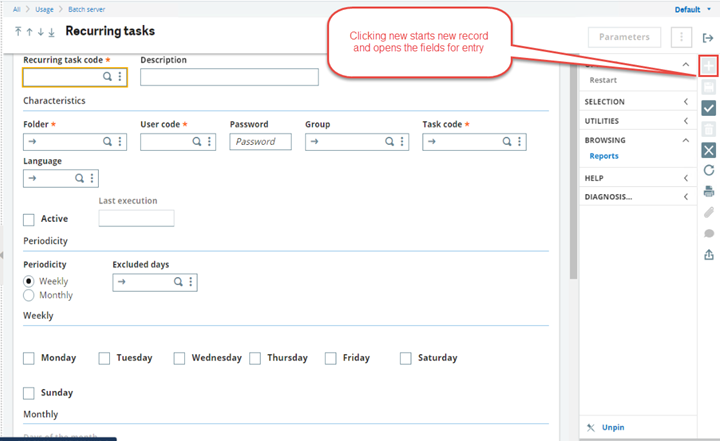
Our next step will be to click the “+” or new button to start a new record. Note that the records are inactive by default so after completing a record you still have to “Active” it.
For the record entry I am going to fill in the following information:
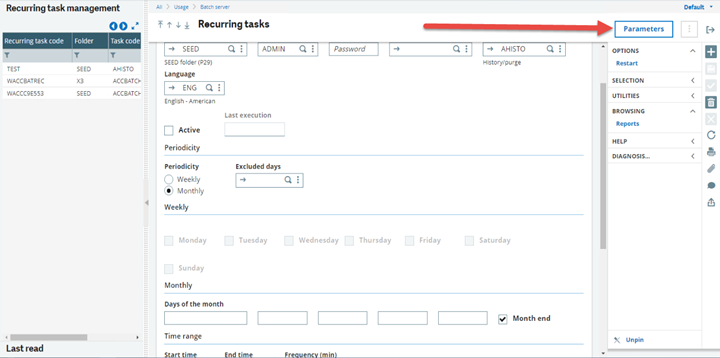
Recurring task code = PURGE_ASUP
Description = Purging ASUPER (asuper is the code were going to use)
Folder = SEED (my demo endpoint folder)
User code = ADMIN (for tracking)
Task code = AHISTO (function I am using to run)
Language = ENG (this is for English language)
Change to Monthly (to run every month)
Check Month end (to run at the end of the month)
Start time = 22:50 (10:50pm)
End time = 23:50 (11:50pm)
Frequency = 60 (one hour)
Check purge (because were purging)
Then click Save
So far, mine looks like this:
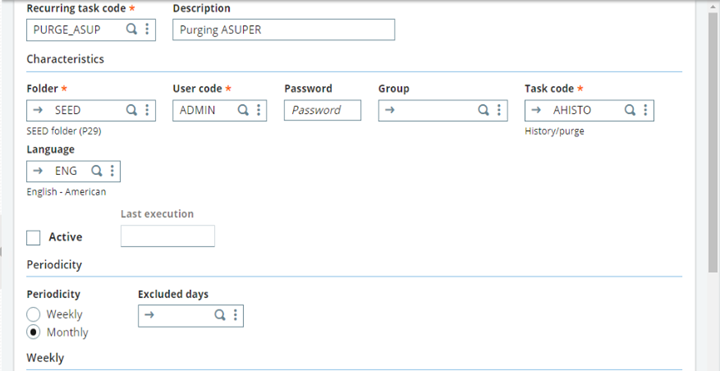
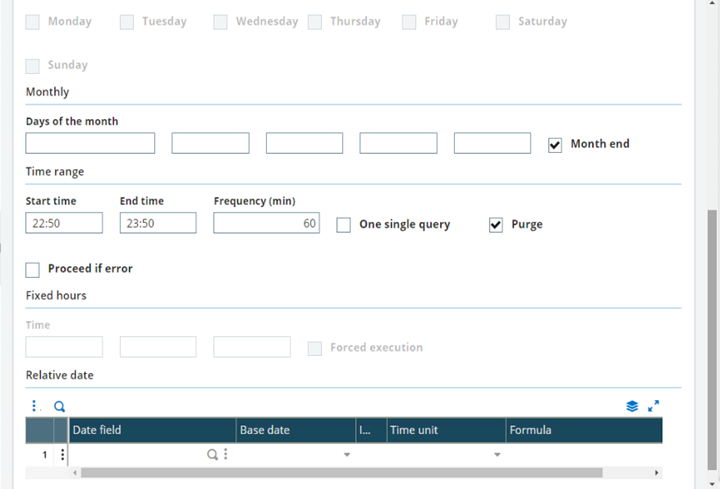
Now, with the way mine looks, yours might end up different. This is just for information. I have mine set to run Monthly (or every month) at Month’s End, to start at 22:50 and end at 23:50, with a Frequency of one hour (or 60 minutes).
The next part, before we can click active, is to set the parameters. To do this, we will click on the parameters button at the top right of the function screen.
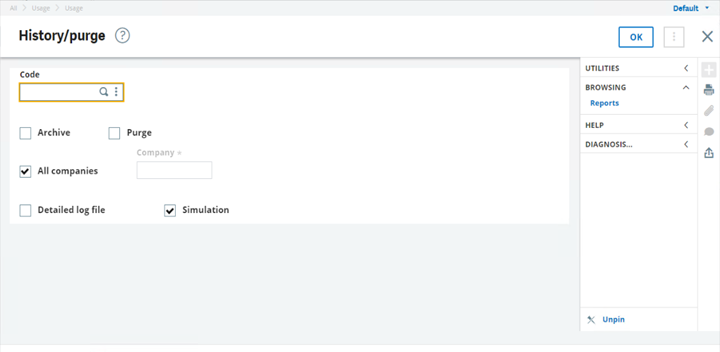
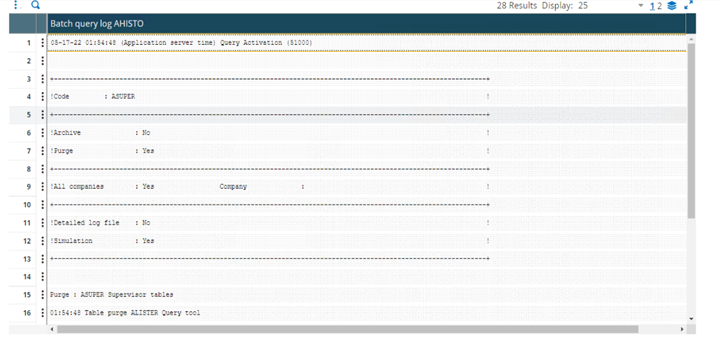
Clicking the parameter button should load a popup window that is the History/Purge function (AHISTO).
Here, we will be selecting the code ASUPER (for ALISTER and AESPION Table purging), selecting the Purge checkbox, leaving all companies selected and deselecting Simulation (like so).
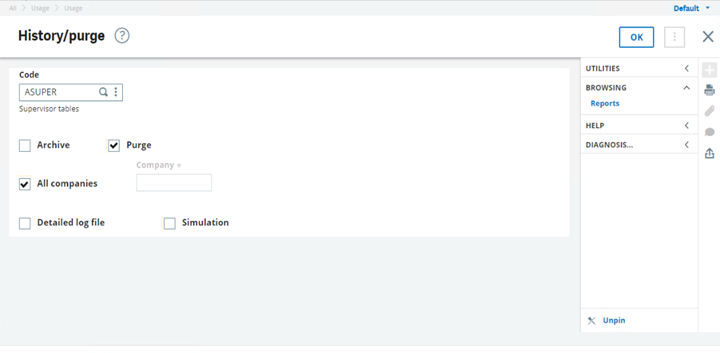
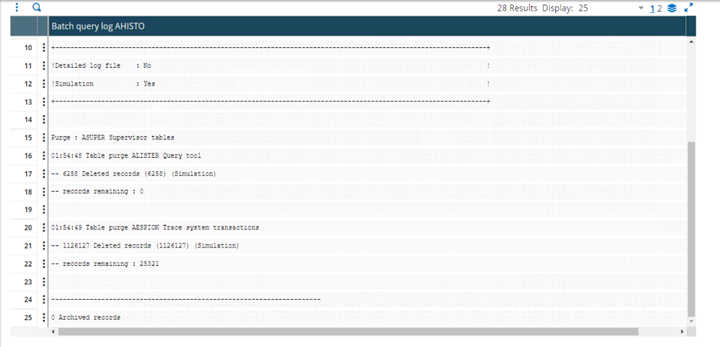
Now, with this configuration, it will indeed purge the ALISTER and AESPION tables of their records… But, if you would like to try without losing any records, you can leave the Simulation checkbox checked. The Simulation will “Simulate” a purge but not really purge anything. It will also generate a record report of what would have been purged if you would have run without it. The system typically dumps reports to TMP or TRA folders but running as a batch you would have to check batch logs for that report. After you have selected the options you want, go ahead, and click OK to save the selected parameters.
The last thing we have to do is select the Active checkbox and save it.
And that all there is to it. Beyond that, you can adjust how you would like, you can set it up to run weekly, daily, one-and-done, etc..
Bonus information:
To show you what it would look like when its ran, I went ahead and manually ran the AHISTO task code so that you all can see what it would look like when you check the Batch Queries. If you go to the function right above the Recurring task management, called Query management, you can see what queries have been ran via batch server.
As you can see, from the screenshot below, I don’t have much going on with my batch server.
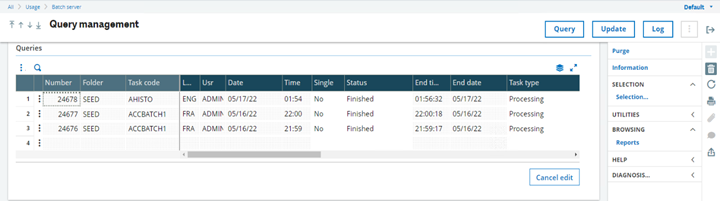
We’re going to look at that top one labeled AHISTO (because I manually ran it). Note that if you are looking for your recurring task you would want to search the list for the task code you labeled your record as.

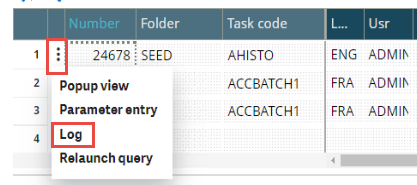
To get to the report, you have to click on the three dots and select the Log option.
It should pull up a log report to show what was purged and from what tables.

This is in direct alignment with my previous blog about the Purge function.
And now you can check the report as well as schedule a purge.
Until next time,