

Hey, Hey Readers,
Today we are going to cover how to update search indexes in Sage X3. Search index is one of those things no one really looks into much. It controls the search bar and its criteria on the top right of the screen. This search bar can be used to look up just about anything in the system, as long as the index is up to date. The index is controlled by the Elasticsearch component install (in v12 its just a separate download) and in conjunction with the Syracuse the data index gets its initial population. Every now and then someone will update it but only when absolutely necessary so it’s rare for us to see issues with it. You can also set it on a reoccurring update with the automated scheduler if you never want to worry about it.
So, some reasons you would want to do this? Or care to? If you use the search box to, well search for stuff. Maybe you added a bunch of features to the system, and you want to use the search box to search for them. Or you have a heavily modified the system and you want more accurate searches. OR…
I’m sure there is probably a TON more reasons why people would update indexes but then again, I don’t want to spend my day listing them out. Anyways, I am going to run through a quick demonstration on how you would manually update the Index.
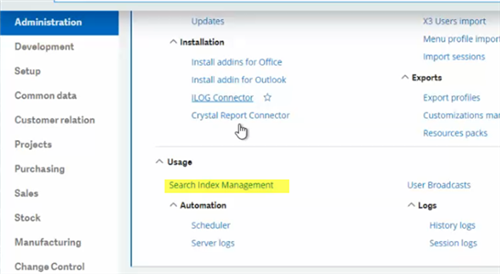
First things first, you’re going to need the X3 Admin account to do this. Or a login that has access to the administration module (because that’s where we’re going). Get that account and log into X3. To update the indexes, you do not need to kick out any users. The index will automatically apply to all users once it finishes updating. You’ll want to navigate to the Search Index Management function under Administration Module then Usage sub menu.
Once the function loads it should look like this:
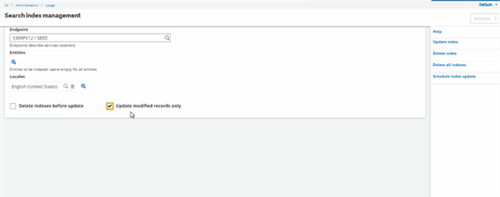
The Search Index Management function allows you to set what is indexed for searching. The Entities field allows you to select what is to be indexed as searchable. Blank = everything. You can also select to have the current index deleted before running the update so that you can get a brand-new index. You can read more about the Search index options HERE.
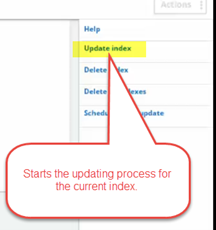
So, from here you can simply press the update index button and start the updating process to update the current index
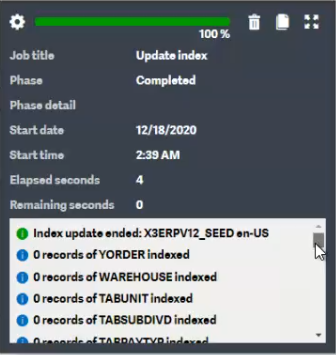
After you click Update Index it should give you a popup like this (below) and start the updating process.

When it finishes, the popup will change to this (below) to signify that it completed. If there were any errors, it will list them in the text box at the bottom. You can also get a full scale look at the logs by clicking the paper looking icon ![]() .
.
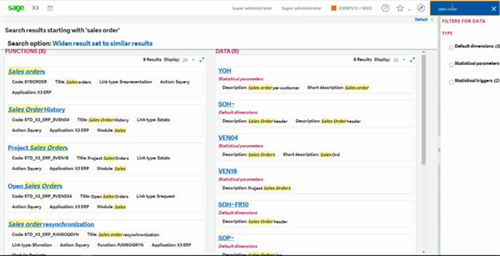
Now that it is done, you can test it out by using the Search Box in the top right and try to search for something
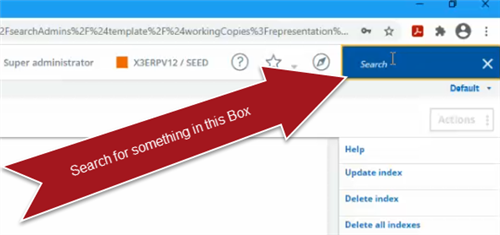
If it worked correctly, you should get search results like mine. ( I did a search for sales order).
And that’s all there is to it.
Until next time…

-

Mike Shaw
-
Cancel
-
Vote Up
0
Vote Down
-
-
Sign in to reply
-
More
-
Cancel
Comment-

Mike Shaw
-
Cancel
-
Vote Up
0
Vote Down
-
-
Sign in to reply
-
More
-
Cancel
Children