

Introduction
Sage 300 has always provided an SDK to allow ISVs to create accounting applications in the same way that we create our own applications like General Ledger or Order Entry. In the past our internal application developers have usually only had the SDK installed for doing their own work.
Further these ISVs can install their applications into a working Sage 300 installation by just copying a specific set of folders. We then will see these folders and allow that module to be activated and used.
The new Web Screens will have the same ability to create custom accounting applications and to easily add them to one of our installations.
We will be starting the beta program for this SDK shortly, so this should start to give people a preview of what is coming.
This overview assumes you have an existing SDK program. That you have Sage 300 Views and VB UIs. That you have an activation UI and can activate your module, making it known to Sage 300. This is just how to create the actual Web UI components.
The Module Creation Wizard
We are first going to create a Visual Studio solution for your Accounting module. Then we will use another wizard to add the screens to this solution. The solution will contain several projects that correspond to the parts of a UI screen. This is different than each screen having its own project. This stays in tune with how the ASP.Net MVC tools create solutions and allows us to leverage everything built into Visual Studio.
Create a Visual Studio project. We provide a project wizard to create your solution. Let’s pretend we are going to create the Project and Job Costing module:
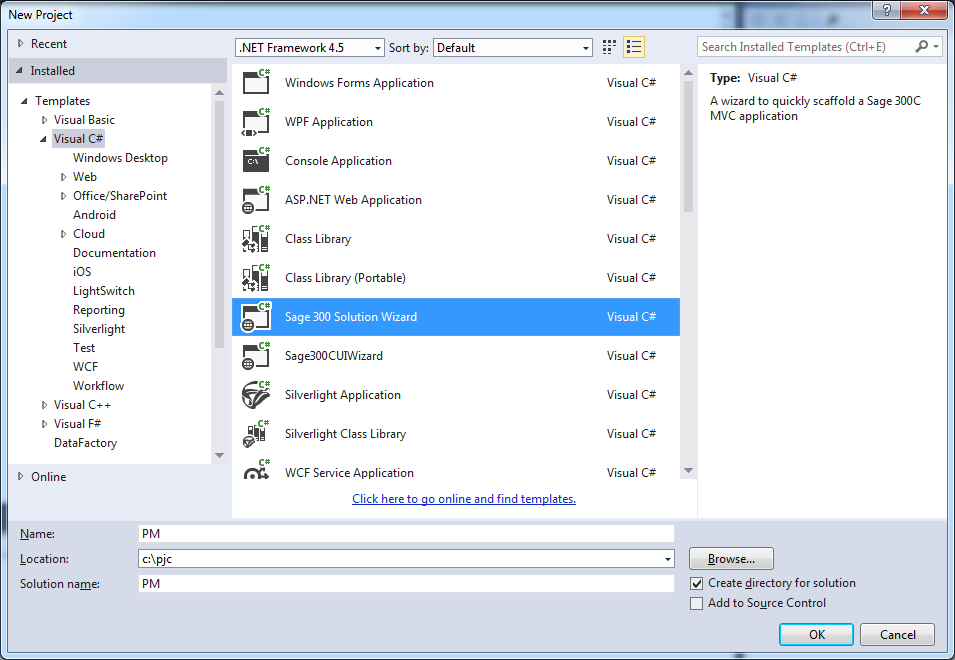
The wizard will then ask you some questions about your module.
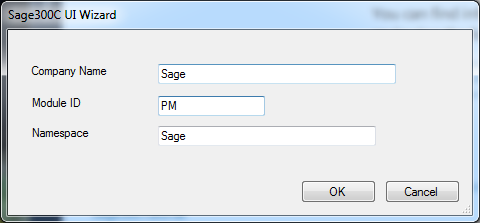
And then create a solution with the correct project structure for your application.
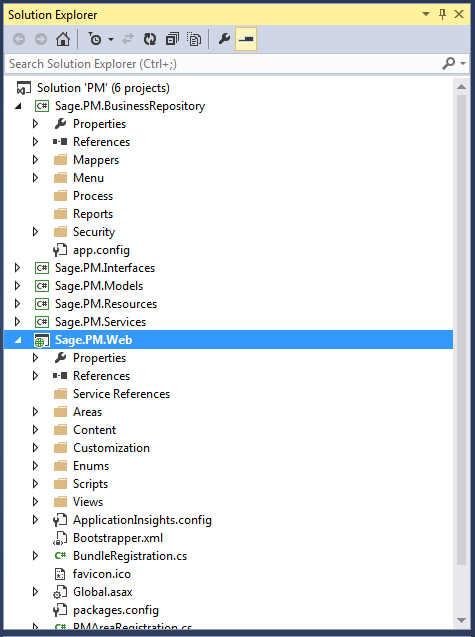
This solution now has the correct structure to add screens to, plus it has all the module level compents and references. This will compile, but there isn’t anything to run yet.
The UI Wizard
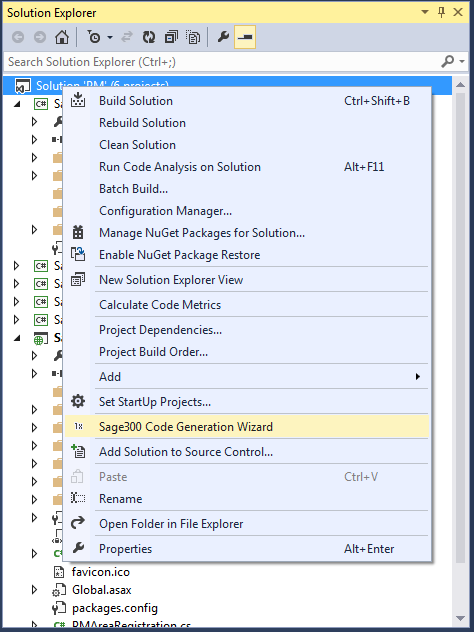
Now you create your separate UIs by running our Code Generation Wizard. You get this by right clicking on the solution and choosing it from the context menu.
This then brings up a wizard that you can step through.
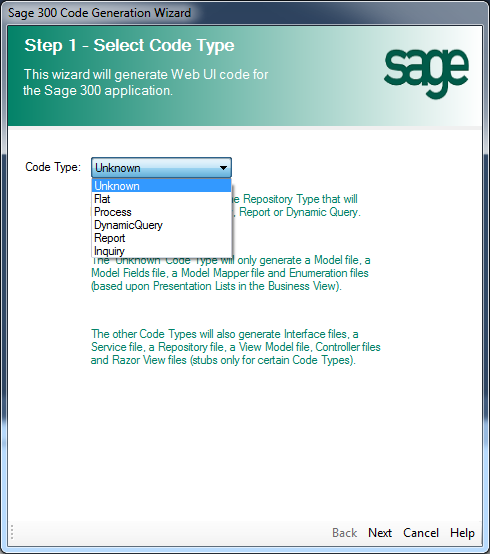
Depending on what you choose for the Code Type, you will get a relevant screen for the details. If you choose Flat you will get the following:
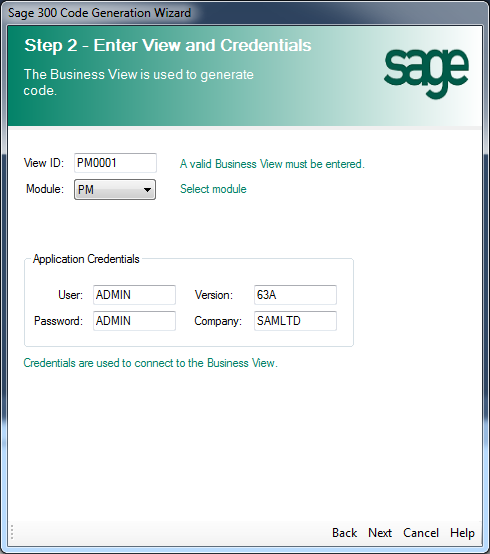
The View ID will be used to generate the model and business repository for this screen. Basically it will use the View meta-data to generate C# classes that will provide most of the functionality to perform standard CRUD type operations.
Next you get a screen to specify which resource file to use for your stirngs:
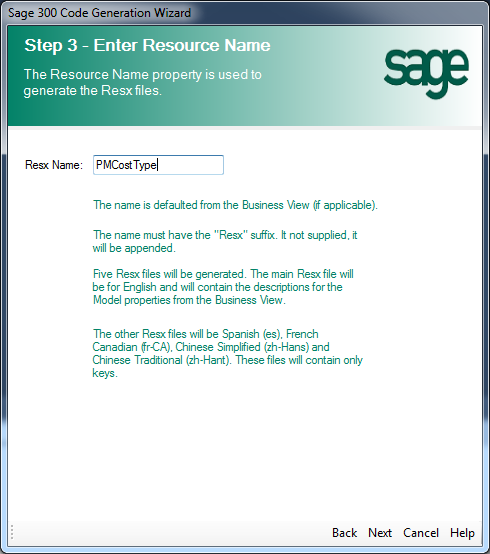
Like all our previous SDKs there is full support for producing a multi-language product. Of course as in the past its up to you whether you leverage this or not.
Now you get to select some options of features to include:
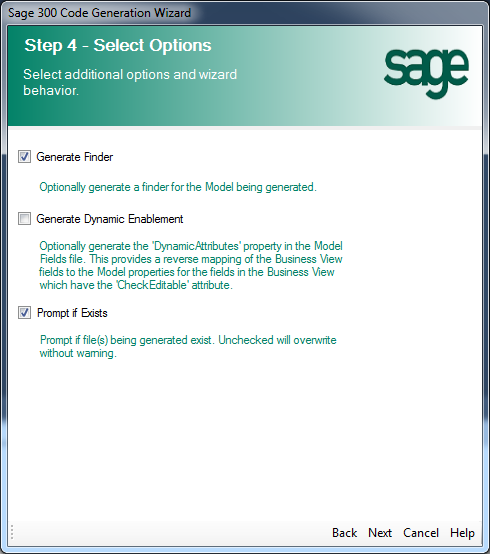
With in the Sage accounting modules the I/C, O/E and P/O Views contain more functionality for determining if a fields is editable or not than do the G/L, A/R or A/P screens. The “Generate Dynamic Enablement” indicates whether all the checking editbable is done by your UIs or by your Views.
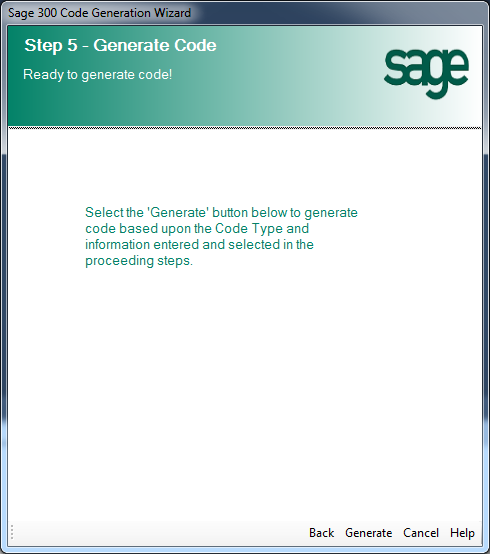
Now its time to confirm to generate the code:
And finally you get the list of files that it generated for you:
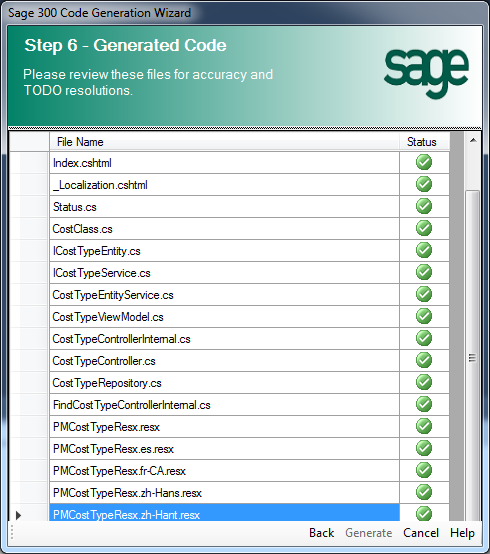
The wizard has used the meta-data from the Sage 300 Business Logic View, in this case the PJC Cost Types view to generate the code for a Business Reposity to use and an empty HTML screen.
Real Work
Running these wizards is quite quick and hopefully they give you a good start. The solution will compile and run, but all you get is a blank screen, since the generated Razor View just contains a TODO to add some controls. Now the real work begins adding controls to your Razor Views, adding custom processing logic and generally wiring things up.
You can now use the code-debug-fix cycle within Visual Studio and hopefully find it a productive way to create your Sage 300 screens.
In future articles I’ll talk about creating the Razor Views, using the extension functions we supply to help make this process easier and the CSS that is used to give the screens a standard look and feel. Then we will need to go into how to wire up finders, perform custom processing and all the other things required to make a Sage 300 screen.
Summary
This was a very quick look at the SDK for our Web Screens. We haven’t covered any coding yet, but we will. All the functionality used is built into the DLLs installed with Sage 300, so the actual SDK component is quite small. Besides the wizard, there is a lot of framework support to help you with common components and abstractions to hide some of the details.