Adding Form Codes to Picking Sheet Printing

SUGGESTED

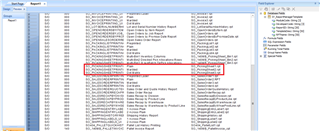
I am modifying our picking sheet and want to save a "test" version. When I am in Crystal Reports and I go to "Save As", I create a new folder in the "SO_PICKINGSHEETPRINTING" Folder. It doesn't show up as a form code when we go to print a picking sheet, though. 

I am fairly certain this method worked before, but what is the best way to create a new form by modifying an existing form and getting the form code to populate the selection so we can test out this new form?

Thanks, 

Arman 

  • 0
    SUGGESTED

    Save a copy of your rpt file because you don't want it to get overwritten.

    Launch the task, type in a new form code in the form code field, select a template that matches your other form code (see below for more detail), and then click the Designer button. This will create the necessary system records and folder structure for your form code.

    You can then take your rpt file and copy/move it into the newly created folder.  You do need to make sure the numeric suffix at the end of the file name matches.  This number is based on the template type you selected when adding the form code and it varies by task.  You can query SY_ReportManagerTemplate to see which template description uses which numeric suffix.

  • 0
    SUGGESTED

    It sounds as you are opening Crystal Designer and editing instead of creating a new form code and then clicking the Designer button on the printing panel.

  • 0 in reply to David Speck

    Clicking Designer is optional if the file is already in the correct place (with the correct paper type #).

  • 0 in reply to BigLouie

    I typically recommend against using the Designer button.  Customized forms can be stored in 4 different folders, and the Designer button only works with one (breaking all the others).

  • 0 in reply to Kevin M

    That is the problem though I think with users unfamiliar with maintaining forms in Sage 100, they may not know the template type numbers or what was used when creating the form in the task.  So using the Designer button is the most reliable way for a user to make sure they are modifying the correct RPT file.  Of course they could always go through Report Manager but for setting up a new form, I find it is less confusing and easier for a user unfamiliar with the process to simply launch the task and enter the new form code they want to use, pick the template type and then click Designer and let Sage 100 handle automatically creating the necessary folder and copying the correct RPT file with the correct template type number.  Once this process is done, you can always close the Crystal Report Designer launched by the Designer button, and then open the new RPT file in a manually launched instance of Crystal Report Designer so you can tweak it and test it using the printing task left open.

  • 0 in reply to David Speck

    We commonly set up form codes at a system level so they work for all company codes.  We've also set up customized forms for "All form codes, this company", and "All form codes, all companies".  Users clicking Designer on the printing screen break all three of those configurations, and we have to go in and delete the extraneous RPT to make the customized form active again.  It's only the "correct" RPT when the form is named and company specific.

    I agree it is not the most user friendly way to have users go to the raw files / folders, but with guidance it  is actually safer.  Using Designer gives you zero opportunity to create a copy of the "before" RPT.  Go to the folder, and it's easy to make a quick dated copy of the file.

  • 0 in reply to Kevin M

    That is a fair point, most implementations I've worked with have company specific forms, so we rarely use forms for all companies.