

We've talked about using PlannerOne Manager in Demystifying PlannerOne Manager but today we are going to talk about verifying the configuration of Production Scheduler in Sage X3. Let's dive right in.
We first need to verify the Connected application. You will find this under Administration, Administration, Settings, Authentication, Connected applications.
Let's look at the URL. In the Connected application, the URL is built with information that can be found in PlannerOne Manager on the Configuration Manager tab under Tenants. Your URL should be formatted like this: http://servername:Web Site Port/Web Application Name

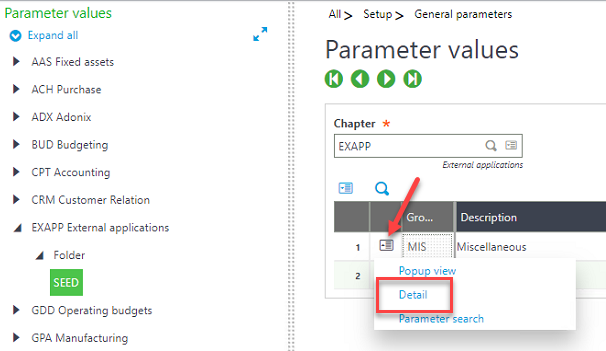
Now we need to verify the parameter values. Copy the Client ID from the Connected application and head over to Setup, General Parameters, Parameter values. Under EXAPP External applications, Folder, <foldername>, click on the action card next to MIS Miscellaneous and choose Detail.
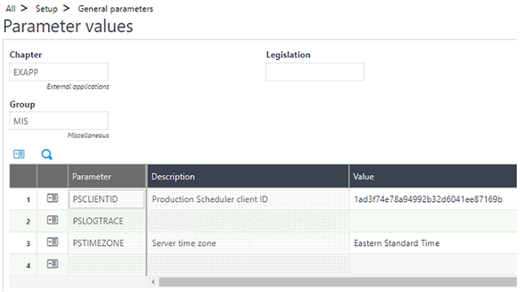
Verify the PSCLIENTID is the same as the Client ID you copied from the Connected application. Another thing to check while you are in this screen is the PSTIMEZONE. This should be set to the time zone of the server. If it is set to some other value it could cause issues with scheduling. Once these settings are verified, click on OK and Save.
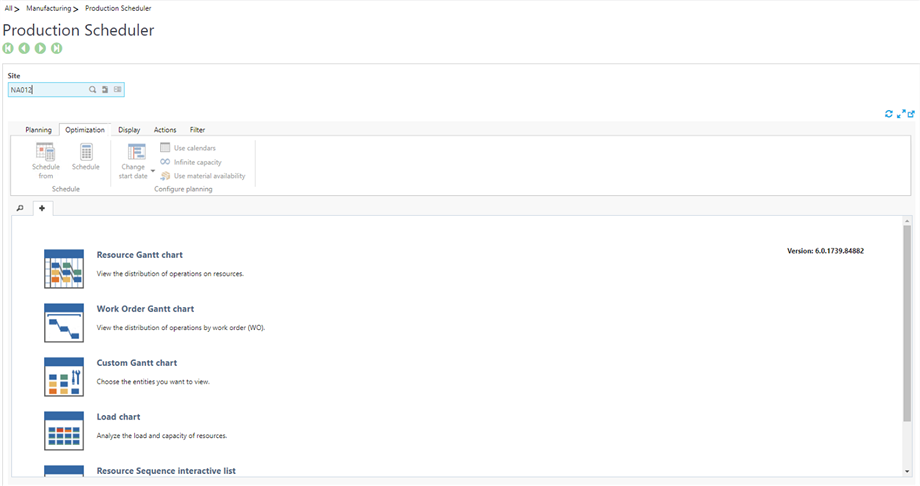
Once you have verified everything in PlannerOne Manager and verified the settings from this blog post, you should be able to open Production Scheduler from Manufacturing, Production Scheduler, Production Scheduler.
Stay tuned for the next blog post where we will talk about common errors and how to troubleshoot them.