
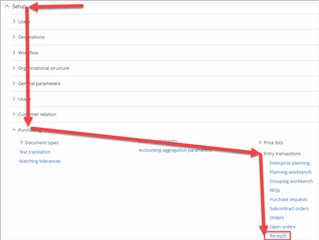
Have you ever been working between two folders, and found a need to copy items from one folder to the other? You may well know that some functions have a copy feature (for example entry transactions). Let’s look at purchase receipt entry transactions as an example.
Navigate to Setup, Purchasing, Entry transactions, Receipts
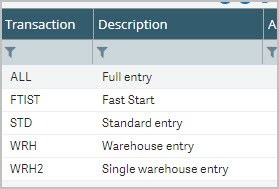
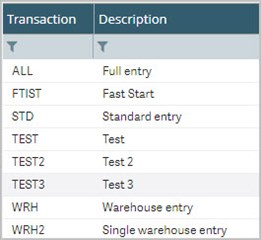
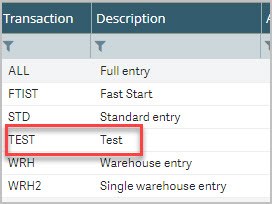
In our example we have two folders: SEED and TESTSEED. Below are the current receipt entry transactions in each.
SEED:
TESTSEED:
From TESTSEED we can select the TEST transaction, and use the Copy feature to copy it to the SEED folder (assuming the folders have been set up with authorizations to write to one another):
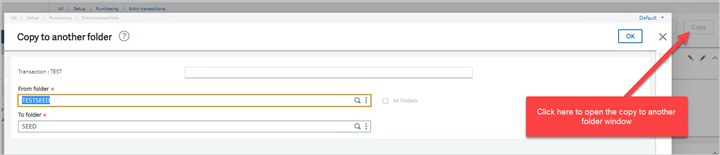
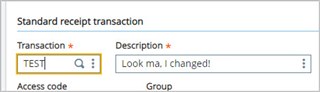
And if we go into TEST we can see that the new TEST receipt transaction is available:
Of course, we’ll want to validate the transaction while we’re here, so that it is available to use for entering receipts.
This method is great but could get tedious if we have several transactions to copy. There must be a better way, right? Of course there is! Let’s turn our entry transactions into a patch!
First, we’ll make a quick change to the Description field of the TEST transaction—you’ll see why soon.
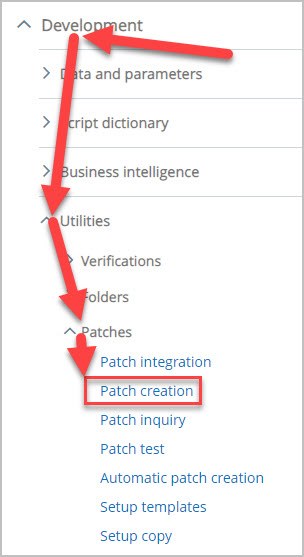
Next, go to Development > Utilities > Patches > Patch creation
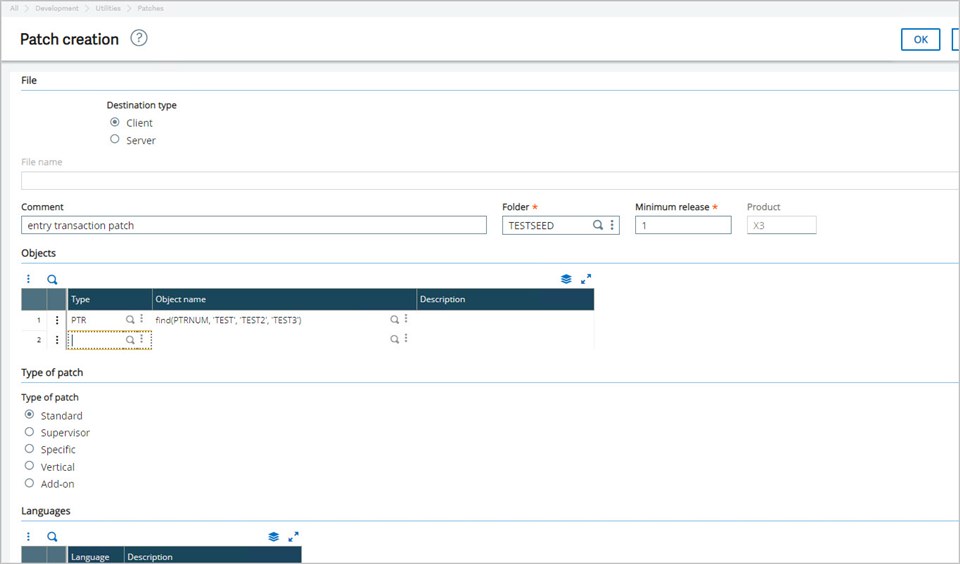
Select Client for the Destination type to save the patch to your local machine. Things begin to get interesting when we look at the Objects block. Here we can enter a table abbreviation as the Type, and in the Object name use the syntax “find(key, ‘value’, ‘value2’, ‘value2’).
Important note! Completing a data extraction this way can modify existing data with the same key (as we’ll see in a moment) or create new data. However, for security reasons, the data may never be deleted during the patch integration. Review the online help (search for patch creation) for further details.
For our example, here is how we would provide the condition to copy TEST, TEST2, and TEST3 from TESTSEED into a patch that can be applied to SEED. Keep in mind that the TEST transaction already exists in SEED.
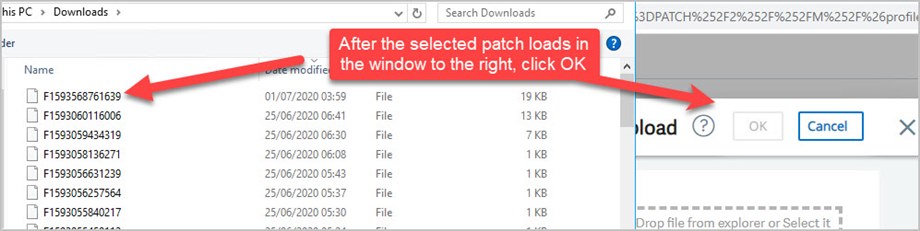
Once we click OK, the patch will be created and placed in our local Downloads directory:

Now we can go back into our SEED folder, and navigate to Development > Utilities > Patches > Patch integration:
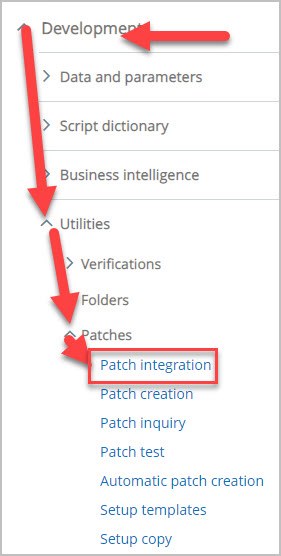
Set the Destination type to Client, check Patch integration, and be sure that only the SEED folder is selected under Folders:
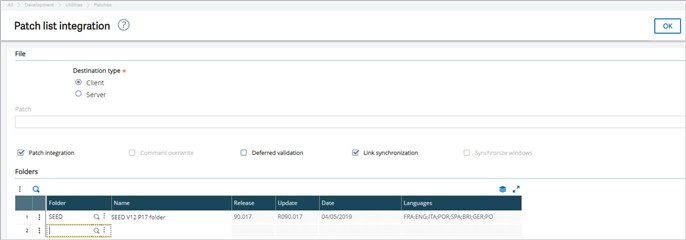
Click Ok to select our patch:
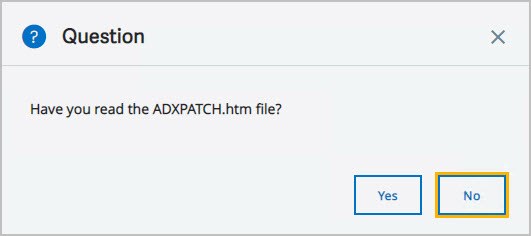
Click Yes at the Question:
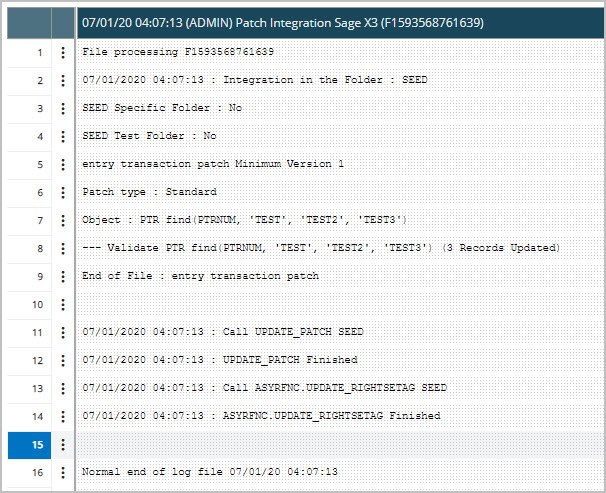
Finally, review the log that is generated:
Then navigate back to Setup, Purchasing, Entry transactions, Receipts to see the results of the patch:
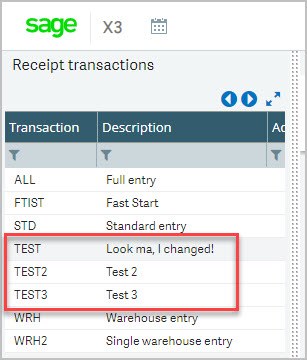
We now have our TEST2 and TEST3 transactions (which need to be validated so they can be used), and we also see that our description for the existing TEST transaction has been modified.
This same logic can be applied to any table, with just a little bit of research into which table/table abbreviation and key needs to be used.
Hopefully, this handy trick can save you from tediously copying individual items from one folder to another in the future.
Until next time!