In this blog let us look at the setup of an import template to import physical assets.
A physical element can be attached to only one asset. However, several physical elements can be attached to the same asset. For example, a central processing unit (CPU), a screen and a keyboard are three physical elements that can be attached to the same asset: a computer.
Prior to setting up the physical element template, we need to make sure we have the locations setup. Locations can be setup under Common data, Fixed assets tables. Here you will specify the basic information about the location such as the location code, description, building (separate function under fixed assets tables), and finally the site.
Additionally, make sure the general parameter PHYAUTNUM (physical asset numbering) under AAS chapter, PHY group is set to ‘Optional’ or ‘Mandatory’. If you select ‘None’, the automatic numbering is not activated. The reference must then be entered by the user and the user only.
When the physical asset numbering is automatic, it uses the sequence number document assigned to physical asset reference line under sequence number assignment management (GESTCA).
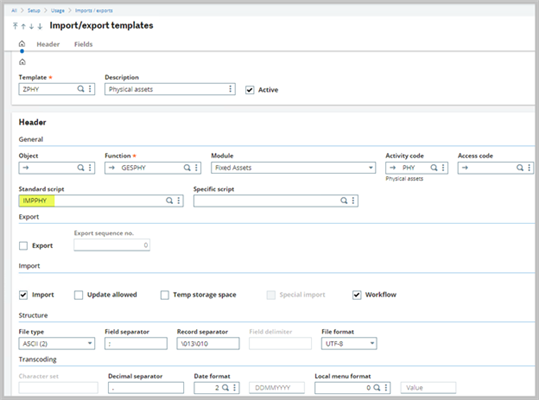
1. In Setup, Usage, Imports/exports, Import export templates, select the ‘PHY’ physical assets template and duplicate it.
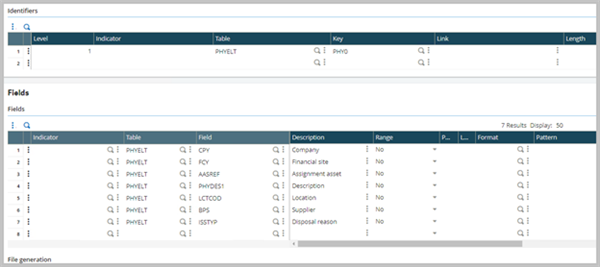
2. Edit the template based on what information that you want to include when creating a physical element.
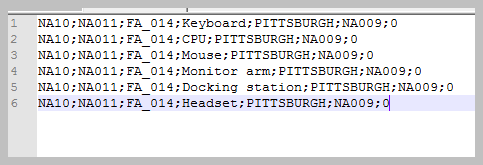
3. Generate an import file by either using an existing physical element record or create a new one based on the fields selected on the import template.
4. In Usage, Imports/exports, Imports select the import file and start the import process.
Review the log file to make sure there are no errors.

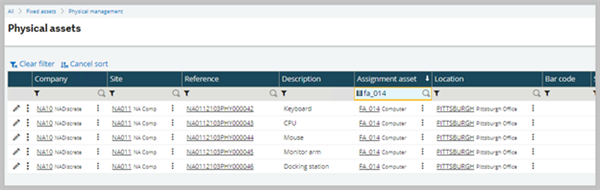
Filter the physical assets screen to check the imported physical elements.
Additionally, you can check the physical elements that are linked to the main asset by clicking on the link button.