Today we are going to lightly discuss how someone can change the report code being used for payment entry; specifically for check printing. It is not a common request as it appears that our normal NA-CHECKS report code seems to work for most people. That, or people have some sort of custom process they do which bypasses the normal process. Anyways, I am going to show you a simple way you can force everything check related to print to a specific report code.
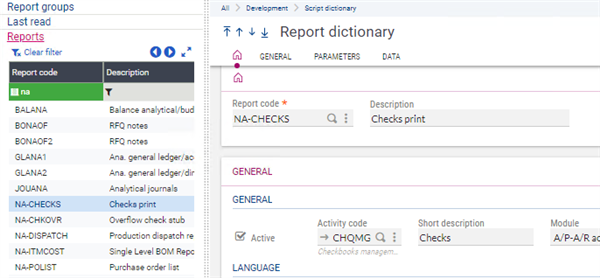
Before you start, we need to know which report code you want to use. If it’s a custom one or a standard one it will not matter. We just need to remember the name. If you forget and cannot remember the exact name, you can check in the Report Dictionary function. You can find that under Development, Script dictionary, Reports (GESARP).
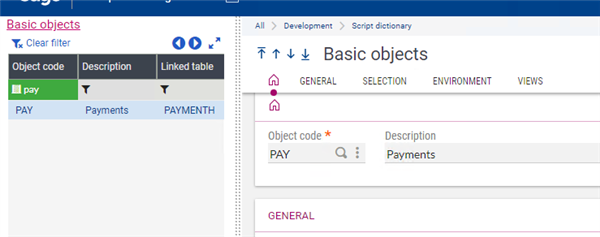
Once you have found the report code name you wish to use, we can now go and change it. We are going to go to an uncommon place to update the report code to what we want. That place is the Object function. The Object function traditionally controls the left list for any classic function like sales orders or journal entries. To find the Object function you would have to navigate to Development, Script Dictionary, Objects (GESTAOB). Once loaded you can search for the PAY Object from the left list.
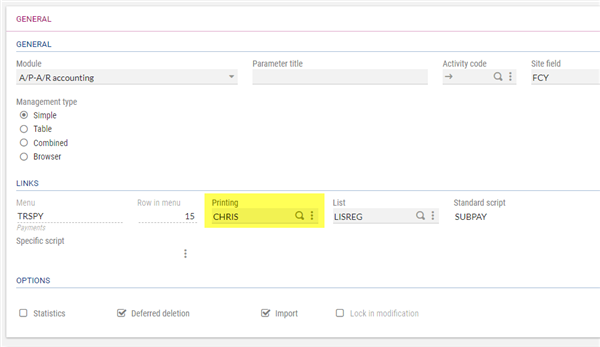
When the PAY Object loads look In the General Tab (or section in v12) and there should be a field labeled “Printing”
You can type the name of the report code you want to use in the field box. You can also use the lookup tool if you wish.
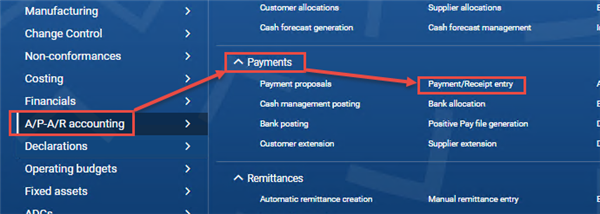
After selecting your report code, tab away and click the save button to save the change. The next thing you would have to do is validate the object PAY. The Validation process will take some time to validate as it must update all payment types for GESPAY. This is the point where you can get up and stretch or get some coffee or whatnot. Once it finishes (after what seems like hours) go test it out and make sure it is working. GESPAY is also known as Payment/Receipt entry under A/P-A/R accounting module.
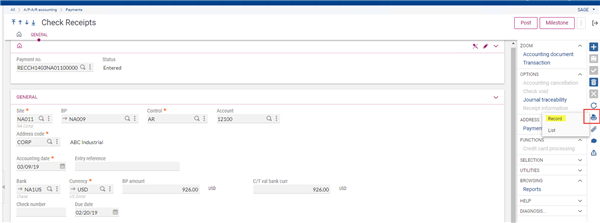
I am choosing RECCH for my scenario, but you can use any of the payment entries for this test. After loading the transaction entry of your choice, select a record to load that record. Next click the print button and select record action.
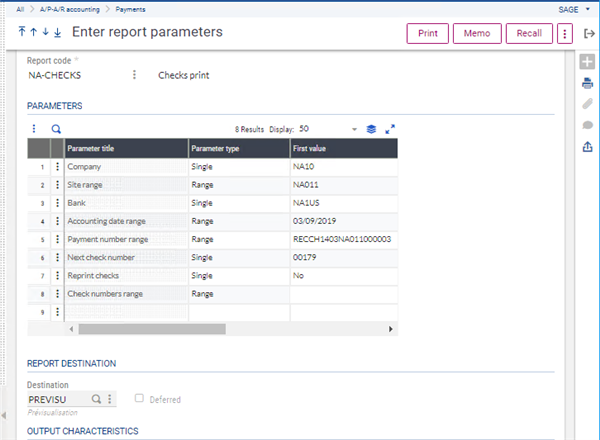
When it loads the report parameters it should show the new report code and parameters for you to fill out for that report code. I sort of cheated and used the existing NA-CHECKS as the default check so that now all the payment entry transactions will all use NA-CHECKS. Note this also prevents users from selecting a different report upon launching the printing function from within a payment entry transaction.
And there you have it, a way to micro-manage the report codes for a function. This can essentially be done to any classic function with an Object.