So, I have a quick topic today, Elastic search. How many of you knew you can login to Elastic Search directly? Hm. I am not seeing any hands being raised. Well that’s ok. I didn’t know either. Personally, I just shut the thing off on my VMs because it takes up all my machines limited memory. As soon as I get Syracuse up and running, I disable the service. For those who use the Search bar, I am going to show you all how to view Elastic search’s indexing features. Just as a For-Your-Information, I will not be demonstrating all the features to Elastic Search, this is really just a quick tour per say.
For any of the technical people out there, we all know that Elastic Search is a component required for the Syracuse component to be installed; it’s a prerequisite to Syracuse’s install. We also know that Elastic Search is that search box at the top of the screen when you sign into Sage X3. But you can also log into it. Its actually pretty simple. If you log into the server where Elastic search is installed and put this into the browser http://localhost:9200/_plugin/head/ you should be able to get to an Elastic search home page. If you cannot get to the hosting machine you can replace the “localhost” with whatever the server-name is.
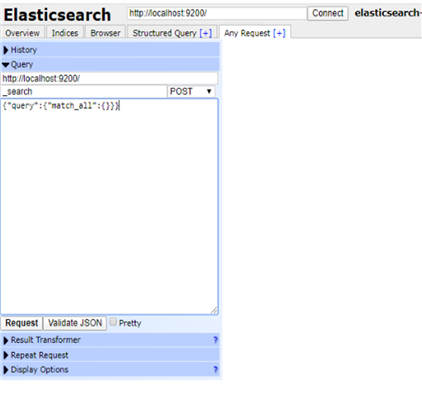
You should get to a site like so:
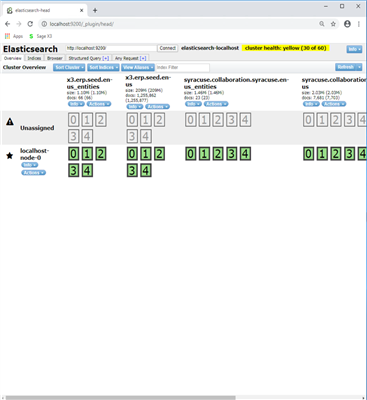
Here you can see what Elastic Search has done so far. You can browse what has been indexed for searching, make requests, restart the services, sort the clusters, and more. The main reason I would come in here is to see what has been indexed already. If you’re in Sage X3 and you are searching for something that does not come up, maybe its not indexed. Remember, it has to be part of the search index to be searched. So, if something like an addon was added after the initial search index update was ran then it may not be part of the index.
You can however go to the Browser tab in the same Elastic Search site and see what’s been indexed. All you have to do is use the CTRL+F and search for what you’re looking for.
In my example I was looking for the SORDER table to see if it was indexed
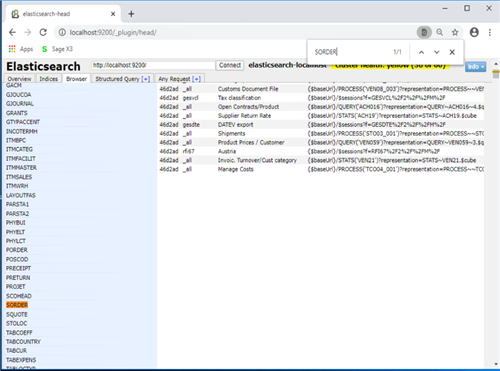
Sure enough, it was.
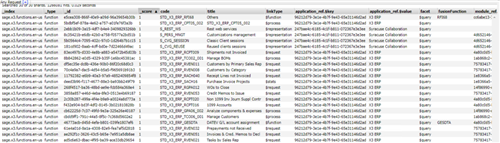
There is associated data that goes with the SORDER table as seen below
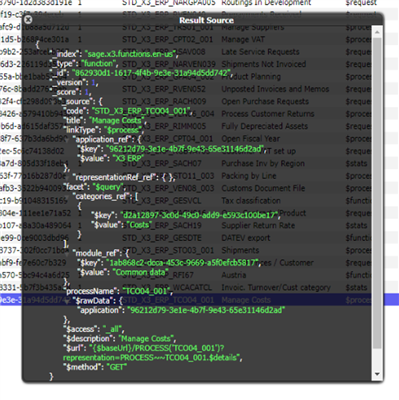
And, if you click on any of the indexes you can see the search json criteria associated with that record. I loaded the managed cost field so you all can see what I mean.
You can essentially look for anything that has been indexed by the update.
If you’re really handy with Json coding you can even build your own search requests.
I’m not so there won’t be any examples this time.
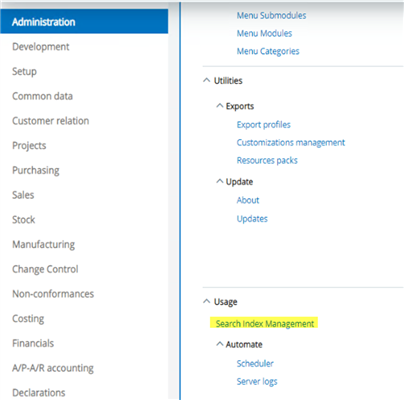
So how do you run the search index update anyways? Well that’s just as easy. You run the function from within Sage X3. You can find it under Administration, Usage, Search Index Management
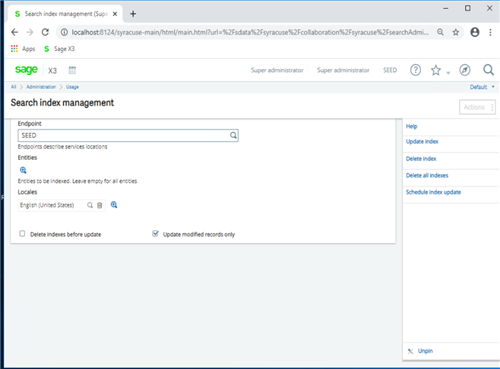
Once it loads you can pick what endpoint you want to run it against and click update index
You can also choose to update modified records and the option to delete the previous indexes before creating a new (in case you want to start fresh).
Once you click update, it will start the update process and you can go back to doing whatever it is that you were doing. It will continue to run in the background for the entire process
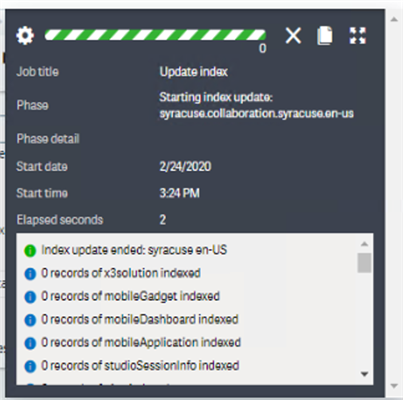
Note that the first time you run the index it will take a very long time to finish. After that it will only process updated information and new information.
And there you have it. Elastic Search… uuhh, sorry I don’t have any metaphor or analogy for it.
Anyways, hope this helps someone.