

Many people are asking us if it's possible to add your own custom built entities to the iPhone. Well, the good news is you can!! Below is an example of exactly what needs to be done. Remember, to create a custom entity for use on your iPhone, you would firstly create your new entity using the new entity creation wizard.
In this example I wish to record and monitor my company car information within CRM. I would like to be able to add and edit my cars using the iPhone. I also want to perform searches on cars using the iPhone.
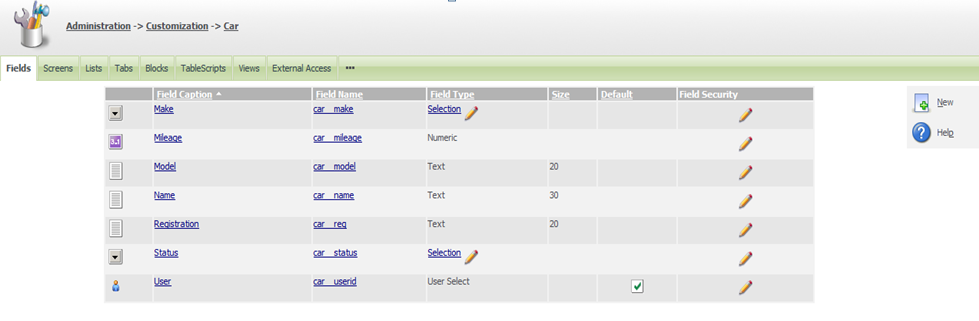
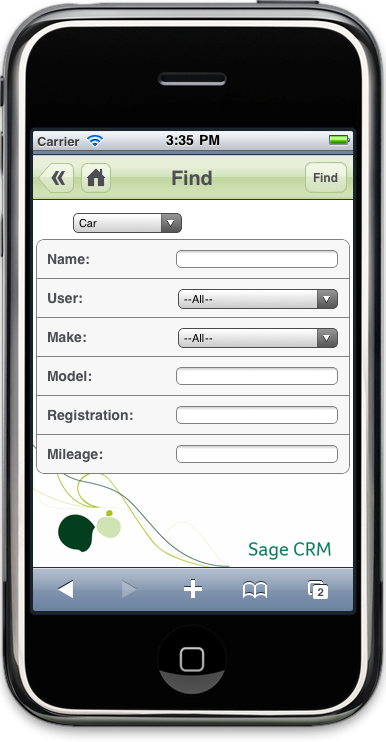
I have created a custom entity called 'Car' and added the following fields:
In this example I wish to record and monitor my company car information within CRM. I would like to be able to add and edit my cars using the iPhone. I also want to perform searches on cars using the iPhone.
I have created a custom entity called 'Car' and added the following fields:
- Make — Selection — (Audi/BMW/Ferrari)
- Model — Text
- Registration — Text
- Mileage — Number
Before adding the car entity to the iPhone, I have edited my screens so that they contain the fields I want to see on each screen.
Ensure that when you're adding your fields to the screens that you remember to switch your devices to 'iphone'.
Adding your new Car entity to the iPhone
There are a number of steps involved in adding a new custom entity to the iphone. The Summary Screen must be contained within a Block which in turn must be contained within a Tabgroup which in turn must be linked to from a grid.
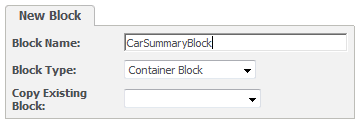
Step 1 — Create a new container Block and Add your car summary screen to the block.
- Navigate to Administration — Customisation — Car — Blocks Tab
- Select 'New'.
- Give your new container block a name and choose 'Container Block' as the block type.
- Choose 'Save'.
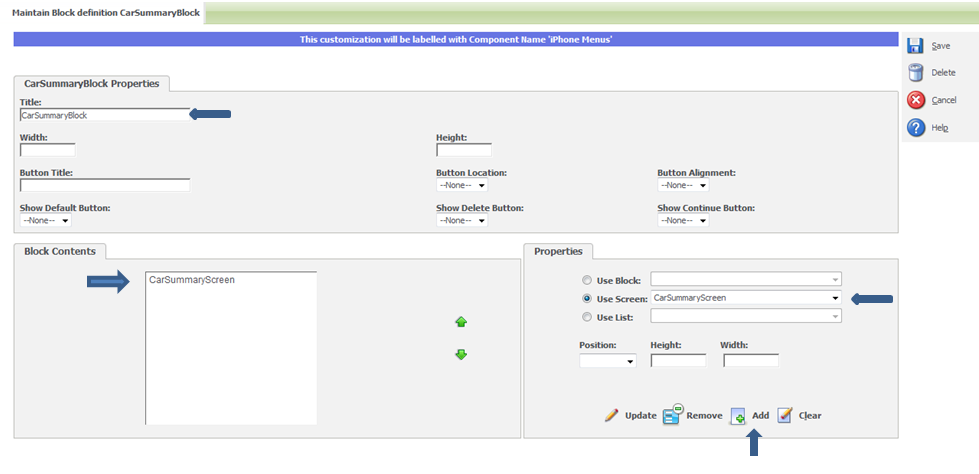
Customise your new block 
- Select 'CarSummaryScreen' from the 'Use Screen Drop' down option and select 'Add' so that the Car Summary Screen is added to the Block Contents.
- Choose 'Save'.
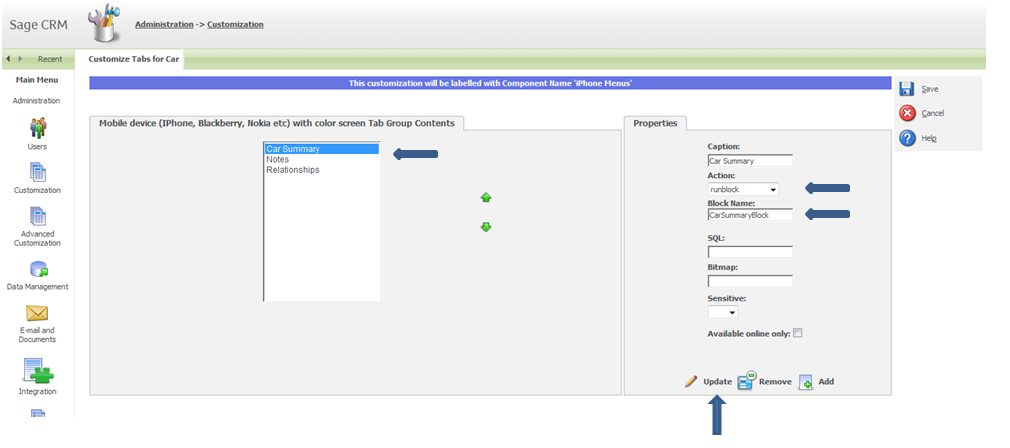
Step 2 — Add your container Block to the Car tab group.
- Navigate to Administration — Customisation — Car — Tabs.
- Ensure that IPhone is selected under devices. Choose 'Customize'.
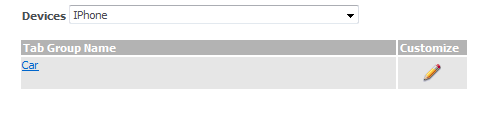
- Change the action under Car Summary to 'runblock' and enter 'CarSummaryBlock' under block name so that CRM knows to use the CarSummaryBlock that we created in step 1.
- Choose 'Update' first, then choose 'Save'.
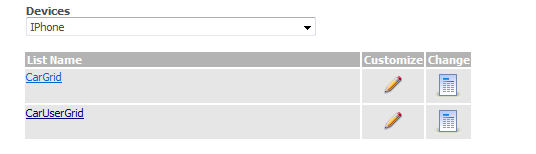
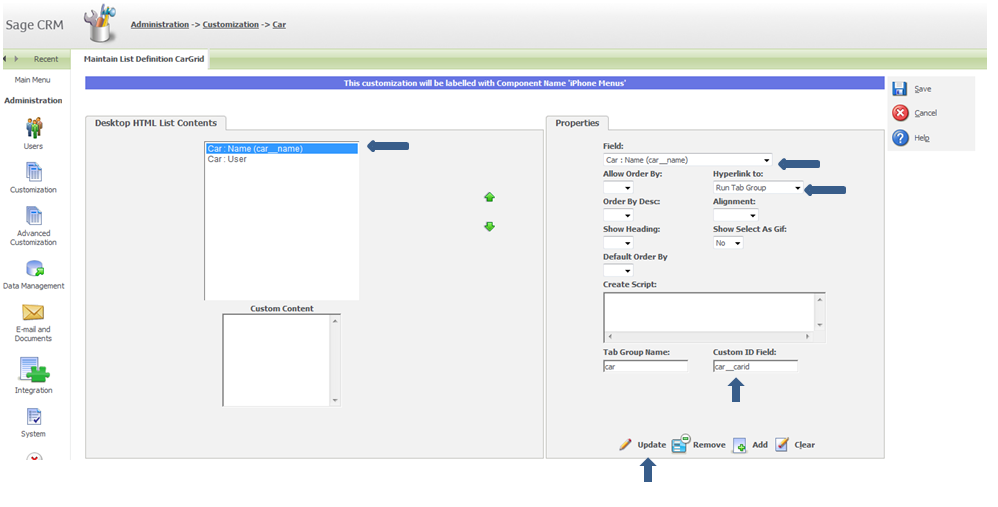
Step 3 — Link to the newly edited tab group from the car grid.
- Navigate to Administration — Customisation — Car — Lists.
- Ensure that IPhone is selected under devices. Choose 'Customize' on the 'CarGrid'.
- Ensure 'car name' is highlighted to the left of the screen. On 'Hyperlink to' choose 'Run Tab Group'.
- Ensure that the Tab Group Name is 'Car' and the Custom Id Field is 'Car_carid'.
- Choose 'Update' first and then choose 'Save'.
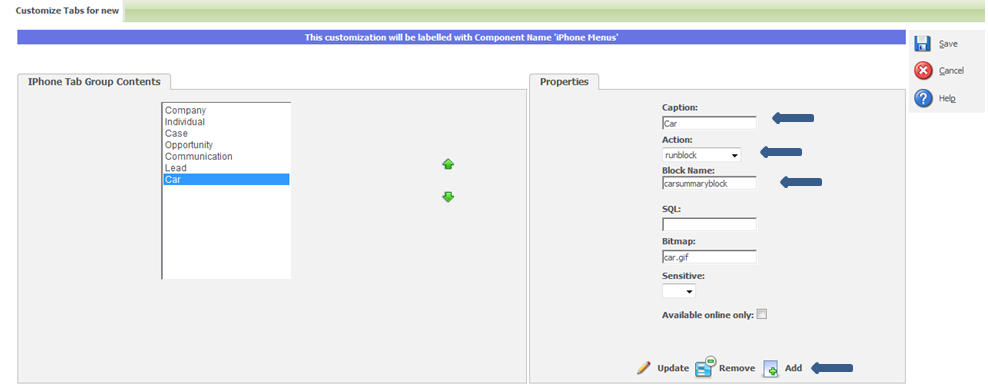
Step 4 - Add the car entity to the 'new' and 'find' system screens on the iphone.
- Navigate to administration — advanced customisation — system menus.
- Ensure IPhone is selected under devices.
- Select the 'find' hyperlink from the list.
- To the right of the screen enter 'Car' for the Caption.
- Choose 'runblock' for the Action and enter the block name as 'carsearchbox'.
- You can also enter a bitmap image of the car at this stage if you like.
- Choose 'Add' and then choose 'Save'. This will add the Car to the Find menu on your mobile device.

- Navigate back to administration — advanced customisation — system menus.
- Again ensure IPhone is selected under devices.
- Select the 'new' hyperlink from the list.
- To the right of the screen enter 'Car' for the Caption.
- Choose 'runblock' for the Action and enter the block name as 'carsummaryblock'.
- As before, enter the image name of the car, e.g. car.gif.
- Choose 'Add' and then choose 'Save'. This will add the Car to the New menu on your mobile device.
- Don't forget to add your own entity image(e.g. car.gif) to your wwwroot\themes\Img\'your theme'\menu folder for each of your themes!
Now let's see what it looks like on our iPhone!
Let's say we want to add a new car that we purchased for one of our employees using our iPhone.
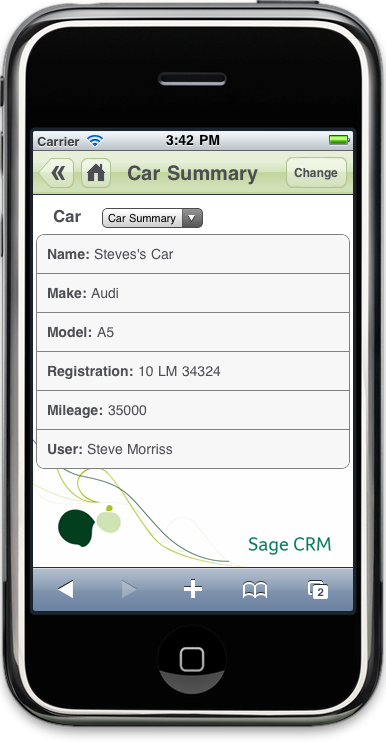
We navigate to the new menu on our iPhone and we can see our new car icon. We would enter our details and then click save. We are now taken to the summary screen of the Car where we can make changes by clicking on the change button if we so wish and then saving the changes.
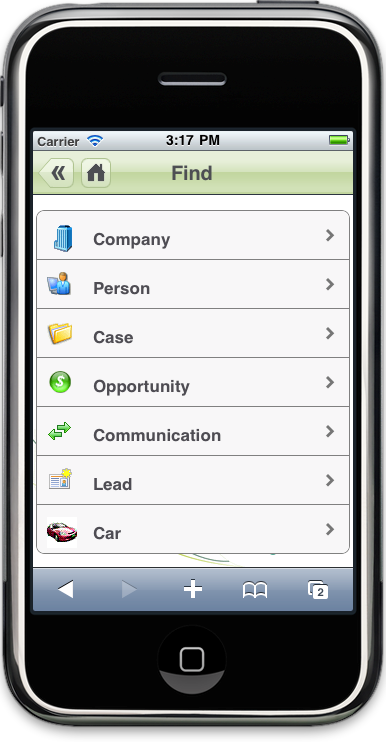

We now want to know what company cars are in the system by doing a search. Navigate to find menu from on the iPhone and again we can see our 'find car' icon. You can filter the search by any of the criteria that you've added to the search screen. In our case we want to see all cars so we would simply choose 'find'.

We can see the details of any of the cars listed by selecting that car. This will bring us to the summary information for that car and from here we can change details if we so wish.
Remember it's completely up to you what fields are added to your new entity. For example you might want to record things like the date of purchase or the size of the engine or the fuel type.


