

In this article I want to discuss how the Mail Merge process works in detail. This includes what happens within Sage CRM and how the document is created.
Mail Merge for Sage CRM takes place server side.
I have discussed previously in the article "System Architecture" how Sage CRM's design is undergoing a process of change.

Sage CRM is moving more and more of its features into the java based technologies. Mail Merge is just one of the features that have been changed to work as a server side process under the Tomcat/Java processes.
It is important to realise that because the merge takes place on the server that no text file or cookie is created during the new Mail Merge process and application data is not passed to the client.
There have been some very helpful articles written that explain how the Mail Merge works in the new technology.
- Mail Merge in Sage CRM
- This article looks at continuing to edit Word templates and insert fields into those documents.
- Editing an Existing Microsoft Word Mail Merge Template in Sage CRM
- The serverside merge uses HTML templates but can continue to use Word templates. This article discusses how system administrators can continue to maintain templates created in Word.
- Working with existing Microsoft Word mail merge templates in Sage CRM
- This discusses how Word templates can be switched to HTML.
- Working with Microsoft Word Templates in Sage CRM
- This article contains details of working with Quote or Order Microsoft Word Templates within the new architecture and looks at how labels can be printed.
Data Sources
Whether the server-side mail merge uses an HTML template or a Word template the data for the merge needs to be drawn from an underlying view. The view will changing according to the context in which the mail merge is initiated.
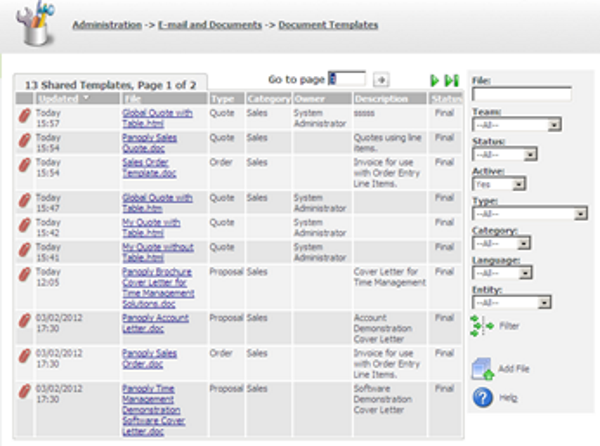
The merge templates are stored in the Administration area
Administration -> E-mail and Documents -> Document Templates
As I have mention above Sage CRM now supports 2 types of templates for the merge process.
- HTML Templates
- Classic Sage CRM Word Templates
HTML Templates can be saved as files before being uploaded into Document Templates. HTML extensions are allowed
- Templatename.html
- Templatename.htm
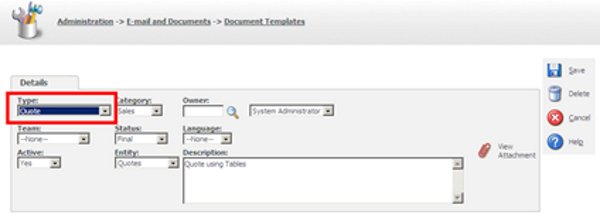
Template for Quotes & Orders must be saved of correct Type
- Quote
- Order
Note: If your system uses a network share for mail merge templates then you will need to manually copy the new files to the network share.
All users can create their own private templates and the process of creating a new template can be easily started by starting to perform a mail merge.
Below you can see that a new HTML Template has started to be created.
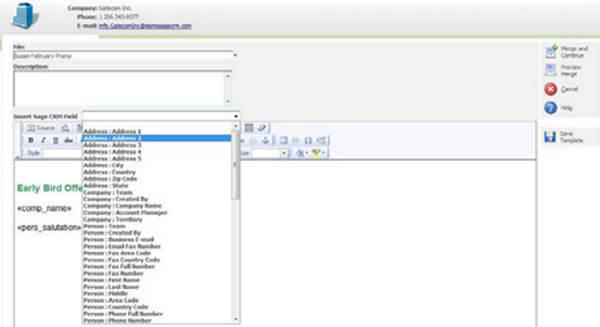
You just need to start the mail merge process and opt to create a new template.
The template will then be available in the context where created.
The context determines the views that used and the fields that can be added to the template.
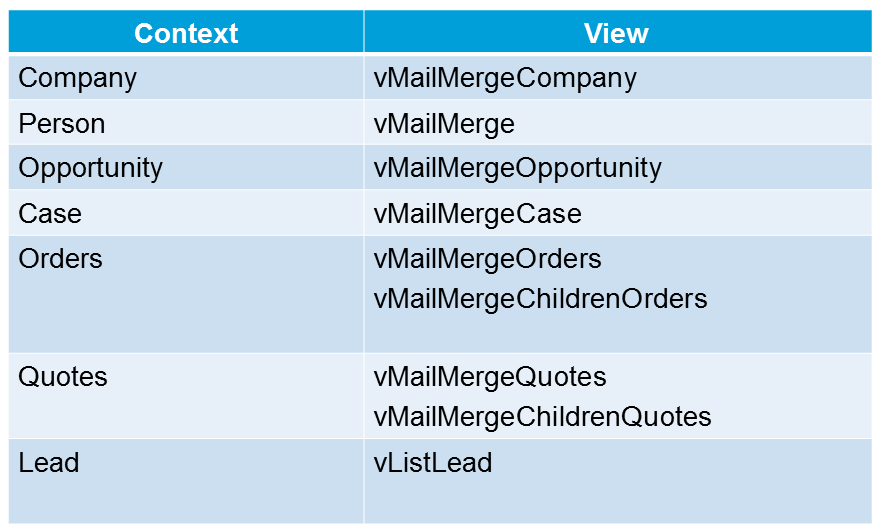
The following views are used
Context
- Company - vMailMergeCompany
- Person - vMailMerge
- Opportunity - vMailMergeOpportunity
- Case - vMailMergeCase
- Lead - vListLead
The Orders & Quotes are different as the merge process allows for header and detail merges to take place using information from two separate views.
- Quotes use vMailMergeQuotes and vMailMergeChildrenQuotes
- Orders use vMailMergeOrders and vMailMergeChildrenOrders
vMailMergeChildrenQuotes
CREATE VIEW vMailMergeChildrenQuotes AS SELECT QuoteItems.*, NewProduct.* FROM QuoteItems Left Outer Join NewProduct ON QuIt_ProductId = Prod_ProductId WHERE Quit_Deleted IS NULL
vMailMergeChildrenOrders
CREATE VIEW vMailMergeChildrenOrders AS SELECT OrderItems.*, NewProduct.* FROM OrderItems Left Outer Join NewProduct ON OrIt_ProductId = Prod_ProductId WHERE Orit_Deleted IS NULL

The process of creating HTML Quote or Merge templates requires you to insert special nested regions into the HTML of the template.
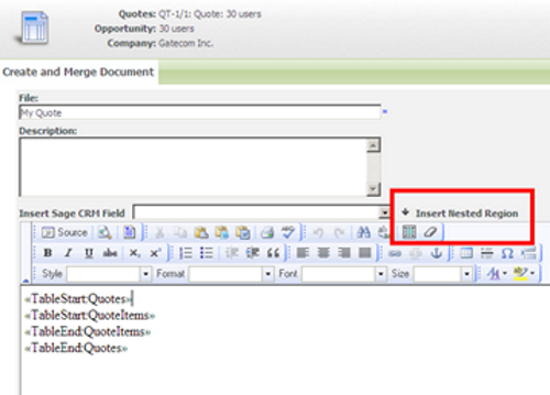
You can start the template using "Insert Nested Region". It is strongly recommended that you include the child information from the Order Items or the Quote Items with the structure of a table.
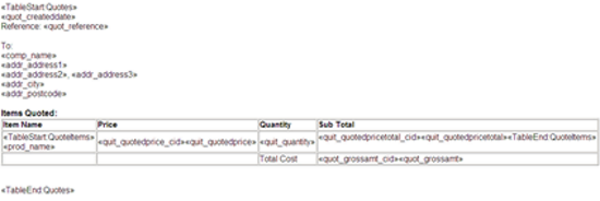
You should include the CID field beside each currency field. E.g «orIt_quotedprice_CID» «OrIt_quotedprice» as this will ensure correct formatting of the currency information.
