

This is the sixth article in a series that discusses creating a new database connection to the Sage X3 database using the standard Sage CRM features.
Fields that exist in the linked view in Sage X3 are mapped automatically to the Sage CRM Entry Types based on their physical database type but actually can be changed and mapped to other Sage CRM Entry Types.
Lists and screens can now be created for these secondary tables that are actually views in the Sage X3 database.
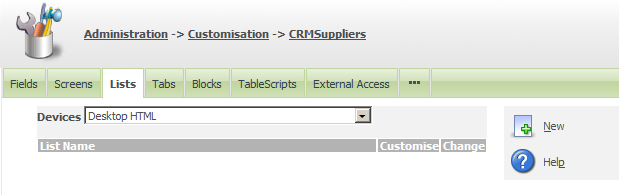
In this example I have started to create a new List. I have navigated to the Customization screens
Administration -> Customisation -> CRMSuppliers
CRMSuppliers is a secondary entity based on a view in the Sage X3 database.
The List is going to be used for displaying data under the 'Find' menu. Because it is going to be used in a Find menu option I will use the suffix Grid. The naming convention is XXXXList for lists called from Tab menus (e.g. My CRM, or the Account Context) and XXXXGrid from the 'Find' menu.
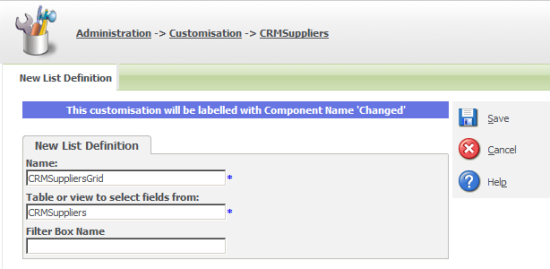
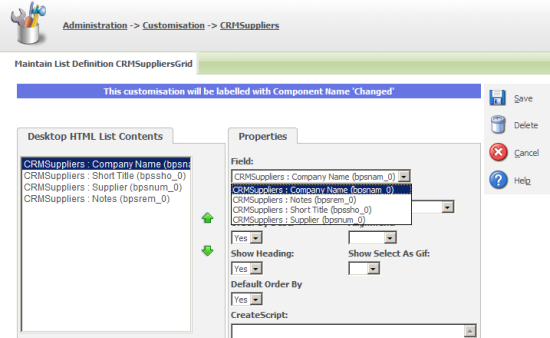
The fields from the underlying view can be added to the List and any behaviour wanted can be added.
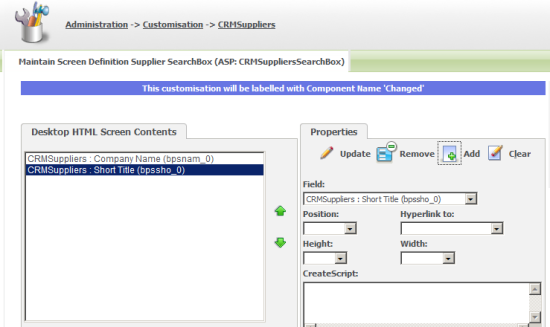
The next task that needs to be done is the creation of the Screen block that will be used to enter the search criteria.
I have added a screen under the customization screens.
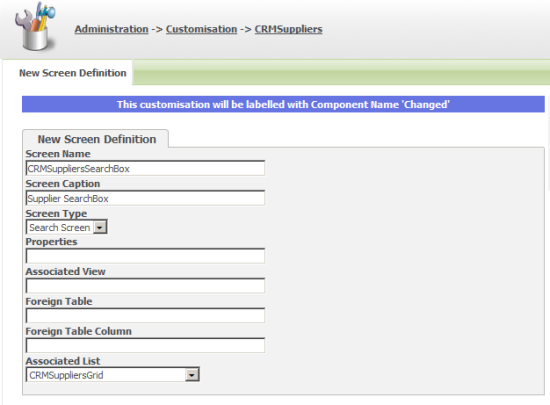
The important thing to note is the new Screen is defined as a Search Screen and an Associated List has been defined.
The fields that we need can be added to the screen.
The Search screen and the Grid that has been created can be combined in a Container block and then added to the interface using RunBlock. RunBlock is one of the most useful ways of extending Sage CRM. It is a pure metadata-driven approach and can allow us to swiftly create new screens that list and present data within Sage CRM that comes from external databases like Sage X3 that have been linked in meta data.
You can read more about this in the article "Creating a Codeless Search Screen on an External Database using RunBlock"
Below you can see I have created a Screen Block to wraps around the search screen I created.
This allows for the 'Search' box to have the correct 'Find' caption and pick up the style guide information.

The screen block and the results grid need to be added into a container block.
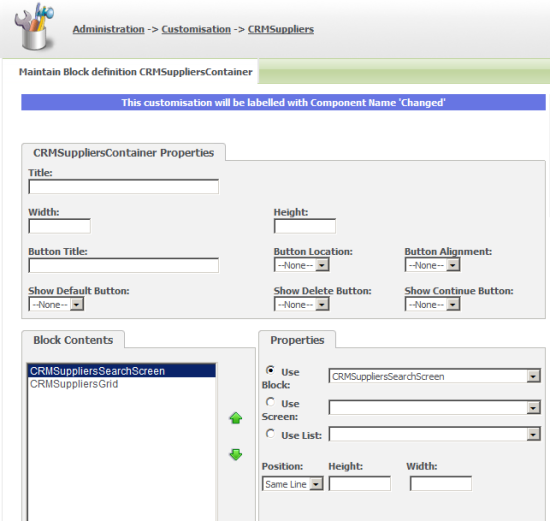
Once the Container has been created. The Find menu can be changed to include a call to the new Container block.
Administration -> Advanced Customisation -> System Menus

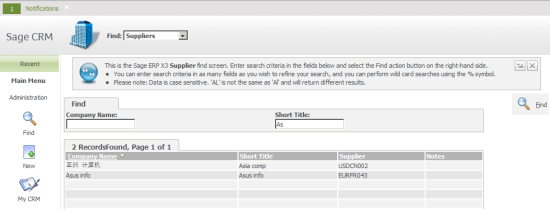
This will then have created a functioning Search screen allowing data from the Sage X3 system to be retrieved from within the Sage CRM interface.
The image screen below has had a Coaching Caption added to it so that it appears even more like a standard Sage CRM screen including the display of notifications.
The next article will look at using the .NET and classic COM ASP APIs to create more sophisticated screens.
Creating a new database connection to Sage X3
