

Welcome to the new UK Blogs channel on Sage City. In this post, I will run through copying an X3 folder that has an associated archive folder to a new server.
I had some fun working this out for a customer who was implementing a test server for the first time so that they could have an environment to test X3 patching and technology component updates before implementing in their live environment.
For this example, I will be using a SEED folder, for which I have previously configured an archive folder
First, you need to create an SVG export for the main folder SEED and the archive folder HSEED at the source. You CANNOT use the X3 console to extract an SVG for the archive folder. You must use DOSSVG (recurring task code for function: DOSEXTRA)
I decided to use the console, to create the SVG Extract for the SEED folder
1. Select SEED folder
2. Press export press ok
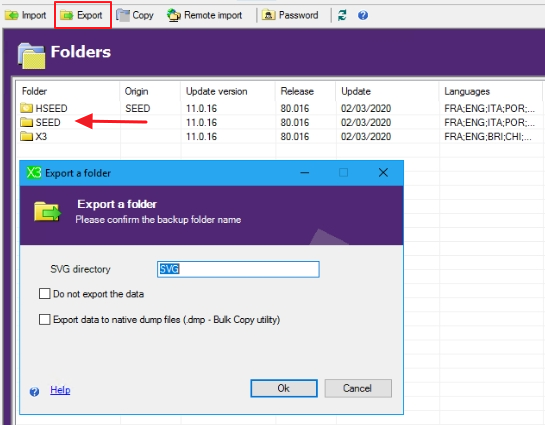
3. This process will create you a SVG export for the SEED folder in the SEED folder directory
Note: you could schedule a batch server task DOSSVG Task for this

4. The next step is to create an SVG extract for your archive folder.
You can do this using the DOSEXTRA function in Development, Utilities Data Extract, or set up the batch server task DOSSVG.
Note: that you need to select the tick box Archived for the archive folder data extraction.
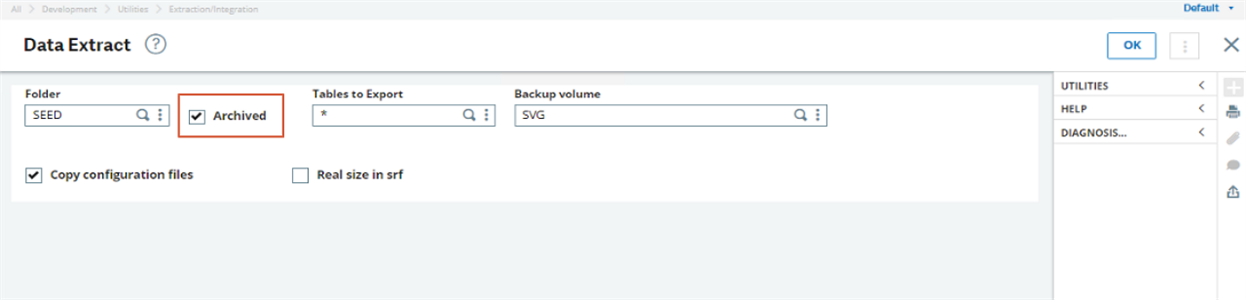
This will create an SVG Folder in the archive folder directory (HSEED).
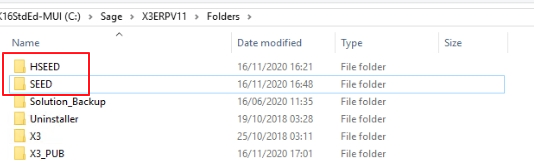
5. Now that both your extracts are done copy the two folders the SEED & HSEED folder with associated folders from the X3_PUB location to the new destination server. In my case this was a new installation on the destination server so there was no existing SEED folder.
On the destination server in the folders directory you should have SEED & HSEED
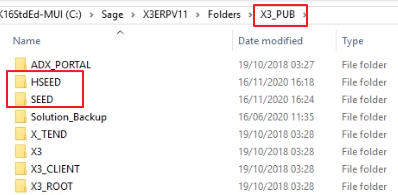
6. On your destination server in the X3_PUB directory you should have SEED & HSEED from the same directory on your source server, make sure you don’t get the folders that go in the X3_PUB directory mixed up with the folders that should be copied into the FOLDERS directory
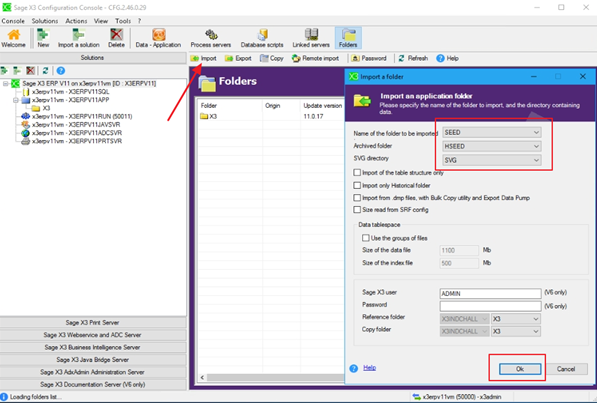
7. Now you’re ready to launch the folder import from the console. You will need to specify the main folder that you are importing & the archive folder in this window. (note: the SVG needs to exist in the folder structure for both folders SEED and HSEED, the folder must be called the same name e.g. the default name SVG)
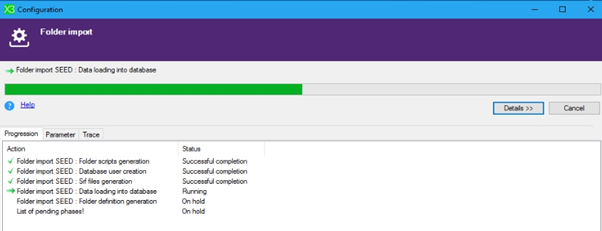
If the data has been copied over correctly and is in the correct folders the console will first import the main folder followed by the archive folder.
The console will first import the main folder followed by the archive folder.
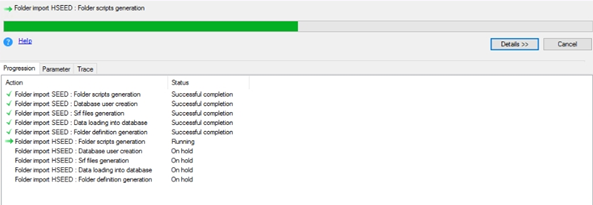
Console progresses to Importing the archive folder called HSEED once the SEED import is complete.
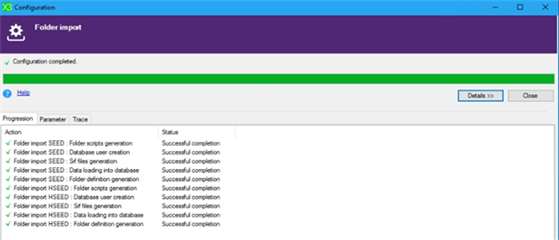
The import completed successfully!
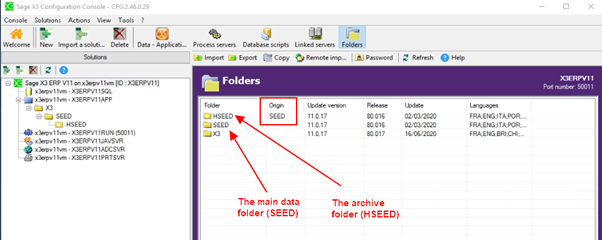
Once the import of the main folder and archive folder is complete, you will see both folders in the console folders section. The archive folder will have the main folder name populated in origin in the console.
All you need to do now is define your endpoints for both these folders and you're good to go !
When you log into X3 after the import has completed to check the folder definition you will see that the archive folder HSEED is linked to the SEED.
Hope you found this interesting, feel free to leave any comments & be sure to keep an eye out for new blogs !

