

You may find yourself in a situation where you need to restore Sage X3 Folder data on a test server. In my case, the server already had a test Folder that was no longer required so to keep things tidy and to avoid a shortage of disk space I needed to remove this Folder.
In this blog, I will run you through the steps that I took to Delete the Folder called TEST1.
Before removing a Sage X3 Folder, you should discuss this with the project administrator and take a snapshot of the server. The last thing you want is to remove a Folder that is still required inadvertently.
THESE STEPS CANNOT BE UNDONE SO PLEASE PROCEED WITH CAUTION
In this post, I will document the three main steps you need to take to remove a Sage X3 Folder you no longer need.
-Remove Folder definition in X3 /Folders table
-Remove Folder data from SQL
-Remove Folder data from the file system
Removing the Folder definition in X3
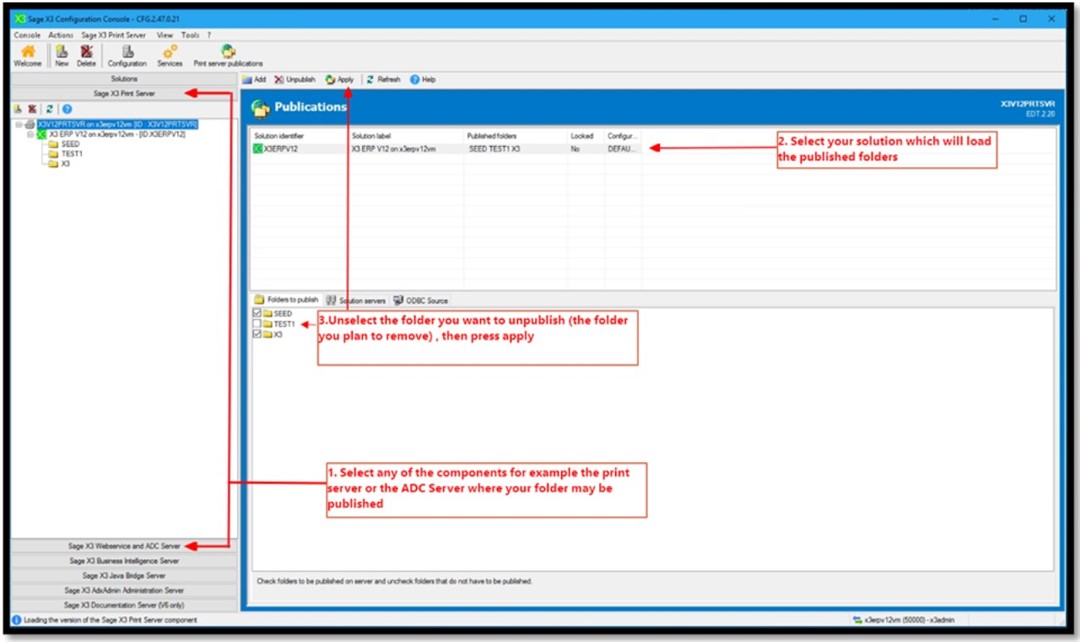
1. If the Folder to be deleted is published in any additional components like the webserver component, ADC Server or print server component, you will need to remove this from the X3 console first.
Select the component, then the solution to load the published folders, unselect the Folder you want to move for the publication, in this case, TEST1 press apply.
2. Now login to the Sage X3 Web client as the ADMIN user and connect to the X3 Endpoint. Make sure that no users are in the Folder that you plan on deleting you can check this in the PSADX function. Then disable any running batch jobs & abort any scheduled batch tasks for the Folder that you are planning to remove.
Next, we will remove references to the Folder in Sage X3 by removing any associated web service pools linked to the TEST1 Folder.
Login to Sage X3 and change to X3 Endpoint then navigate to administration, web services, classic SOAP pool configuration.
Select the SOAP pool that has the Endpoint listed as the Folder you are planning to remove in this example TEST1 use the action button and select Delete.

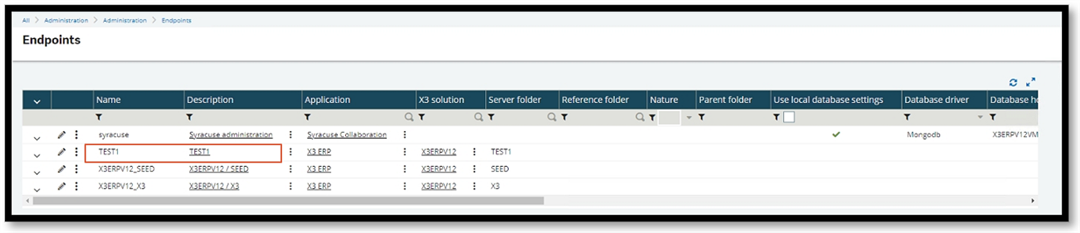
3. Now we can proceed to remove the endpoint TEST1
Navigate to administration, administration, endpoints, endpoints click on the endpoint description TEST1
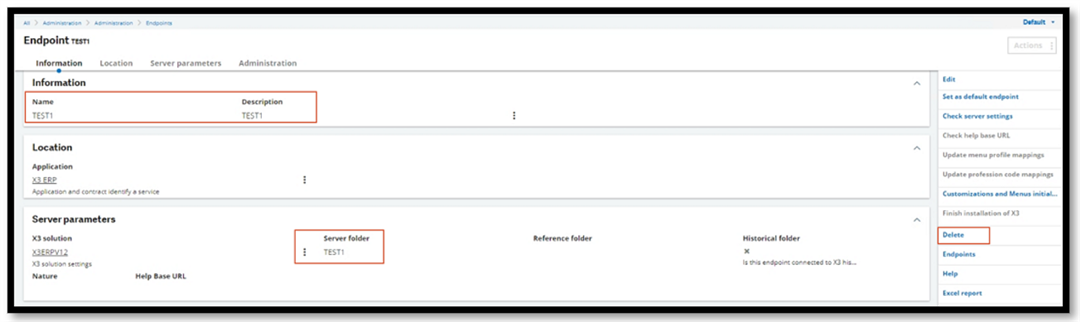
This opens the TEST1 Endpoint details where you should confirm the server Folder name which is also TEST1 in this example but could be different, click delete in the right menu and confirm your delete request.
4. The last step in removing the Folder within X3 is removing the Folder definition. Navigate to parameters, general parameters, folders (GESADS) and select in the left list the name of the Folder to be deleted TEST1 in this case and press button in the right menu to delete the Folder definition.
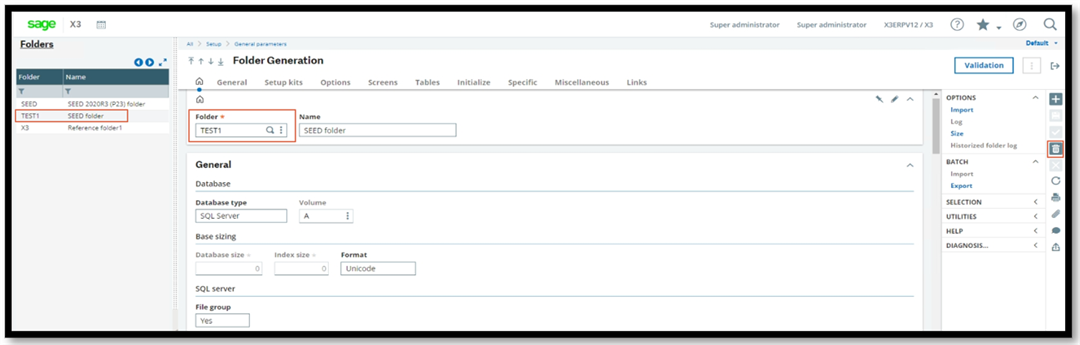
5. Press OK to confirm the Deletion and your Folder is now completely removed from X3
Removing the Folder data from SQL
6. We can continue to clean up the database in SQL. I would only recommend taking on this task if you have an understanding of SQL and the SQL Management studio application, you could use a script to do this for you (this is available in the How-to Guide Delete-a-Sage-X3-folder), I will run through the manual steps.
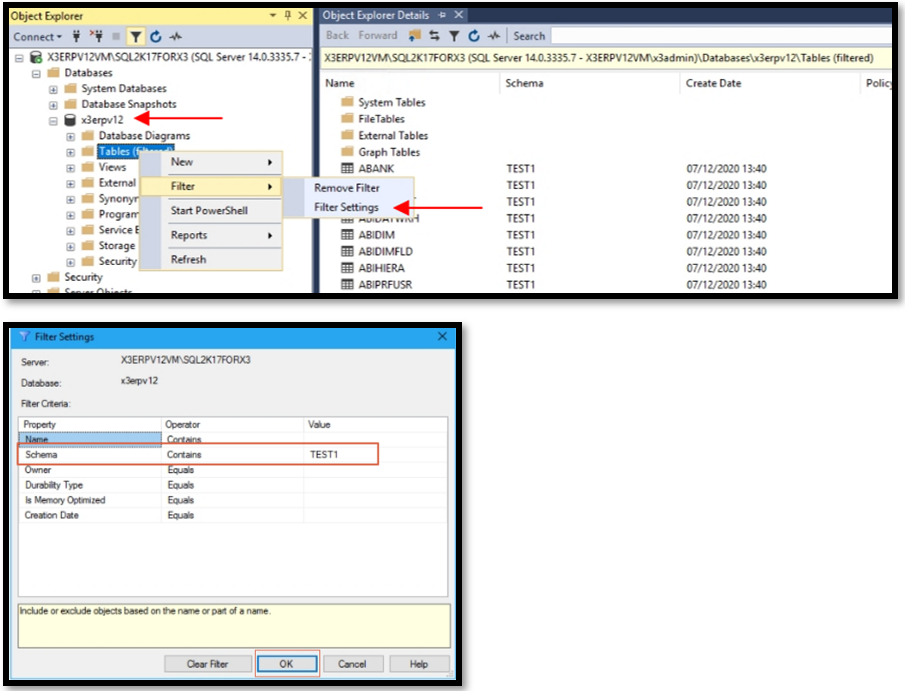
Open SQL Management Studio select your X3 database from the object explorer and filter on the schema name that corresponds to the Folder you removed from Sage X3 (TEST1)
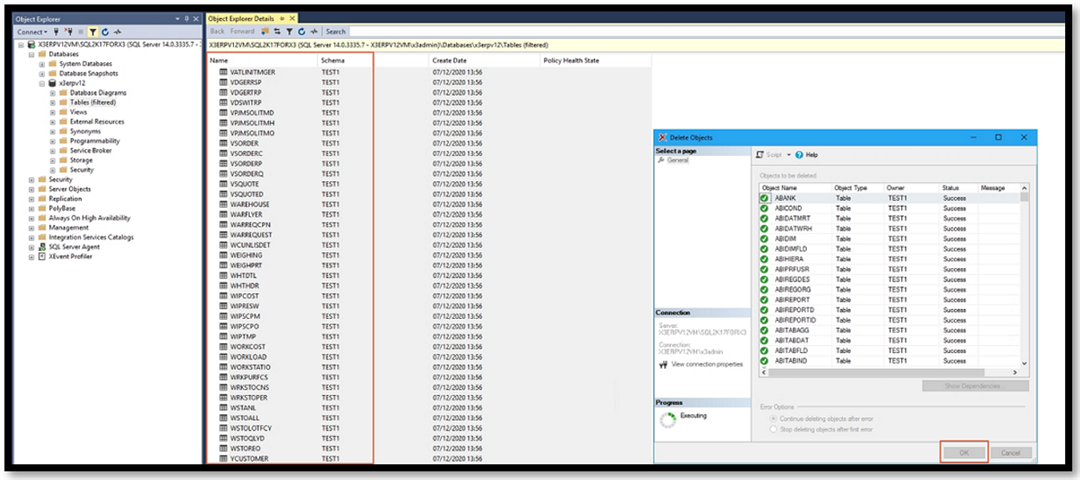
In the Object Explorer details, you will now see all the tables with the Schema TEST1, select and delete all these tables
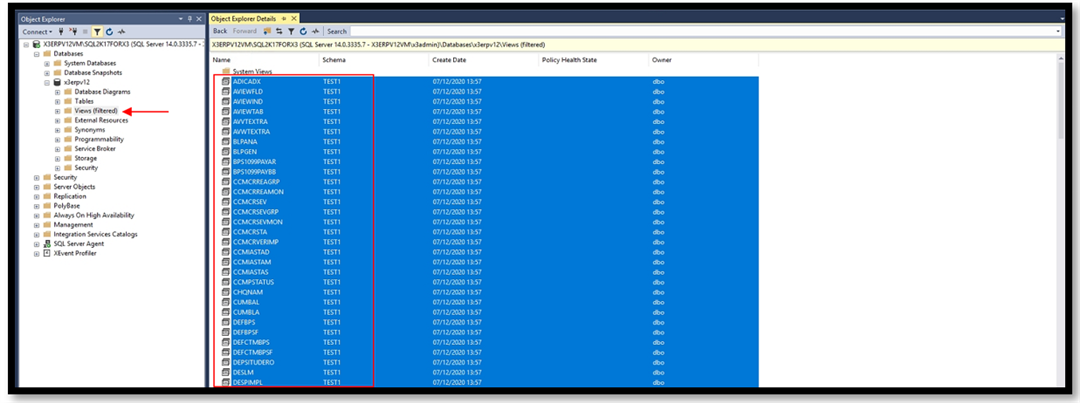
 7. Now we can do the same for database views where the schema is TEST1
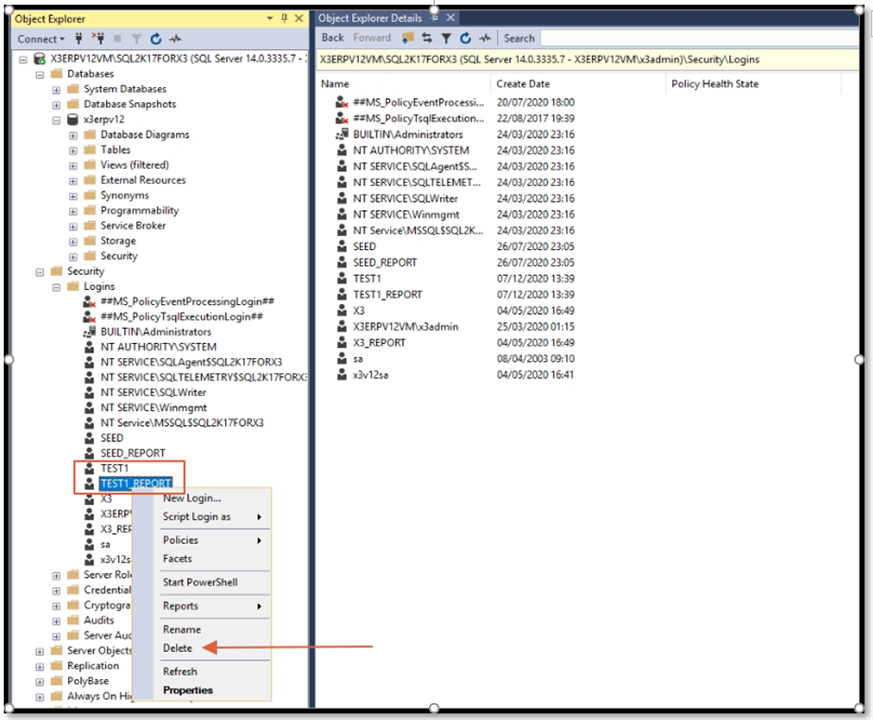
8. The SQL data tables and views have been deleted; we can move on to the removal of the SQL users.
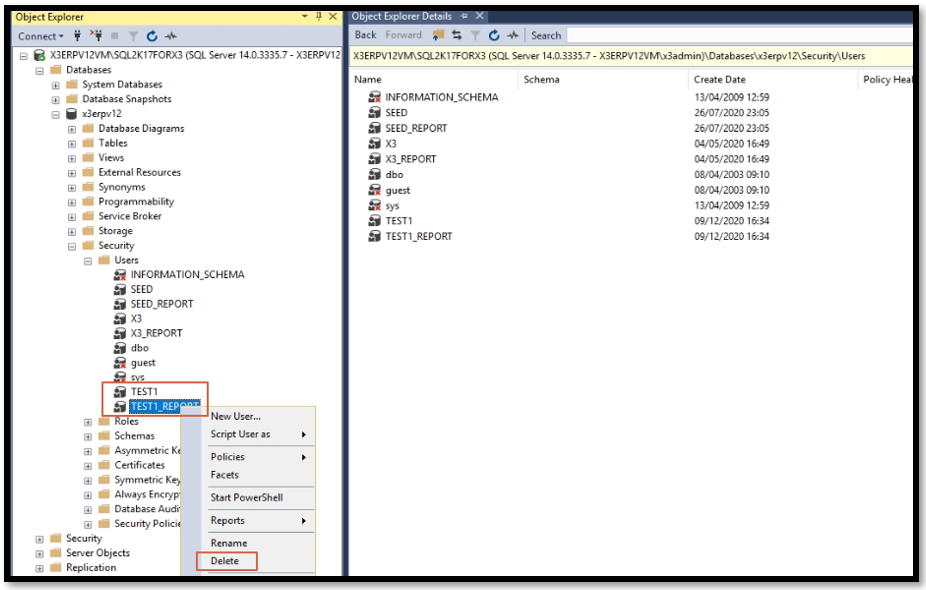
At the server level, Select TEST1 user right click and delete, then do the same for the TEST1_REPORT
Now delete the users at the database level (x3erpv12). Delete TEST1 user by right click and delete as we did at the server level, then do the same for the TEST1_REPORT user.
9. The last step in SQL Management studio involves removing the database files right-click on your Sage X3 database and select properties
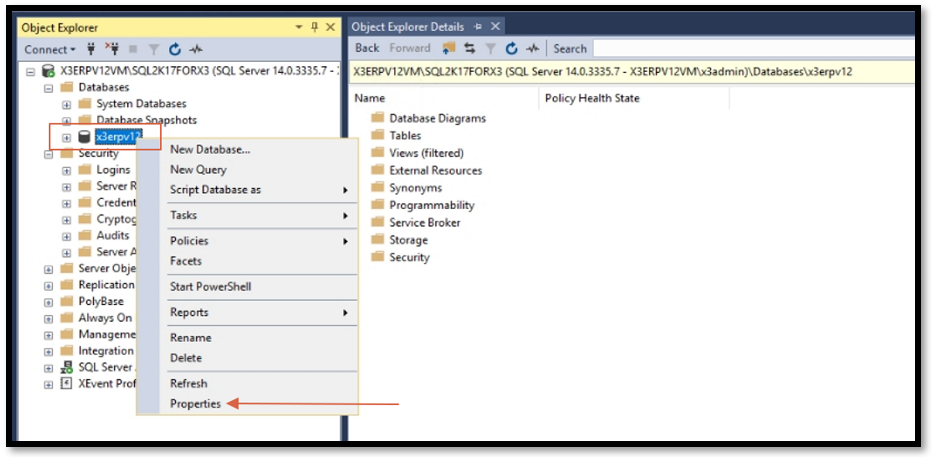
In the database properties, select filegroups from the left select the IDX and the DAT File associated with your Folder and click remove, then press OK (if you press the ‘Cancel’ button the remove will not happen)

You can confirm the files have been removed by checking the properties of the database and selecting the files tab

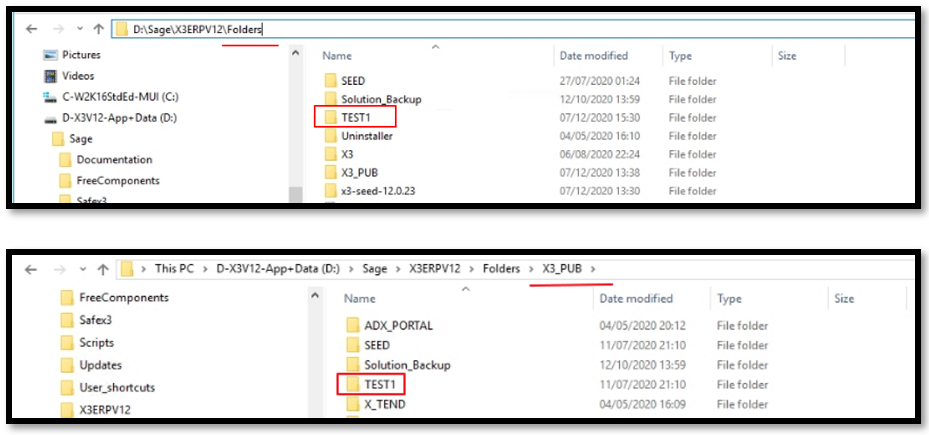
Remove Folder data from the file system
10. The last step in this process involves deleting the folder data from your Sage X3 folder directory. You can delete the TEST1 Folder from the Folders directory and the X3_PUB directory
And that’s it! This is how I recovered all that valuable disk space.
Sage KB Article with a worked example from V5
Sage KB Article How to delete a folder in X3 Version 7 and later

