

Hello and welcome to this post on using control tables in Sage X3 to validate email addresses. After investigating a support case around this functionality, I think it is a great underused feature that you can implement to help with validation. You can implement this without divulging into full-scale development and code.
In this worked example, I will walk you through how you can set up a control table entry to validate the email addresses entered for customer records by using an Adonix expression. This will give you a starting point to explore more options, for example, phone number validation or postcode validation and so on.
The steps involved are
- Setting up the control table entry
- Apply the control table entry to a field on a screen
- Test to make sure that your control is working as expected
What are control tables
Control tables are a tool in Sage X3 that allow you to implement validation rules in addition to any standard validation controls that already exist on screens, report parameters and accounting and system transactions.
Setting up the control table entry.
To start with, set up a control table entry using the function GESACL by navigating to (Parameters, General parameters, Control tables) GESACL
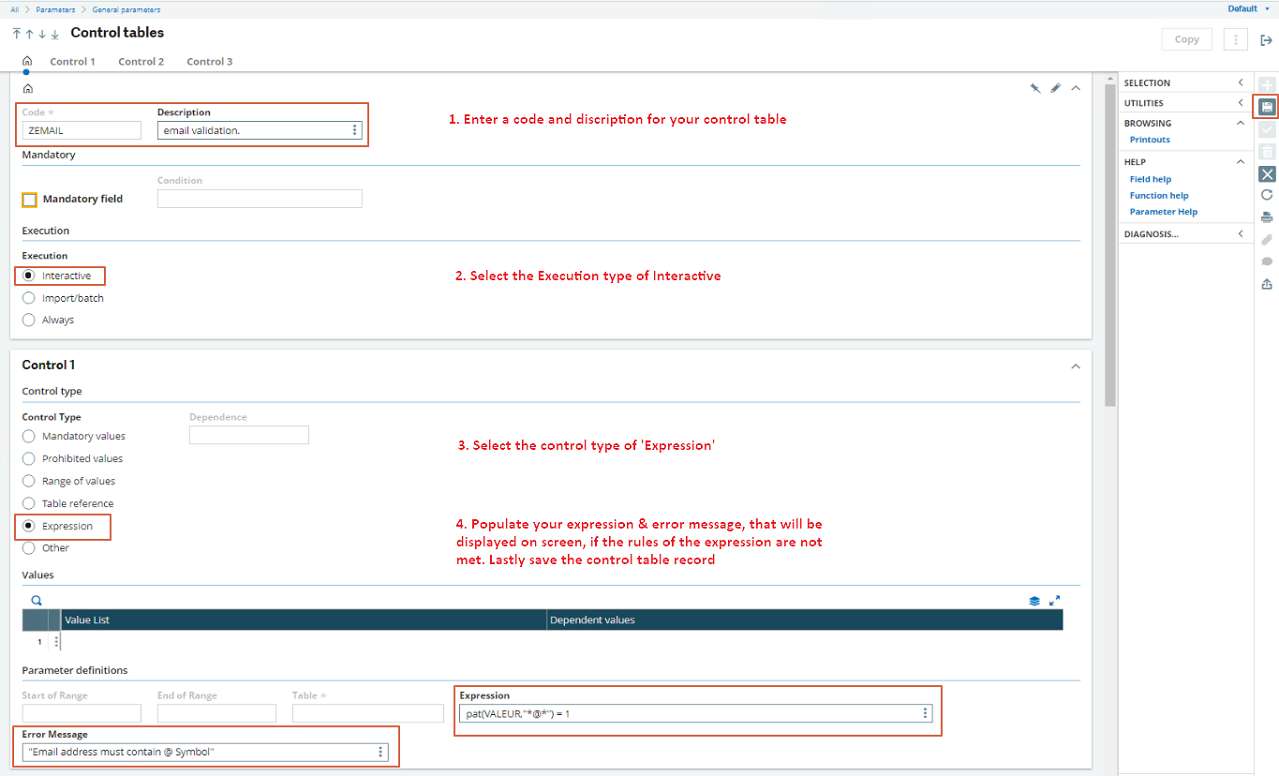
In this example (ZEMAIL), follow the steps in the screen print below and populate the expression value with:
pat(VALEUR,"*@*") = 1
This expression will evaluate the entered data to make sure it contains the @ symbol.
Note: When entering an expression, you must use the VALEUR placeholder variable instead of the actual field name. More detailed information on the expressions can be found on the online help on the ADONIX Calculated expressions page.
Applying the control table entry to a screen
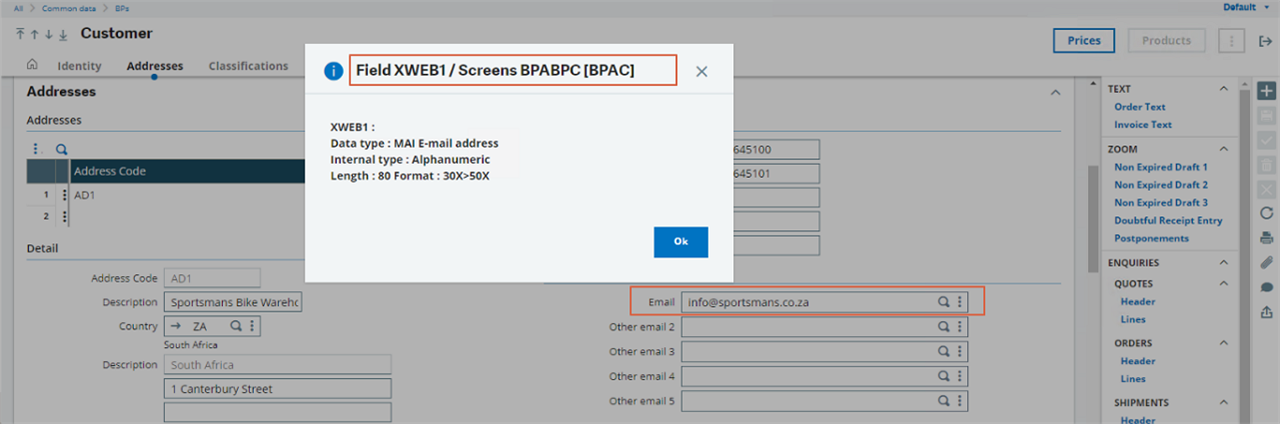
Now we need to apply the control table entry we created to a screen and a specific field. In this example, I want to validate the ‘Email’ field in Common data, BPs, Customer (GESBPC)
You can identify the screen name and the field name by selecting the field on the screen and pressing Shift Key +F6.
Once you have identified the screen, navigate to Development, Script dictionary, Screens (GESAMK)
Select the screen you identified in this example BPABPC and apply the control table entry we created ZEMAIL in the example. Make sure to save and validate the screen.

Testing the control
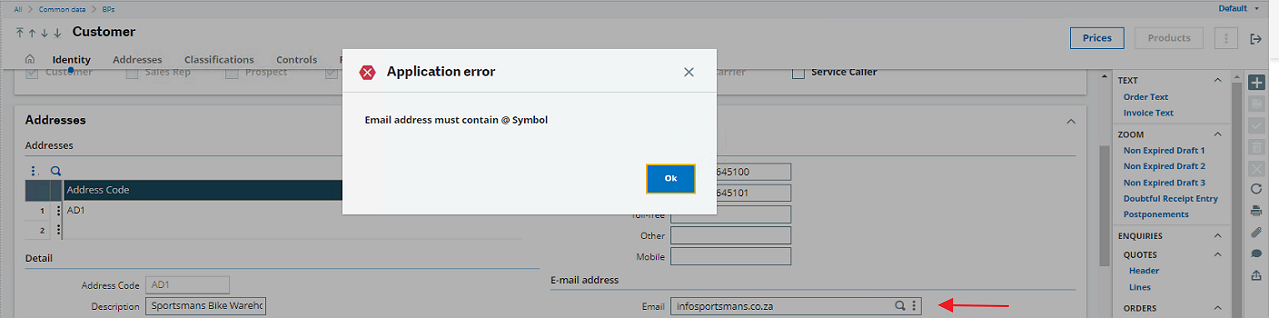
We can now test the control that we have implemented by navigating to Common data, BPs, Customer (GESBPC), selecting a new or existing customer, and attempting to populate the email field.
If the field XWEB1 (Email) does not contain the @ symbol, users will see this message on the screen once they tab out of the field or press save on the record. The user will not be able to proceed until the error is corrected.
And that's a basic introduction to the control tables that I hope you will find useful; there are loads more you can do if you discover a useful control that may help others; feel free to comment on this post with any examples or comments.
Useful links
Can not enter more than 30 lines in the control table
Using Control tables (GESACL) for email validation
How to limit data entry in the Project field to only existing projects when entering Purchase Order